Sahil Bansal is a digital marketing expert with deep knowledge of trending topics in SEO, social media, affiliate, and content marketing. Known for insightful blogs and reviews, he keeps audiences informed and businesses ahead with his sharp analysis and marketing expertise.
Utah has rapidly developed into one of the most dynamic and fast-growing economic regions in the United States. Cities such as Salt Lake City, Provo, and Lehi have become major hubs for industries like technology, SaaS, healthcare, real estate, tourism, and eCommerce. With this growth, competition among businesses has intensified significantly.
Today, businesses in Utah are not only competing locally but also with national and global brands. In such an environment, digital marketing is no longer optional; it is a fundamental requirement for survival and growth.
Marketing agencies play a crucial role in helping businesses establish a strong digital presence, generate qualified leads, and convert those leads into long-term customers.
Why Marketing Support Is Important for Utah Businesses
Modern consumer behavior has changed dramatically. Most customers now begin their buying journey online. Whether it is searching on Google, browsing social media, or reading reviews, digital presence heavily influences purchasing decisions. Without a strong marketing strategy, even high-quality businesses struggle to reach their ideal audience. Marketing agencies solve this problem by using structured, data-driven, and performance-focused strategies rather than guesswork.
Key benefits of hiring a marketing agency include:
1. Improved Search Engine Visibility (SEO): Agencies optimize your website so that it ranks higher on Google and other search engines. This helps your business appear when customers are actively searching for your products or services. 2. Paid Advertising Campaigns (PPC): They run targeted ads on platforms like Google Ads, Facebook, and Instagram to attract high-intent customers quickly. 3. Strong Brand Awareness: Marketing agencies ensure your brand maintains consistent visibility across multiple platforms, building trust and recognition. 4. Content Creation and Marketing: High-quality blogs, videos, and social media posts help educate customers and establish authority in your industry. 5. Lead Generation and Conversion Optimization: Agencies focus not only on traffic but also on turning visitors into paying customers through optimized funnels and landing pages. 6. Data-Driven Strategy: Instead of guessing what works, agencies use analytics and performance tracking to refine campaigns for better results.
List of Top SEO and Marketing Companies in Utah
Below is a refined list of some of the most recognized digital marketing and SEO-focused agencies in Utah.
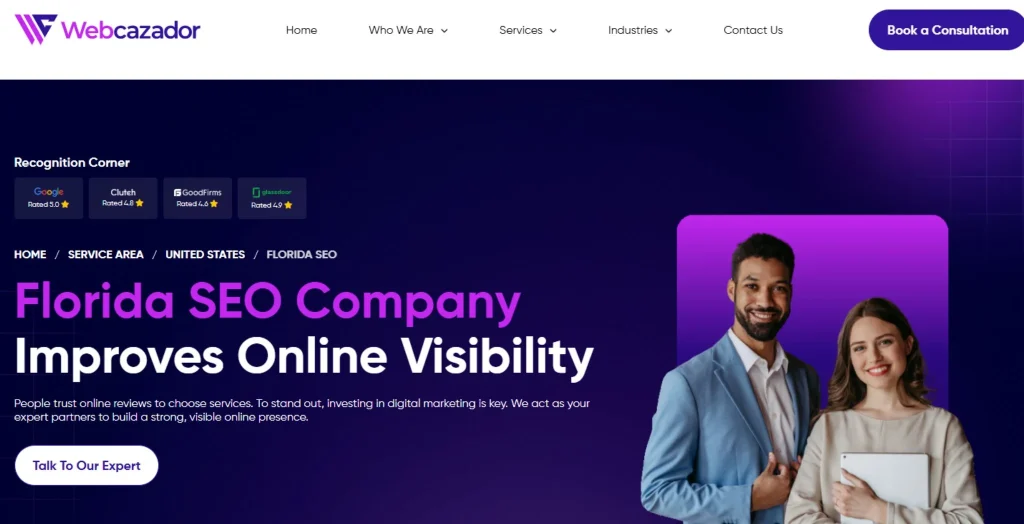
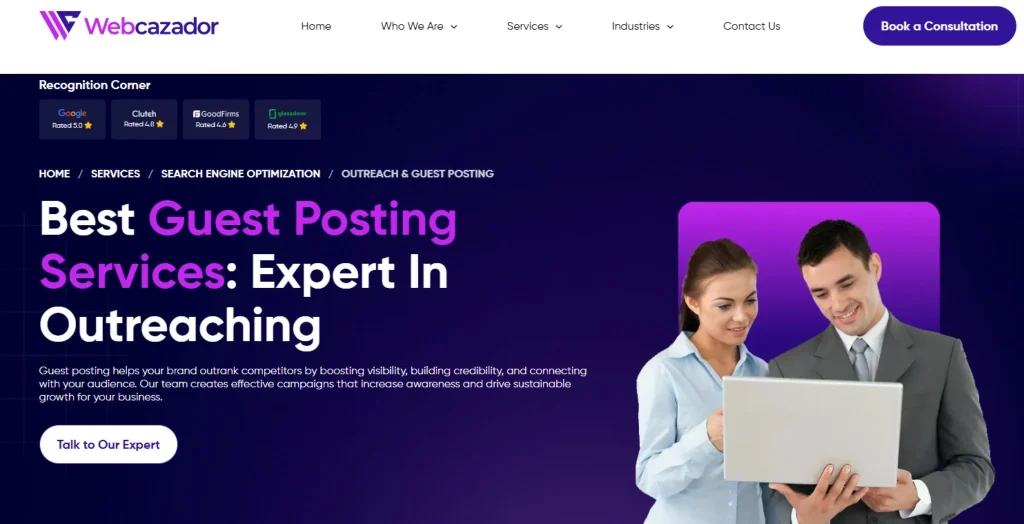
1. Webcazador
Webcazador is a digital marketing agency that works mainly with small and medium-sized businesses to help them grow their presence online and attract more customers through search engines and digital platforms.
The main goal of the agency is not just to bring traffic to a website but to help businesses get real results like leads, inquiries, and sales from that traffic.
SEO (Search Engine Optimization): keyword research and targeting, on-page optimization, and content improvements.
Content marketing: writing blogs, landing pages, and website copy.
Performance marketing: running campaigns focused on lead generation and conversions.
Key idea: They focus on long-term, sustainable business growth rather than quick ranking boosts. Their SEO strategies are designed to gradually increase organic traffic and improve conversions over time.
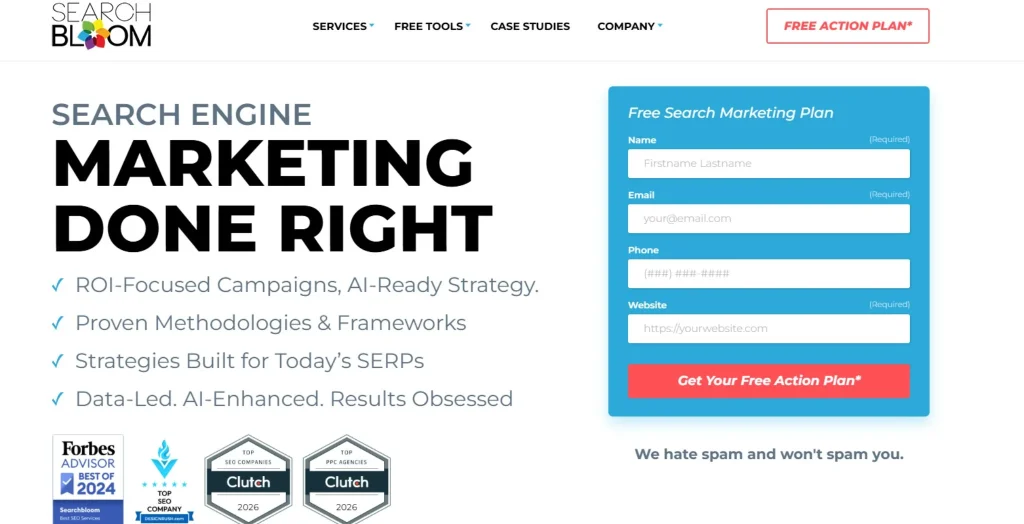
2. Searchbloom
Searchbloom is a specialized SEO agency based in Utah that focuses strongly on search engine optimization with a performance and ROI-first mindset. Their core identity is being a results-driven SEO company, meaning they prioritize measurable business outcomes rather than just rankings or traffic.
What they do:
Advanced SEO strategy development and website audits.
Local SEO for businesses targeting specific cities or regions.
National SEO campaigns for competitive industries.
Conversion Rate Optimization (CRO) to improve lead generation and sales.
Key strength: They are known for transparent reporting and ROI-focused SEO campaigns, where success is measured through real business results such as leads, conversions, and revenue, not just keyword rankings.
3. Chamber Media
Chamber Media is a Utah-based video advertising and digital marketing agency that focuses on creating high-performing video ads for social media platforms.
Specializes in video ad production and paid advertising (Facebook, Instagram, YouTube)
Focuses on generating sales, leads, and conversions
Uses creative storytelling combined with ad testing and optimization to improve performance
Strong emphasis on performance marketing rather than traditional SEO
Key idea: They transform video content into high-converting ads that help businesses grow through paid social media campaigns.
4. 97th Floor
97th Floor is a well-known performance marketing agency that works with mid-size and enterprise brands. They are heavily focused on data-driven marketing strategies and measurable outcomes.
What they do:
Enterprise SEO and content strategy.
Paid search and digital advertising.
Analytics and marketing performance tracking.
Content-driven lead generation.
Key strength: Strong emphasis on analytics, storytelling, and scalable marketing systems for larger brands.
5. Red Olive
Red Olive is a digital agency that focuses on creating websites that look modern and professional while also helping businesses rank better on search engines like Google. They combine design, SEO, and branding to improve both appearance and performance.
What they do:
Website design and development: They build responsive, user-friendly websites that work well on all devices.
SEO optimization: They improve website structure, speed, and keywords so sites rank higher on Google.
Branding and identity: They help businesses create a consistent visual style, including logos, colors, and messaging.
Content strategy: They plan what type of content (blogs, pages, etc.) will attract and engage visitors.
UX (User Experience) optimization: They make websites easier to navigate so users stay longer and convert more.
Key strength: Strong balance between design aesthetics and SEO performance.
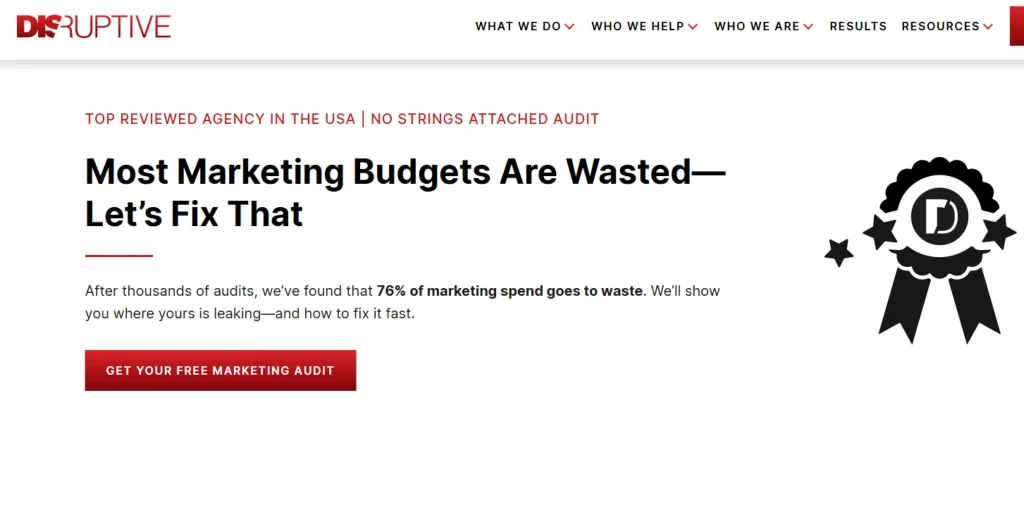
6. Disruptive Advertising
Disruptive Advertising is one of Utah’s most well-known performance marketing agencies, specializing in data-driven digital advertising and conversion optimization.
What they do:
PPC management (Google Ads, social ads).
Conversion rate optimization (CRO).
Landing page optimization.
Paid social and remarketing campaigns.
Key strength: Strong focus on maximizing return on ad spend (ROAS) through continuous testing, optimization, and performance-based decision-making.
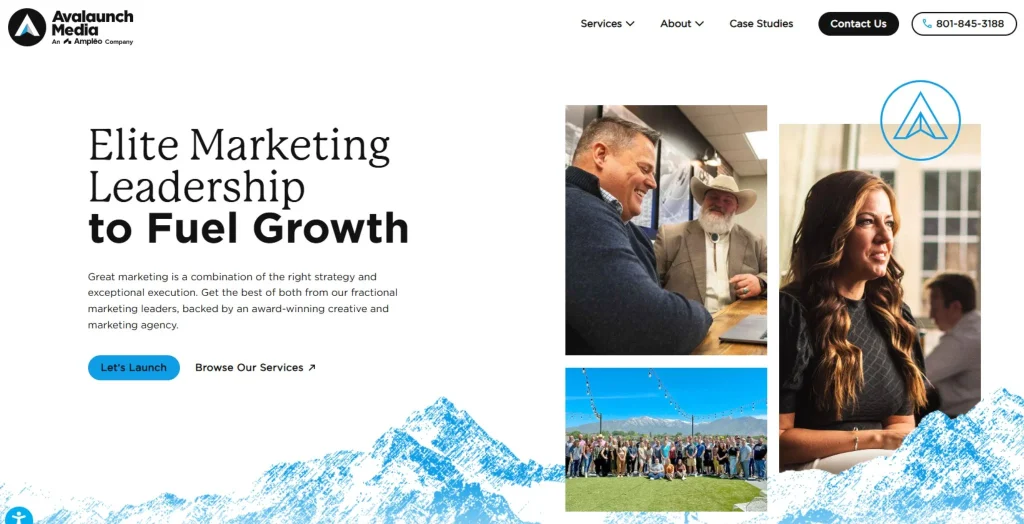
7. Avalaunch Media
Avalaunch Media is a marketing agency that helps businesses grow online by improving how easily people can find them on Google and how strong their brand looks on the internet. They use a mix of SEO, content, PR, and ads.
What they do:
Search Engine Optimization (SEO) and content marketing.
Digital PR and brand outreach campaigns.
Paid media advertising campaigns.
Creative strategy and integrated campaign development.
Key strength: They are especially good at combining SEO and PR, which helps a brand get both higher search rankings and stronger online reputation at the same time.
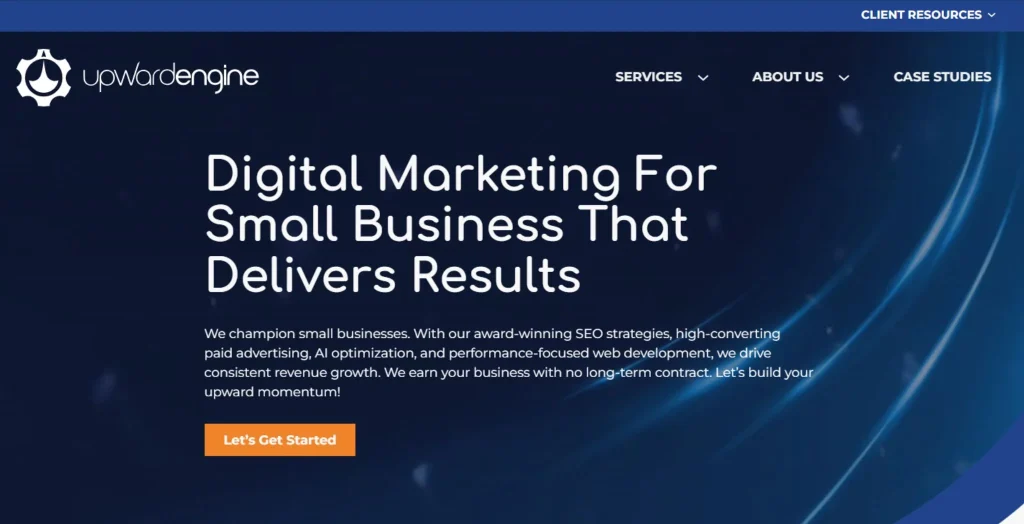
8. Upward Engine
Upward Engine is a digital marketing agency based in Utah that mainly focuses on SEO (Search Engine Optimization). Their goal is to help businesses get more traffic from Google without relying heavily on paid ads. They work on improving websites so they rank higher and attract steady organic visitors over time.
What they do:
SEO audits and technical optimization.
Local SEO for small and mid-sized businesses.
Content creation and keyword targeting.
Link building and authority growth.
Key strength: Focused, SEO-first approach with strong emphasis on scalable organic growth.
Conclusion
Marketing agencies in Utah play a critical role in helping businesses grow in a highly competitive digital environment. From SEO and PPC to social media and content marketing, these agencies provide comprehensive solutions designed to enhance visibility, attract customers, and increase revenue.
Choosing the right marketing partner requires careful evaluation of experience, strategy, transparency, and performance history. Businesses that invest in professional marketing services are better positioned to achieve long-term success and build a strong digital presence.
For businesses looking to scale effectively and compete with the Utah digital marketing agencies, partnering with a reliable and experienced agency is essential.
One such trusted resource for digital marketing solutions and service-area expertise is Webcazador, which provides strategic marketing support designed to help businesses improve their online presence and reach their target audience effectively.
Sahil Bansal is a digital marketing expert with deep knowledge of trending topics in SEO, social media, affiliate, and content marketing. Known for insightful blogs and reviews, he keeps audiences informed and businesses ahead with his sharp analysis and marketing expertise.
The cryptocurrency and blockchain sector continues to evolve at a rapid pace, attracting investors, developers, and innovators from across the globe. With increasing competition and constant technological advancements, gaining online visibility has become more challenging than ever. In such a dynamic landscape, search engine optimization (SEO) plays a critical role in helping blockchain platforms and crypto-based services establish authority, attract organic traffic, and build long-term credibility.
Unlike traditional industries, crypto-related platforms face unique SEO challenges, including regulatory restrictions, advertising limitations, and rapidly changing search trends. Therefore, implementing a well-structured SEO approach is not just beneficial; it is essential for sustainable growth.
Understanding Cryptocurrency SEO in the Financial Ecosystem
Cryptocurrency SEO refers to the process of optimizing blockchain and crypto-related websites to improve their visibility on search engines like Google. Unlike traditional finance SEO, this niche requires a deeper understanding of decentralized technologies, tokenomics, trading behavior, and regulatory sensitivity.
Search engines evaluate crypto websites based on authority, trustworthiness, and relevance. Therefore, SEO strategies must focus on delivering accurate financial insights, high-quality content, and transparent information to build credibility.
Key components include the following:
Keyword optimization for crypto-related search intent.
High-authority backlink building from finance and blockchain sources.
Technical SEO for secure and fast-loading websites.
Content marketing focused on education and industry updates.
Why SEO is Essential for Cryptocurrency and Fintech Platforms
In the competitive digital finance landscape, paid advertising alone is not enough. Many crypto-related ads face restrictions across platforms, making organic search visibility even more important.
SEO provides long-term benefits such as:
Sustainable organic traffic growth.
Increased trust and authority in financial markets.
Higher conversion rates from targeted users.
Improved brand recognition in blockchain ecosystems.
Businesses that invest in SEO gain a strategic advantage by appearing in top search results when users search for crypto trading, blockchain solutions, or investment opportunities.
Top Tips to Choose the Right SEO for Crypto & Blockchain Success
Selecting the right SEO strategy or agency is essential for long-term success in the blockchain and cryptocurrency industry. Since this niche is highly competitive and technical, your SEO approach must be both strategic and compliant with search engine guidelines.
1. Evaluate Industry Experience in Blockchain SEO
It is essential to choose SEO professionals who have proven experience in the blockchain and cryptocurrency industry. Such experts understand niche keywords, market behavior, and audience intent better. Their familiarity with crypto trends helps create more targeted strategies that improve visibility, organic traffic, and long-term search engine rankings effectively.
2. Focus on Technical SEO Expertise
Technical SEO plays a major role in optimizing crypto websites, which often include complex structures like dApps, token platforms, and smart contract dashboards. Experts ensure proper indexing, fast page loading speed, mobile responsiveness, and clean site architecture. This improves crawling efficiency and enhances overall search engine performance and visibility.
3. Content Strategy and Keyword Research Skills
A strong SEO strategy depends on detailed keyword research and content planning. Professionals analyze user intent to target investors, developers, and crypto enthusiasts effectively. High-quality, informative content is then created to match search queries, improve engagement, and increase organic rankings while building authority in the blockchain ecosystem.
4. Link Building and Authority Development
High-quality backlinks are crucial for improving domain authority in the competitive crypto space. SEO experts focus on acquiring links from reputable blockchain, finance, and tech websites. These authoritative backlinks enhance trust signals, improve search rankings, and increase organic traffic, helping crypto businesses establish a stronger online presence.
5. Compliance with Google Guidelines
Following Google’s SEO guidelines is critical for long-term success. Ethical SEO practices avoid black-hat techniques such as keyword stuffing or spammy backlinks. Compliance ensures stable rankings, prevents penalties, and builds trust with search engines. This results in sustainable growth and improved visibility for cryptocurrency and blockchain websites.
Final Thoughts
In the evolving landscape of digital finance and blockchain innovation, publishing high-quality guest content has become a powerful strategy for improving online visibility and authority. Platforms that support structured publishing opportunities help brands, marketers, and creators reach highly targeted audiences while strengthening their SEO performance.
One such valuable destination for content distribution is Webcazador, a trusted platform that focuses on industry-specific publishing opportunities across multiple niches, including finance, cryptocurrency, and digital marketing. It provides contributors with an effective space to share insights, build backlinks, and enhance search engine presence through relevant, contextual placements.
By leveragingWebcazador’s guest posting opportunities, digital creators and blockchain-focused platforms can significantly improve their organic reach, strengthen domain authority, and connect with a wider professional audience in a highly competitive online ecosystem.
Sahil Bansal is a digital marketing expert with deep knowledge of trending topics in SEO, social media, affiliate, and content marketing. Known for insightful blogs and reviews, he keeps audiences informed and businesses ahead with his sharp analysis and marketing expertise.
Florida’s digital marketplace has become one of the most competitive ecosystems in the United States. From local startups to enterprise-level brands, every business is fighting for visibility. In this environment, SEO is no longer optional; it is a core growth engine that determines how effectively a brand attracts, converts, and retains customers online.
Today’s SEO goes far beyond keyword placement. It focuses on user intent, technical excellence, content authority, and data-driven decision-making. Businesses that invest in strategic SEO consistently outperform competitors in visibility, traffic quality, and revenue growth.
Below is a curated list of the top SEO agencies in Florida (2026) known for delivering measurable, scalable, and long-term digital success.
Why SEO is Important for Businesses in Florida
Florida is home to a thriving business ecosystem, ranging from small startups to large enterprises. With increasing competition across industries, simply having a website is no longer enough. SEO plays a crucial role in ensuring that businesses appear in front of their target audience when they search for relevant products or services.
Effective SEO strategies help improve search engine rankings, increase organic traffic, and enhance user experience. Businesses that invest in SEO often experience higher conversion rates, better brand credibility, and sustainable online growth.
Top 10 SEO Service Providers in Florida for 2026
Florida is one of the most competitive digital markets, especially for industries like real estate, legal services, healthcare, tourism, and eCommerce. The best SEO agencies here focus on local SEO, technical optimization, content strategy, link building, and AI-driven SEO (GEO/AEO).
1. Webcazador
Webcazadoris an emerging SEO agency that focuses heavily on performance-driven and analytics-based SEO campaigns. Their approach is centered on understanding business goals first and then building a tailored SEO roadmap that includes keyword research, technical optimization, and content strategy. They are particularly focused on helping newer brands compete with established players by using modern SEO techniques, data tracking, and continuous optimization. Their strength lies in adaptability and measurable growth outcomes.
Data-driven SEO strategies.
Focus on lead generation.
Technical SEO optimization.
Content and keyword targeting.
Scalable growth solutions.
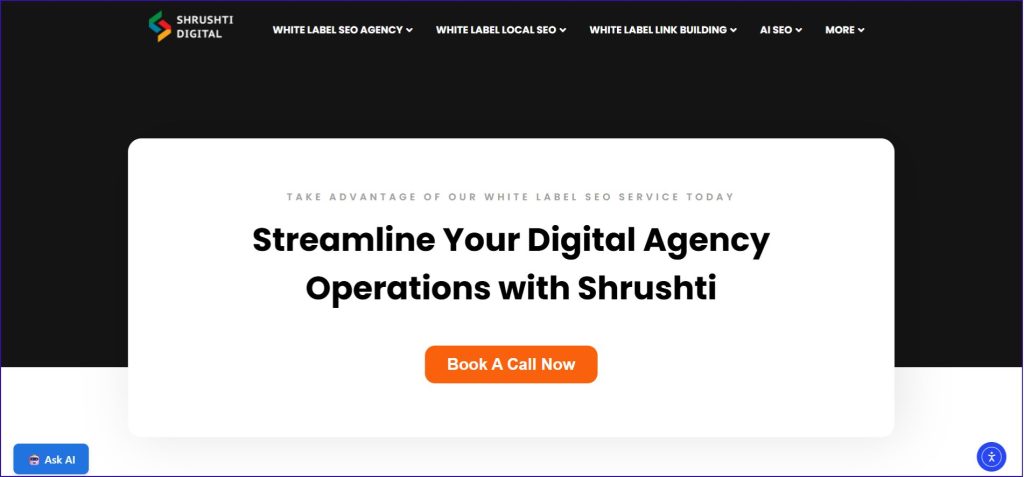
3. Shrushti Digital
Shrushti Digital is an SEO and white-label link-building agency with over 10 years of experience helping businesses improve their online visibility and organic growth. The agency specializes in strategic link acquisition, local SEO, white-label SEO solutions, and technical optimization tailored to each client’s objectives. With a results-oriented approach, Shrushti Digital focuses on developing sustainable SEO strategies that improve search rankings, drive qualified traffic, and deliver measurable business outcomes. Their expertise in outreach and scalable SEO execution makes them a reliable partner for agencies and businesses seeking long-term growth.
White-label SEO solutions for agencies.
Expertise in high-quality link building.
Local SEO and Google Business Profile optimization.
Technical SEO and on-page improvements.
Customized strategies focused on measurable growth.
Transparent communication and scalable execution.
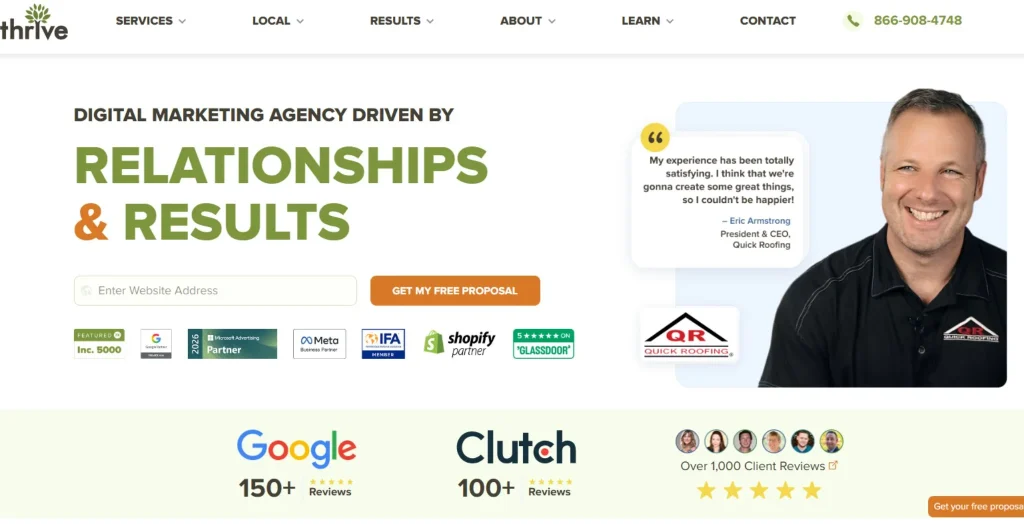
3. Thrive Internet Marketing Agency
Thrive Internet Marketing Agency is a full-service digital marketing company known for structured and highly customized SEO strategies. They analyze competitors, market trends, and website performance to design campaigns that improve both rankings and conversions. Their team places strong emphasis on transparency, reporting, and ROI tracking. Thrive is often chosen by businesses that want a long-term partner capable of handling everything from on-page SEO to authority building and conversion optimization under one strategy.
Customized SEO strategies.
Strong link-building campaigns.
Conversion rate optimization.
Data-driven reporting.
Long-term growth focus.
4. SmartSites
SmartSites is widely recognized for combining SEO and PPC into integrated digital marketing campaigns. This allows businesses to gain both immediate traffic (via ads) and long-term organic growth. Their SEO process includes technical audits, keyword optimization, and content enhancement, while PPC supports fast visibility. They are especially strong in analytics and ROI measurement, making them ideal for businesses that want clear performance tracking and scalable digital marketing across multiple channels.
SEO and PPC integration.
ROI-focused strategies.
Scalable marketing solutions.
Strong analytics reporting.
Multi-industry expertise.
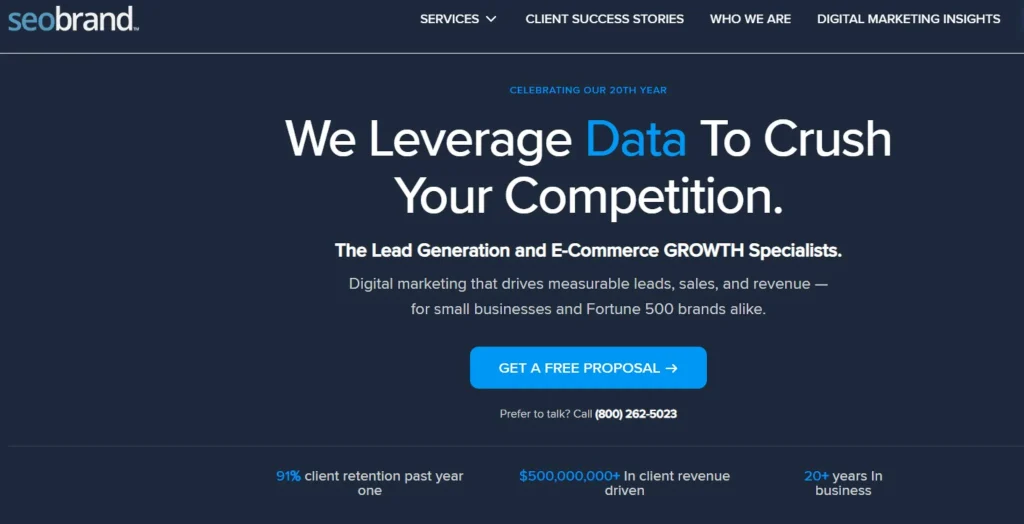
5. SEO Brand
SEO Brand focuses on enterprise-level SEO solutions designed for highly competitive industries such as finance, healthcare, and e-commerce. Their strategies are built around advanced technical SEO, authority building, and large-scale content optimization. They often work with companies that already have a strong online presence but want to dominate search results in competitive markets. Their structured methodology ensures stability, scalability, and long-term ranking authority across multiple keywords and markets.
Enterprise SEO solutions.
Competitive market targeting.
Technical SEO expertise.
Authority and backlink building.
Long-term ranking stability.
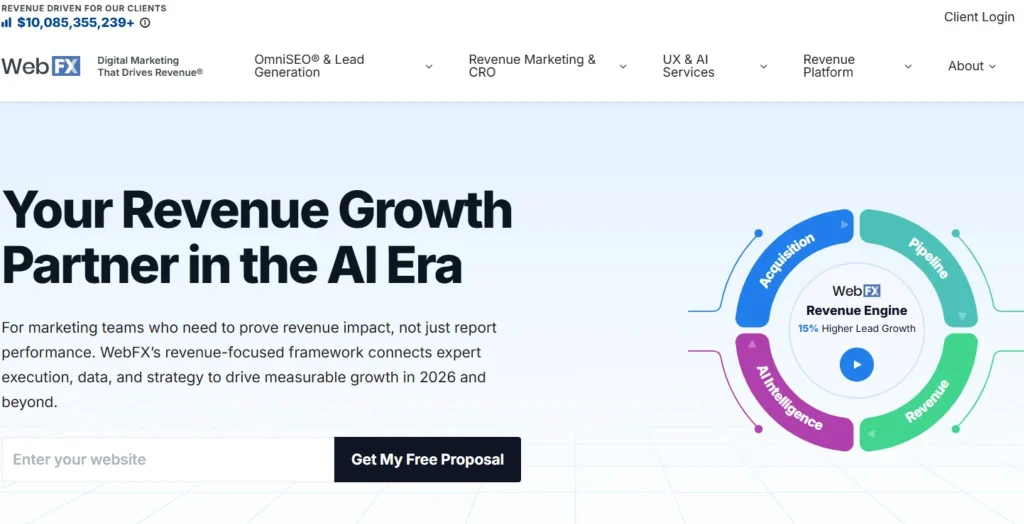
6. WebFX
WebFX is a globally established digital marketing agency known for its strong emphasis on technology and data-driven SEO. They use proprietary tools and advanced analytics platforms to track campaign performance in real time. Their SEO services are deeply tied to revenue generation, not just rankings, which makes them popular among growth-focused businesses. WebFX offers end-to-end services, including content marketing, technical SEO, CRO, and digital strategy, making them a comprehensive marketing partner.
Data-driven SEO strategies.
Proprietary marketing tools.
Strong ROI focus.
Global client base.
Full-service digital marketing.
7. Ignite Visibility
Ignite Visibility is a premium SEO and digital marketing agency that focuses on advanced strategy development and multi-channel integration. They combine SEO with paid media, email marketing, and social media to create a unified growth system. Their team is known for predictive analytics and strategic forecasting, helping businesses anticipate trends and adjust campaigns proactively. They often work with large brands and competitive industries that require consistent, scalable, and high-impact digital marketing performance.
Advanced SEO strategies.
Predictive analytics usage.
Multi-channel marketing.
High-profile clients.
Conversion optimization focus.
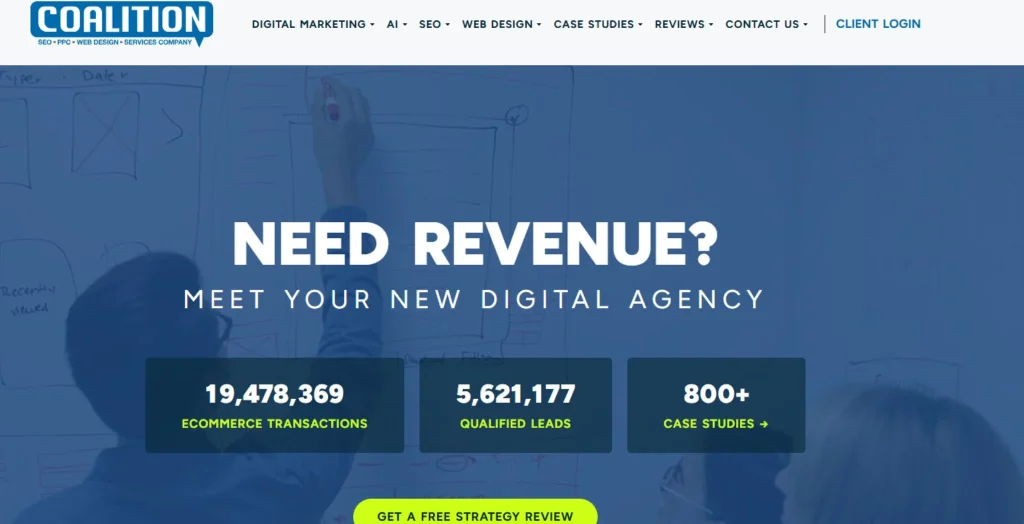
8. Coalition Technologies
Coalition Technologies is a highly technical SEO agency that specializes in detailed website optimization and structured SEO execution. They are especially strong in e-commerce SEO, helping online stores increase visibility and sales through product page optimization, site architecture improvements, and content enhancements. Their team uses a systematic, data-backed approach that includes audits, testing, and continuous refinement to ensure sustainable organic growth over time.
SEO audits and analysis.
E-commerce optimization.
Content strategy development.
Technical SEO improvements.
Performance tracking systems.
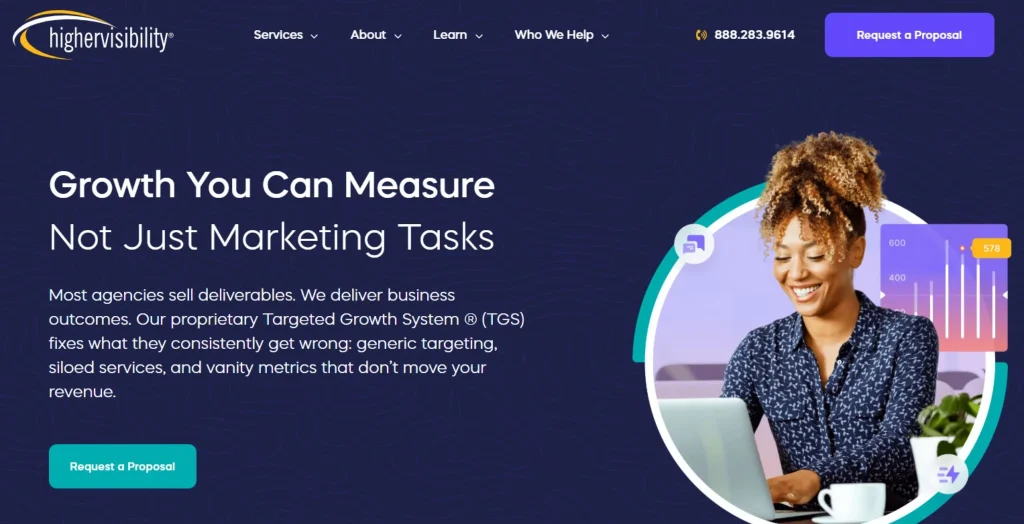
9. HigherVisibility
HigherVisibility focuses strongly on local and regional SEO, helping small and medium businesses improve visibility in their geographic markets. They specialize in Google Business Profile optimization, local citations, and geo-targeted keyword strategies. Their services are particularly useful for service-based businesses like clinics, law firms, and local shops that depend on nearby customers. Their goal is to strengthen local search presence and increase foot traffic and leads.
Local SEO expertise.
Citation-building strategies.
Keyword optimization.
Small business focus.
Online visibility improvement.
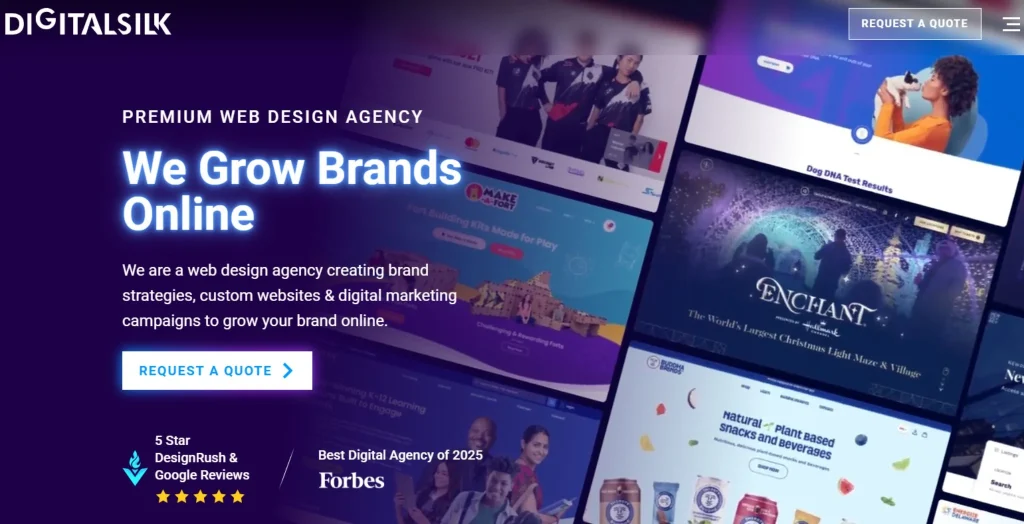
10. Digital Silk
Digital Silk is a digital agency that blends branding, web design, and SEO into a unified strategy. Their approach focuses on building strong digital identities that not only rank well in search engines but also engage users effectively. They prioritize user experience, conversion design, and storytelling through web content. This makes them ideal for businesses that want to improve both brand perception and organic search visibility simultaneously.
Branding + SEO integration.
UX-focused website design.
Content optimization.
Conversion-driven strategy.
Digital identity development.
11. SEO Discovery
SEO Discovery provides cost-effective SEO services aimed at delivering long-term and sustainable organic growth. Their strategies focus on ethical SEO practices such as white-hat link building, content creation, and keyword targeting. They are especially popular among startups and small businesses that need affordable yet effective SEO solutions. Their long-term approach ensures gradual but stable ranking improvements rather than short-term spikes.
Affordable SEO services.
Ethical SEO practices.
Content marketing focus.
Link-building strategies.
Long-term growth approach.
Conclusion
With the growing importance of digital presence, investing in SEO has become essential for businesses in Florida. The companies listed above represent some of the best options available in 2026, offering a range of services tailored to different business needs.
Among them, Webcazador stands out as a promising SEO partner that focuses on delivering measurable results through customized and data-driven strategies. Businesses looking to improve their online visibility, attract more customers, and achieve sustainable growth can explore their services to gain a competitive edge in the digital marketplace.
Sahil Bansal is a digital marketing expert with deep knowledge of trending topics in SEO, social media, affiliate, and content marketing. Known for insightful blogs and reviews, he keeps audiences informed and businesses ahead with his sharp analysis and marketing expertise.
Guest posting remains one of the most reliable ways to build high-quality backlinks. When executed properly, it helps you earn editorial links from authoritative and relevant websites, which directly improves your SEO performance. It also drives genuine referral traffic from audiences who are already interested in your niche, increasing engagement and potential conversions. Over time, consistent guest posting strengthens your domain authority and improves your website’s visibility in search engine results. Many businesses and SEO professionals use guest posting services to create well-researched, valuable content and secure placements on trusted blogs.
These services ensure that the content is not only optimized for search engines but also useful for readers. In today’s competitive digital space, guest posting has become an essential strategy for building credibility, authority, and long-term organic growth.
What Is Guest Posting and Why It Matters for SEO
Guest posting refers to the practice of publishing content on third-party websites within a specific niche. These posts typically include backlinks pointing back to the author’s website, which helps improve SEO rankings.
Search engines like Google consider backlinks as a major ranking factor. High-quality backlinks from authoritative websites signal trustworthiness and relevance, which ultimately enhances a website’s ranking potential. This is why guest posting remains a cornerstone of modern SEO strategies.
Strategic Advantages of Guest Posting Services
Professional guest posting services offer several strategic benefits that contribute to overall digital marketing success:
1. Enhanced Domain Authority: Backlinks from high-authority websites strengthen a domain’s credibility, improving its ability to rank for competitive keywords.
2. Targeted Audience Reach: Guest posts published on niche-relevant platforms attract audiences with a genuine interest in the subject matter, resulting in higher engagement rates.
3. Brand Positioning and Credibility: Consistent visibility on reputable platforms positions a business as a trusted authority within its industry.
4. Sustainable SEO Performance: Unlike short-term advertising strategies, guest posting delivers long-term value by continuously contributing to organic traffic and rankings.
5. Operational Efficiency: Outsourcing guest posting enables organizations to focus on core business activities while experts manage outreach, content creation, and placement.
10 Best Guest Posting Service Providers You Should Know About
Guest posting services help businesses build high-quality backlinks, improve domain authority, and increase organic traffic. These providers connect brands with niche-relevant websites, ensuring strong SEO growth, better visibility, and long-term digital marketing success through strategic content placement and outreach campaigns.
1. Webcazador Digital Solutions
Webcazador Digital Solutions delivers tailored guest posting services across multiple industries, focusing on authoritative websites with real traffic. Their outreach strategy ensures niche relevance, high-quality content, and sustainable backlink growth that supports long-term SEO performance and improved online visibility.
Key Points:
Industry-specific outreach.
High-authority placements.
Real traffic websites.
SEO-focused content strategy.
Sustainable backlink growth.
2. QBurst
QBurst offers comprehensive digital marketing solutions with a strong emphasis on guest posting. They prioritize content quality, relevance, and natural backlink placement within valuable articles, helping brands enhance authority, improve rankings, and achieve measurable organic growth through ethical SEO practices.
Key Points:
Quality content focus.
Natural link placement.
SEO-integrated strategy.
Authority-building approach.
Organic growth results.
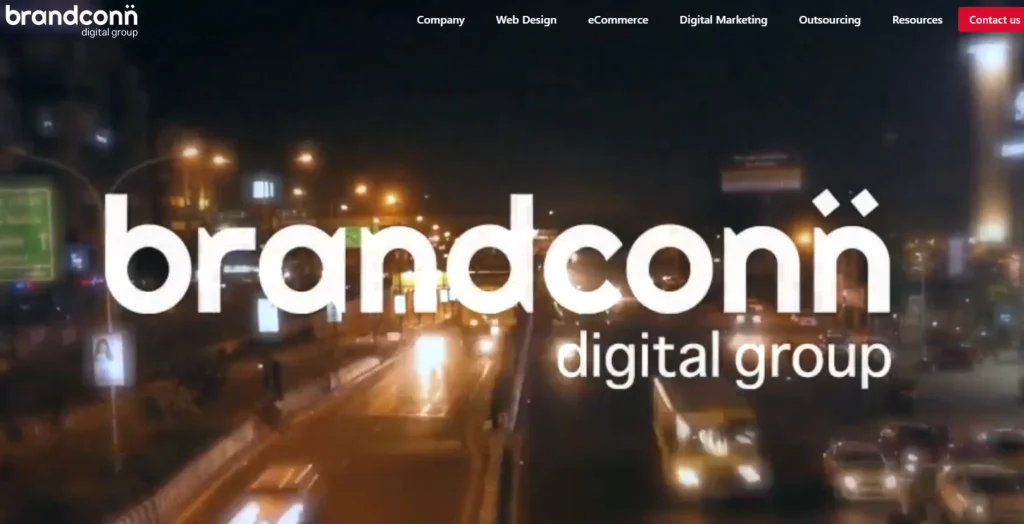
3. Brandconn Digital
Brandconn Digital provides result-driven SEO and guest posting services through a wide publisher network. They focus on niche-specific placements, helping businesses gain targeted exposure, improve search visibility, and build strong domain authority through consistent, high-quality backlink acquisition strategies and SEO performance.
Key Points:
Niche-specific targeting.
Strong publisher network.
Authority-building strategy.
High-quality backlinks.
SEO performance focus.
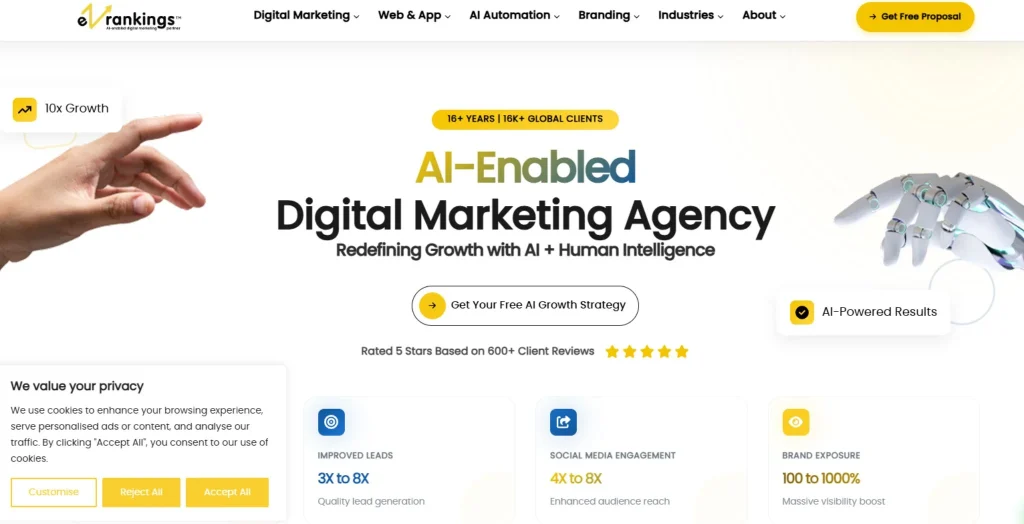
4. EZ Rankings
EZ Rankings is a well-established SEO agency offering scalable guest posting services focused on white-hat backlink building. They ensure compliance with search engine guidelines while improving website authority, organic traffic, and long-term search engine performance through ethical optimization techniques successfully.
Key Points:
White-hat SEO methods.
Scalable link building.
Search engine compliance.
Authority improvement focus.
Long-term SEO success.
5. ShootOrder
ShootOrder combines creativity with SEO expertise to deliver impactful guest posting campaigns. Their services are designed to improve visibility, strengthen brand recognition, and drive organic growth through engaging content, strategic outreach, and high-quality backlink placements across relevant niche websites and channels.
Key Points:
Creative SEO approach.
Brand visibility boost.
Engaging content strategy.
Strategic outreach process.
Niche website placements.
6. Techmagnate
Techmagnate is a leading digital marketing agency offering premium guest posting services. They prioritize high-authority placements, strategic link building, and content-driven SEO campaigns that enhance brand visibility, improve search rankings, and deliver sustainable organic traffic growth for businesses’ online success.
Key Points:
High-authority backlinks.
Strategic link building.
SEO-driven campaigns.
Brand visibility improvement.
Online success focus.
7. Loganix
Loganix is widely known for its transparent and reliable guest posting services. They focus on delivering measurable SEO results through high-quality backlinks, ensuring consistent performance, improved domain authority, and sustainable organic growth for businesses across competitive industries for long-term SEO success.
Key Points:
Transparent processes.
Reliable service delivery.
Measurable SEO results.
Authority improvement.
Long-term SEO success.
8. RankZ
RankZ specializes in SEO and content marketing, offering guest posting solutions that enhance domain authority and organic growth. Their strategies focus on high-quality content placement, niche relevance, and scalable link-building campaigns for sustained digital marketing success and brand visibility.
Key Points:
Content marketing focus.
Domain authority growth.
Niche relevance strategy.
Scalable link building.
Brand visibility increases.
9. Guest Post UK
Guest Post UK provides access to a wide network of publishers, helping businesses secure backlinks from reputable websites across multiple niches. Their service emphasizes quality placements, niche targeting, and improved search engine visibility for sustained online growth and digital marketing success.
Key Points:
Wide publisher network.
Reputable website links.
Niche targeting approach.
SEO visibility boost.
Digital marketing success.
10. iGuestBlog
iGuestBlog is a platform that connects businesses with bloggers and publishers, making guest posting more accessible and efficient. It simplifies outreach, enhances collaboration, and supports SEO growth through quality content distribution and targeted backlink opportunities for digital marketing success growth.
Key Points:
Blogger connections.
Easy outreach system.
Collaboration focused.
Quality content distribution.
Targeted backlink growth
How to Choose the Right Guest Posting Service Provider
Selecting the right service provider is crucial for achieving desired SEO results. Businesses should consider the following factors:
Domain Authority of Publishing Sites: Higher-authority websites provide stronger and more valuable backlinks.
Niche Relevance: Links should come from websites that are closely related to your industry or business.
Content Quality: Well-written, informative, and engaging content improves both user experience and SEO performance.
White-Hat Practices: Ethical link-building strategies ensure long-term SEO success without the risk of search engine penalties.
Making an informed decision helps ensure that guest posting efforts deliver maximum ROI and sustainable growth.
Why Businesses Are Investing in Guest Posting in 2026
With increasing competition in digital spaces, businesses are prioritizing strategies that deliver sustainable results. Guest posting continues to evolve as a reliable SEO technique because it aligns with search engine guidelines and focuses on quality over quantity.
In 2026, businesses are leveraging guest posting not only for backlinks but also for brand storytelling, audience engagement, and thought leadership. It has become a multi-purpose strategy that supports overall digital marketing goals.
Final Thoughts
Guest posting continues to be a powerful strategy for businesses looking to improve their SEO performance and online authority. However, the effectiveness of this approach depends largely on selecting the right service provider.
A dependable agency focuses on quality, relevance, and ethical practices. They ensure that every backlink contributes positively to a website’s growth and visibility.
For businesses searching for reliable guest posting services, Webcazador Digital Solutions emerges as a strong contender. Their expertise in securing high-quality placements, combined with a strategic approach, makes them a valuable partner for long-term SEO success. By leveraging their services, businesses can strengthen their digital presence and achieve sustainable growth in search rankings.
Sahil Bansal is a digital marketing expert with deep knowledge of trending topics in SEO, social media, affiliate, and content marketing. Known for insightful blogs and reviews, he keeps audiences informed and businesses ahead with his sharp analysis and marketing expertise.
In today’s fast-evolving digital landscape, SEO has become essential for strengthening a business’s online presence. With new businesses emerging every day, the need for reliable and effective SEO services continues to rise at a rapid pace.
As demand grows, marketers and business owners are increasingly prioritizing digital marketing strategies, particularly SEO, to stay ahead of the competition. In such a competitive environment, choosing the right SEO partner can have a major impact on long-term growth and visibility.
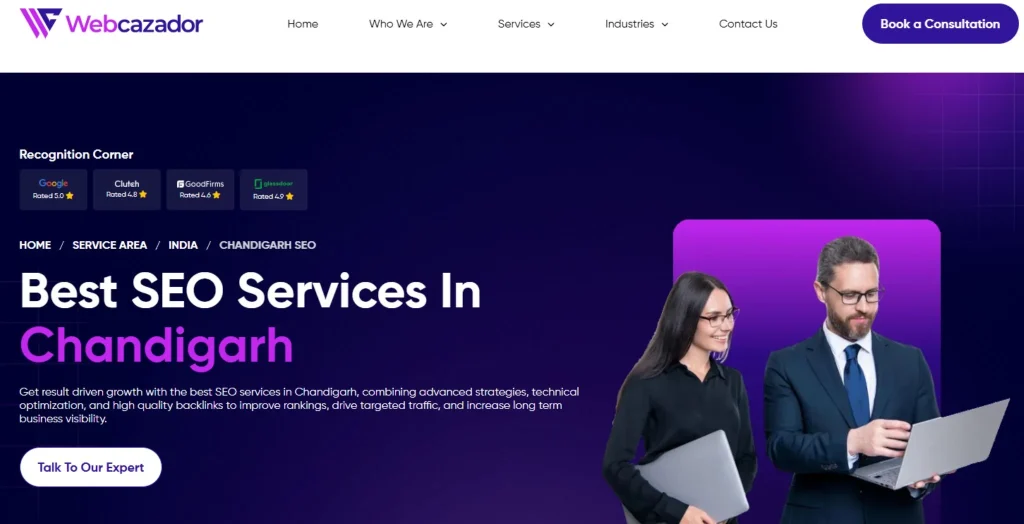
However, selecting the best SEO company in a dynamic city like Chandigarh can be challenging, especially for new businesses. To make this process easier, we’ve compiled a list of the best SEO companies in Chandigarh for 2026. This guide highlights ten trusted agencies known for delivering strong results at competitive pricing, helping you enhance your digital presence with confidence.
What Makes SEO Essential for Businesses in 2026
The digital marketing landscape continues to evolve, and SEO has become more sophisticated than ever. In 2026, search engines prioritize user intent, content quality, and website performance over traditional keyword stuffing techniques.
Modern SEO focuses on the following:
Understanding user behavior and search intent.
Delivering valuable and informative content.
Ensuring mobile-first optimization.
Improving page speed and user experience.
Building authority through high-quality backlinks.
Businesses that fail to adapt to these changes risk losing visibility and potential customers. SEO is no longer a one-time activity but an ongoing process that requires continuous optimization and strategic planning.
A Smart Checklist to Choose the Best SEO Agencies in Chandigarh
Choosing the right SEO agency can make or break your digital growth, especially in a competitive market like Chandigarh. Instead of going with flashy promises, a structured checklist helps you evaluate agencies logically and confidently. Here’s a smart, practical checklist to guide your decision:
1. Webcazador
Webcazador is an SEO agency in Chandigarh focusing on structured, data-driven strategies for business growth. They emphasize keyword research, on-page SEO, technical optimization, and ethical link building to improve search rankings and visibility. Transparent reporting supports performance tracking and clarity.
Overall, they aim to generate consistent organic traffic, better search visibility, and long-term digital growth for clients. Their process is guided by analytics, regular audits, and continuous optimization, ensuring improvements in rankings, user engagement, and overall online business performance consistently.
2. SEO Discovery
SEO Discovery is a well-established digital marketing agency known for handling large-scale SEO and online marketing campaigns. They combine SEO, paid advertising, and content marketing to deliver measurable business growth. Their strategies are designed to improve search rankings, brand visibility, and online authority across global markets.
With a skilled and experienced team, they create scalable solutions for businesses of all sizes. Their strength lies in data-driven execution, performance tracking, and delivering consistent results in highly competitive digital environments.
3. WebHopers Infotech
WebHopers Infotech is popular for providing affordable SEO services, especially for startups and small businesses. Their focus includes keyword optimization, on-page improvements, technical SEO, and performance monitoring. They aim to deliver ROI-focused strategies that help businesses improve search engine rankings and gain steady online visibility.
Known for budget-friendly solutions, they offer practical and result-oriented services. Their approach is gradual but consistent, making them a suitable choice for businesses looking to build a strong digital presence without high marketing costs.
4. Indeed SEO
Indeed, SEO is known for its ethical and sustainable SEO practices that ensure long-term ranking stability. Their services include detailed website audits, competitor analysis, keyword research, and conversion-focused strategies. They strictly follow search engine guidelines to avoid penalties and ensure safe optimization practices.
The agency focuses on building long-lasting results rather than short-term gains. With a structured and analytical approach, they help businesses improve visibility, increase organic traffic, and maintain steady growth in competitive online markets.
5. RankZ
RankZ is a performance-focused SEO and digital marketing agency that helps businesses improve online visibility through data-driven strategies. Their services typically include keyword research, technical SEO, content marketing, and link-building campaigns designed to increase organic rankings. They also emphasize conversion optimization to turn traffic into leads and customers.
With a strong focus on analytics and measurable results, RankZ builds customized SEO strategies based on business goals. Their approach supports sustainable growth, improved search presence, and long-term digital performance in competitive markets.
6. Loganix
Loganix is a well-known SEO and digital marketing service provider that offers link building, citation building, local SEO, and content services. It is widely used by agencies and businesses to improve search rankings and online authority. Their work focuses on high-quality white-hat SEO practices with strong attention to accuracy and relevance. Loganix is especially popular for scalable outsourced SEO solutions, helping brands improve visibility domain authority and organic traffic growth consistently across various industries and markets worldwide over time effectively
7. Suffescom Solutions
Suffescom Solutions provides advanced and enterprise-level SEO services designed for scalable business growth. They specialize in technical SEO, mobile optimization, and innovative digital strategies tailored to client needs. Their focus is on helping businesses compete in highly competitive markets using modern and data-driven techniques. They offer customized SEO plans based on industry and goals.
With strong technical expertise, they ensure improved search rankings, increased organic traffic, and sustainable long-term growth for startups, enterprises, and global businesses.
8. Techmagnate
Techmagnate is a premium SEO agency that focuses on enterprise-level digital growth. They use analytics-driven strategies, high-quality content creation, and advanced technical SEO to improve rankings. Their approach emphasizes long-term brand authority and sustainable organic traffic.
The agency works with large businesses and competitive industries, delivering measurable performance improvements. They are known for their structured planning, consistent execution, and strong focus on ROI-driven results. Their goal is to maintain strong online visibility and leadership in digital markets.
9. LeCiel Technologies
LeCiel Technologies offers customized SEO solutions tailored to specific business needs and industry requirements. Their process includes strategic planning, implementation, and continuous performance monitoring.
They focus on transparency, reporting, and gradual ranking improvement. The agency ensures that businesses achieve stable and long-term SEO results. Their flexible approach makes them suitable for different sectors and business sizes. The main objective is to strengthen online visibility, improve search performance, and support consistent digital growth over time.
10. Piegon Media
Piegon Media is a digital marketing and SEO service provider offering solutions for businesses aiming to improve online visibility and lead generation. They focus on SEO optimization, local search marketing, website development, and online advertising strategies. Their approach includes keyword research, content optimization, and performance tracking to achieve better rankings on search engines.
With tailored packages for different industries, they aim to support startups and established companies in building a strong digital presence and driving consistent organic traffic growth.
Benefits of Hiring a Professional SEO Agency
Partnering with a professional SEO agency offers numerous advantages for businesses looking to grow online. It allows you to focus on your core operations while experts manage your digital presence and search engine performance.
1. Improved Online Visibility: SEO experts optimize your website with targeted keywords, technical improvements, and quality content, helping it rank higher on search engines, attract more traffic, and increase overall brand visibility online effectively.
2.Better User Experience: Professional SEO agencies enhance website speed, mobile responsiveness, navigation, and content structure, ensuring visitors enjoy a seamless browsing experience, stay longer, and engage more with your website without frustration.
3. Higher Conversion Rates: SEO strategies target the right audience through relevant keywords and optimized content, bringing qualified visitors to your site, increasing trust, improving engagement, and ultimately boosting conversions, leads, and sales performance.
4. Cost-Effective Marketing: SEO is a long-term strategy that reduces dependency on paid ads by generating organic traffic, delivering sustainable results, lowering marketing costs over time, and providing a higher return on investment consistently.
Future of SEO in Chandigarh
The future of SEO in Chandigarh looks promising as more businesses embrace digital transformation. Emerging trends such as voice search, AI-driven optimization, and mobile-first indexing are reshaping the SEO landscape.
Businesses that adapt to these changes and invest in advanced SEO strategies will have a significant advantage. The demand for skilled SEO professionals is expected to grow, making it essential for businesses to collaborate with experienced experts.
Conclusion
In 2026, SEO remains one of the most powerful tools for digital growth. Businesses in Chandigarh have access to some of the most skilled SEO professionals who can help them achieve higher rankings, increased traffic, and improved online visibility.
With the right strategies, consistent efforts, and expert guidance, businesses can build a strong online presence and stay ahead in the competitive digital landscape.
Among the many options available, Webcazador stands out as a trusted choice for delivering result-driven SEO solutions in Chandigarh. They focus on customized strategies, ethical practices, and measurable outcomes to help businesses achieve long-term success.
Sahil Bansal is a digital marketing expert with deep knowledge of trending topics in SEO, social media, affiliate, and content marketing. Known for insightful blogs and reviews, he keeps audiences informed and businesses ahead with his sharp analysis and marketing expertise.
In today’s highly competitive digital world, having a strong online presence is essential for every business. Whether you are a startup, local business, or established brand, Search Engine Optimization (SEO) plays a vital role in improving search engine visibility, increasing organic traffic, and generating quality leads.
Businesses in Mohali, Chandigarh, Zirakpur, and Panchkula are increasingly investing in professional SEO services to improve their Google rankings and stay ahead of competitors. Choosing the right SEO agency can significantly impact your online growth, brand visibility, and long-term success.
If you are searching for the top SEO companies in Mohali, it is important to focus on agencies that offer result-driven strategies, ethical SEO practices, keyword optimization, technical SEO, and content marketing solutions. The best SEO firms help businesses achieve sustainable rankings and consistent online growth through proven digital marketing techniques.
With the right SEO partner, businesses can enhance their digital presence, attract targeted traffic, and convert visitors into loyal customers.
Why Businesses Rely on SEO in Mohali
SEO is no longer optional; it is a necessity in today’s highly competitive digital environment. Businesses in Mohali invest in SEO services because they provide long-term and cost-effective growth compared to paid advertising.
When implemented correctly, SEO helps websites appear in top search results, attract relevant users, and convert visitors into customers. It also improves website usability, content structure, and overall digital performance.
One of the biggest advantages of SEO is its ability to build sustainable visibility. Unlike paid ads, SEO continues to deliver organic traffic even after campaigns are paused, making it one of the most powerful digital marketing strategies.
How SEO Agencies in Mohali Help Businesses Grow
Professional SEO companies in Mohali use a combination of technical expertise and marketing strategy to improve website rankings. Their services typically include keyword research, competitor analysis, content optimization, and backlink building.
Most agencies also focus on improving website speed, mobile responsiveness, and user experience, which are important ranking factors in Google’s algorithm.
In addition, local SEO plays a crucial role for businesses targeting customers within Mohali and nearby regions. Optimizing Google Business Profiles and local listings helps companies appear in “near me” searches and map results.
Top 10 SEO Companies in Mohali
Mohali has become one of the fastest-growing IT and digital marketing hubs in India. Many businesses here focus on SEO (Search Engine Optimization) to improve Google rankings, generate leads, and build strong online visibility. These agencies help companies grow using strategies like keyword research, link building, content marketing, technical SEO, and local SEO.
Below is an expanded overview of the top SEO companies in Mohali and what makes them popular.
Webcazador
Improving digital visibility through structured optimization methods, Webcazador focuses on keyword strategy, technical SEO, and content enhancement. The agency supports businesses in achieving higher rankings, better traffic quality, and long-term sustainable growth across competitive online markets.
SEO Discovery
With strong expertise in digital marketing, SEO Discovery delivers SEO, PPC, and content-driven solutions. The company builds scalable campaigns designed to generate leads, strengthen search visibility, and support consistent business growth across diverse industries globally.
Fortec Web Solutions
Fortec Web Solutions is a Mohali-based marketing agency offering SEO, PPC, web design, and development services, helping businesses improve search rankings, drive targeted traffic, and achieve sustainable online growth through customized strategies and measurable results.
WebHopers
WebHopers focuses on performance-driven marketing by delivering SEO services centered on keyword targeting, local optimization, and eCommerce growth. The agency prioritizes traffic improvement, conversion optimization, and sustainable online success for diverse business needs.
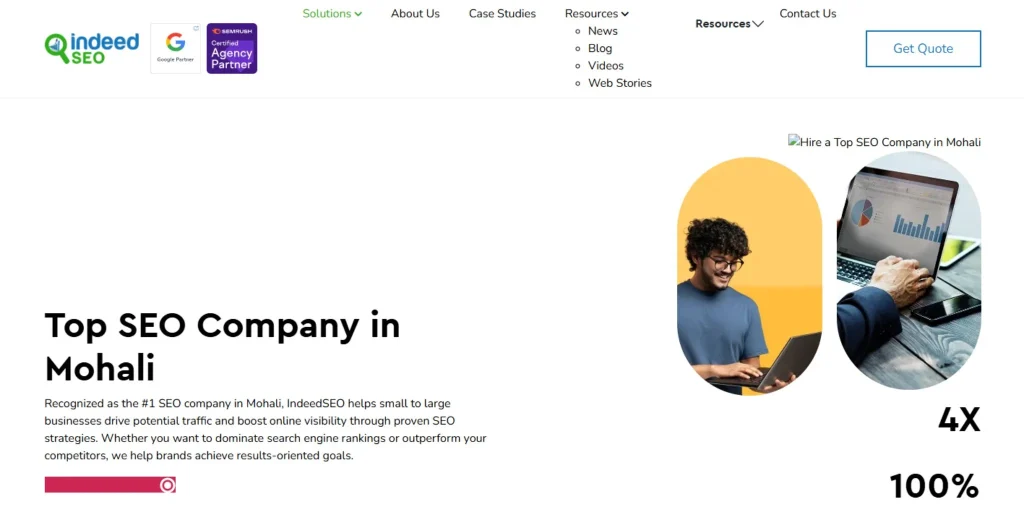
Indeed SEO
Operating across international markets, IndeedSEO specializes in technical SEO, content development, and authority-building strategies. The agency enhances online visibility and strengthens brand credibility through structured, data-driven digital marketing approaches tailored for global expansion.
WebSpero Solutions
Combining technology with marketing expertise, WebSpero Solutions offers SEO, PPC, and web development services. The agency improves website performance, user experience, and search rankings through analytical insights and conversion-focused optimization strategies.
ROI Minds
Focusing on measurable marketing outcomes, ROI Minds provides SEO, paid advertising, and eCommerce optimization services. The agency aims to maximize return on investment by using data-driven strategies that enhance conversions and overall business performance.
SEO Experts
Providing cost-effective optimization solutions, SEO Experts India specializes in keyword research, on-page SEO, and backlink building. The agency supports small and medium businesses in improving search rankings and generating consistent organic traffic growth.
Matrix Marketers
Offering integrated digital solutions, Matrix Marketers combines SEO, web development, and branding services. The company enhances website performance, search visibility, and online identity through structured marketing strategies designed for long-term business growth.
MSM Infotech
Delivering IT and marketing solutions, MSM Infotech provides SEO, website development, and digital branding services. The agency helps businesses improve search engine visibility, attract qualified leads, and maintain a strong online presence through effective optimization techniques.
Modern SEO Techniques Used by Leading Agencies
Top SEO agencies in Mohali use advanced techniques to ensure better performance in search engines. These include:
In-depth keyword research and market analysis
On-page SEO optimization for better indexing
Technical SEO improvements like site speed and crawlability
High-authority backlink creation
Content marketing and blog optimization
Mobile SEO optimization
Voice search optimization
Local SEO strategies for regional targeting
These methods work together to improve search visibility and ensure consistent organic traffic growth.
Importance of Choosing the Right SEO Partner
Selecting the right SEO agency is one of the most important decisions for any business. A good SEO partner not only improves search rankings but also helps build long-term digital credibility.
Businesses should always evaluate an agency’s experience, past results, client reviews, and overall strategy before making a decision. A trustworthy agency focuses on sustainable growth rather than quick, temporary ranking boosts.
The right SEO partner can significantly impact brand awareness, lead generation, and long-term profitability.
Conclusion
SEO has become an essential part of digital marketing for businesses in Mohali looking to establish a strong online identity and generate consistent leads. From keyword optimization and technical SEO to content marketing and link building, SEO agencies play a vital role in improving search engine visibility and driving business growth.
Among various service providers in the region, Webcazador stands out as a reliable name offering professional and result-driven SEO solutions. The agency focuses on delivering customized strategies that help businesses improve rankings, increase organic traffic, and achieve long-term digital success.
For businesses aiming to grow in the competitive online market, investing in expert SEO services from agencies like Webcazador can be a game-changer in achieving sustainable visibility and success.
Sahil Bansal is a digital marketing expert with deep knowledge of trending topics in SEO, social media, affiliate, and content marketing. Known for insightful blogs and reviews, he keeps audiences informed and businesses ahead with his sharp analysis and marketing expertise.
Search engine optimization focuses on improving how websites rank on search engines like Google. SEO ranking factors include high quality content, keyword relevance, user experience, mobile friendliness, page speed, backlinks, technical structure, and secure browsing through HTTPS. Search engines analyze these signals to decide which pages deserve top positions.
In this detailed guide, we will explain what SEO ranking factors are, which factors are involved in search engine optimization, how search engine ranking factors work, and why SEO is important for long term growth. This blog will also break down the most essential SEO components you need to focus on to improve your SERP ranking factors in 2026.
What Is Search Engine Optimization and Why Is It Important?
Search Engine Optimization, or SEO, is the process of improving a website so it appears higher in the organic search results of search engines like Google, Bing, and Yahoo. When people search for information, products, or services, search engines display a list of results. These results are ranked based on many factors, often called SEO ranking factors. Websites that follow these guidelines correctly are more likely to appear at the top of the search results.
SEO is important for several reasons. Most online experiences begin with a search engine. Websites that rank in the top positions receive the majority of clicks. Organic traffic helps build long term brand authority and trust. SEO also reduces dependence on paid advertising, which can save money over time. Higher rankings increase credibility because users tend to trust websites that appear at the top. Without proper SEO, a website can be difficult to find online and may become almost invisible to potential customers.
How the Search Engine Ranking Algorithm Works
Search engine ranking algorithms used by Google and Bing decide which web pages appear first in search results. They analyze content, links, technical quality, and user signals to show the most relevant and useful results for each search query.
1. Crawling: Search engines use automated bots to discover web pages across the internet. These bots follow links from one page to another, collect information, and send data back to the search engine so new and updated pages can be found quickly. 2. Indexing: After crawling, search engines analyze page content including text, images, and structure. They store this information in a massive database called an index. Only indexed pages can appear in search results when users type relevant queries. 3. Relevance: The algorithm checks how closely a webpage matches the user’s search intent. It evaluates keywords, headings, context, and overall topic coverage to determine whether the content truly answers the search query accurately and completely. 4. Content Quality: Search engines rank pages higher when content is original, detailed, and trustworthy. Thin, copied, or misleading content ranks lower. High quality information that clearly explains a topic improves credibility and ranking performance over time. 5. Authority: Backlinks from trusted websites act like votes of confidence. When reputable websites link to a page, search engines consider it more reliable and authoritative, which increases its chances of ranking higher in competitive search results. 6.User Experience: Fast loading speed, mobile friendliness, secure connection, and easy navigation improve rankings. Search engines analyze how users interact with pages, including time spent and bounce rate, to ensure visitors receive a smooth and helpful browsing experience.
10 SEO Ranking Factors You Need to Optimize For in 2026
Search engine optimization is changing faster than ever. In 2026, ranking on platforms like Google is not just about adding keywords to a page. It is about understanding people, building trust, improving experience, and structuring content in a way that both users and AI systems can easily understand.
Search engines are becoming more intelligent with artificial intelligence, machine learning, and behavior analysis. That means websites must focus on real value, credibility, and technical strength. When discussing the factors related to search engine optimization SEO, attention must be given to the core elements that directly influence how search engines rank and evaluate a website. Below is a detailed and practical explanation of the 10 most important SEO ranking factors to optimize for in 2026.
1. Search Intent & Semantic Relevance
Search intent means understanding what a person really wants when they type a query into a search engine. Platforms like Google focus on showing results that best match the purpose behind the search. There are different types of intent such as learning something, buying something, comparing options, or finding a specific website. Your content must match that exact need. If someone wants a guide, give a complete guide. If they want pricing, clearly show pricing details.
Topic relevance is also very important. Do not focus on only one keyword. Cover related questions and supporting points around the topic. Write naturally and clearly so the content feels helpful. Study top ranking pages and understand why they rank. Then create content that is more detailed, organized, and useful than competitors.
2. High Quality and Helpful Content
High quality content means writing something that truly helps readers. Search engines reward content that solves problems and answers questions clearly. Avoid copying or rewriting the same ideas from other websites. Add simple explanations, examples, and practical steps. Make your content easy to read with short paragraphs and proper headings. When readers feel satisfied, they stay longer on your page.
Helpful content should focus on real people, not just rankings. Write in simple language and avoid unnecessary complexity. Add updated information and remove outdated details regularly. If users trust your content, they are more likely to return to your website. In 2026, quality matters more than quantity, and real value makes the biggest difference.
3. AI Search and Generative Results Optimization
Search results now include AI generated summaries that answer questions quickly. This means your content must be clear and structured so AI systems can understand it easily. Write short and direct answers within your content. Use proper headings and organized sections. Add FAQ sections to increase visibility in AI results. Accuracy is very important because AI pulls information from trusted websites.
To improve AI visibility, avoid confusing sentences and unclear formatting. Keep information simple and well arranged. Use facts and reliable data when possible. AI systems prefer content that is easy to extract and summarize. When your page is structured properly, it increases the chance of being featured in AI driven search results.
4. Mobile-Friendly Design
Most users browse websites on mobile phones, so your website must work perfectly on smaller screens. Google checks the mobile version of your site first before ranking it. Your website should load quickly, adjust to screen size, and display readable text without zooming. Buttons must be easy to tap, and navigation should be simple.
If visitors struggle to use your site on mobile, they will leave quickly. This increases bounce rate and affects rankings negatively. Test your website regularly on different devices. Improve speed and remove unnecessary popups. A smooth mobile experience improves both SEO performance and user satisfaction.
5. Local SEO Ranking Factors
Local SEO helps businesses appear in search results within their area. If someone searches for services near them, Google shows local listings. Your Google Business Profile should have correct details such as address, phone number, business hours, and photos. Reviews are also very important because they build trust and influence rankings.
Use your city or area name naturally in your website content. Make sure your business information is consistent across all directories. Encourage happy customers to leave honest feedback. Strong local SEO increases visibility in maps and improves calls and store visits from nearby customers.
E E A T stands for Experience, Expertise, Authoritativeness, and Trustworthiness. Search engines evaluate whether your content shows real knowledge and practical experience. Add author information to show who created the content. Share real examples or insights to demonstrate experience. This builds credibility and trust with readers.
Authority also grows when other trusted websites mention or link to your content. Make sure your website has secure HTTPS connection and clear contact details. Transparency increases trust. Over time, strong credibility helps maintain stable rankings, especially in competitive industries like finance or health.
7. User Experience (UX)
User experience refers to how easy and comfortable your website feels to visitors. If users can navigate easily and find information quickly, they stay longer. Google measures user behavior such as time on page and bounce rate. A positive experience sends good signals to search engines.
Improve user experience by increasing website speed and keeping the layout clean. Use readable fonts and proper spacing. Organize content clearly with headings and sections. Add internal links to guide users to related pages. A smooth experience increases engagement and improves overall SEO results.
8. Quality Backlinks & Citations
Backlinks are links from other websites pointing to your site. They act as recommendations. However, one high quality link from a trusted website is more valuable than many low quality links. Search engines evaluate the relevance and authority of the linking website before giving value.
Avoid spammy link building practices. Instead, create useful content that others naturally want to share. You can also build partnerships or publish guest posts in your industry. Quality backlinks increase authority and help your website rank higher in competitive search results.
9. Technical SEO and Crawlability
Technical SEO ensures that search engines can properly crawl and index your website. Important elements include XML sitemaps, secure HTTPS connection, clean URLs, and fixing broken links. If search engines cannot access your pages easily, rankings will suffer.
Regularly check for technical errors and remove duplicate content. Improve page speed for better performance. Structured data can also help search engines understand your content better. A strong technical foundation supports all other SEO efforts and keeps your website running smoothly.
10. Internal Linking Strategy
Internal linking connects one page of your website to another. It helps search engines understand your website structure and topic relationships. When you link related pages together, authority spreads across your website naturally. This improves indexing and ranking potential.
Use clear and meaningful anchor text when linking. Do not overuse links unnecessarily. Connect blog posts, service pages, and guides in a logical way. Good internal linking improves user navigation and increases time spent on your website, which positively affects SEO performance.
Final Conclusion
SEO in 2026 requires a complete and connected strategy, not isolated tactics or quick wins. Long term success comes from aligning technical performance, content quality, authority signals, security, and user experience into one consistent approach. Search engines reward websites that load fast, communicate clearly, demonstrate expertise, and build trust through real value instead of shortcuts.
Building visibility today means understanding user intent and supporting it with relevant, well structured content. It also requires strong performance, credible backlinks, and clear trust signals. When these elements work together, they create a solid foundation for stable rankings, higher engagement, and steady growth over time.
Staying competitive means continuously refining the approach as search technology evolves. With the right expertise and a clear strategy, it becomes possible to bring all essential SEO elements together and build long term results that consistently drive meaningful growth.
Frequently Asked Questions (FAQs)
What are local SEO ranking factors?
Local SEO ranking factors include optimized Google Business Profile, accurate NAP consistency, local keywords, quality backlinks, online reviews, proximity to the searcher, website optimization, mobile friendliness, local citations, and user engagement. Google considers relevance, distance, and prominence to determine local search rankings.
Which is an example of a technical ranking factor?
An example of a technical ranking factor is website page speed. Search engines like Google consider how fast a page loads when determining rankings. Other technical factors include mobile friendliness, secure HTTPS connections, proper indexing, crawlability, structured data, and clean website architecture that improves user experience and search visibility.
How does internal linking improve SEO?
Internal linking connects your website’s pages, helping search engines understand site structure and relationships between topics. Proper internal linking distributes authority, improves crawlability, guides users to relevant content, and supports better search engine ranking algorithm outcomes.
What is the difference between on-page and off-page SEO factors?
On-page SEO factors are elements you control directly on your website, such as content quality, headings, internal linking, page speed, mobile responsiveness, and meta tags. Off-page SEO factors include backlinks, social signals, mentions, and authority from other websites. Both sets of factors influence search engine ranking factors and overall visibility.
Which SEO ranking factors are most important for local businesses?
For local SEO, key factors include Google Business Profile optimization, accurate NAP information, local keywords, reviews, local backlinks, mobile-friendly pages, and proximity to the searcher. Optimizing these local SEO ranking factors increases visibility in maps and local search results.
Sahil Bansal is a digital marketing expert with deep knowledge of trending topics in SEO, social media, affiliate, and content marketing. Known for insightful blogs and reviews, he keeps audiences informed and businesses ahead with his sharp analysis and marketing expertise.
Content management systems (CMS) are the backbone of modern websites, providing the tools to create, manage, and optimize content efficiently. In 2026, selecting the right CMS is more important than ever because it directly impacts your website’s SEO performance, user experience, and growth potential.
Choosing a SEO friendly CMS ensures your site loads quickly, is easy for search engines to crawl, and allows you to optimize pages for target keywords. Whether you are a small business, blogger, or e-commerce store, knowing the best CMS for SEO helps you save time, improve rankings, and attract more traffic.
In this blog, we will explore the 8 best content management system for SEO, detail their SEO features, highlight pros and cons, and explain why they are considered top choices in 2026.
What Is a CMS and Why It Matters for SEO
A CMS, or content management system, is software that allows you to create, edit, and manage website content without needing advanced technical skills. Popular CMS platforms provide templates, plugins, and built-in tools to help you optimize content, structure your website, and manage SEO effectively. Choosing a best content management system for SEO is not just about creating pages. It affects your website’s:
Site speed and performance.
Mobile responsiveness.
URL structure and indexing.
Meta tags and schema markup.
Ease of content updates.
A poorly optimized CMS can slow down your website, make it hard for search engines to crawl, and reduce your chances of ranking high. On the other hand, a SEO friendly CMS can give you the tools to optimize your website efficiently and compete in search results.
Key Features to Look for in a CMS for SEO
Here’s a clearer and more structured version of your content on key CMS features for SEO, with simple wording and better readability:
1. Clean Code and Fast Loading Speeds
Websites that load quickly rank better on search engines. Look for a CMS that has clean, well-structured code, minimal unnecessary elements, and supports features like caching and image optimization to improve performance.
2. Mobile Responsiveness
Google uses mobile-first indexing, meaning it checks the mobile version of your site first. Choose a CMS that offers mobile-friendly templates and responsive design so your site looks great on all devices.
3. Customizable URL Structure
A good CMS allows you to create short, readable URLs containing relevant keywords. Avoid auto-generated long URLs, as clean URLs are easier for search engines and users to understand.
4. SEO Plugins or Built-in Tools
CMS platforms should include SEO tools or allow plugins for meta tags, schema, XML sitemaps, and other optimizations. These features help improve search visibility and website rankings.
5. Easy Content Management
A CMS must make it simple to add, edit, and organize content, images, and videos. Easy management encourages regular updates, which positively affect search engine optimization.
6. Security and Updates
Security is vital for SEO because hacked sites get penalized. Choose a CMS that provides strong security features and frequent updates to protect against vulnerabilities and maintain search engine trust.
Top 8 CMS Platforms for SEO in 2026
Choosing the right CMS is very important for SEO because it determines how well your website can rank on Google. Different platforms have different strengths. Some are easy for beginners, some give full control over technical SEO, and some are best for online stores. Here’s a detailed look at the top 8 CMS platforms for SEO in 2026.
1. WordPress – The Most Popular SEO CMS
WordPress powers over 40% of all websites in the world, making it the most popular choice for people asking which CMS is best for SEO? Its flexibility, plugin ecosystem, and ease of use make it the best content management system for SEO for most users.
SEO Advantages of WordPress:
1. SEO Plugins: Plugins like Yoast SEO and Rank Math provide step-by-step guidance for on-page SEO, including meta tags, keyword optimization, internal linking suggestions, and content readability checks. 2. Mobile-Friendly Design: Google uses mobile-first indexing, meaning your site must be responsive. WordPress themes are mostly mobile-friendly, helping websites perform better in search results. 3. Custom URLs & Permalinks: WordPress allows you to structure URLs with keywords. For example, a page URL like example.com/best-content-management-system-for-seo is perfect for SEO. 4. Content Optimization: You can easily add alt text for images, headings, and metadata to improve your content’s SEO. 5. Community Support: The massive WordPress community offers tutorials, plugins, and themes that are updated regularly to follow the latest SEO trends.
Example Use Case: A blogger creating articles on travel or tech can use WordPress to target keywords like best CMS for SEO and rank on Google faster than other platforms because of its SEO plugins and mobile-friendly themes.
Pros:
Highly customizable.
Strong SEO plugins.
Large community and resources.
Cons:
Requires regular updates for security.
Plugins may sometimes conflict.
2. Shopify – Best for Ecommerce SEO
Shopify is a CMS made specifically for online stores. It not only helps display products but also makes your store more visible in search engines. Shopify is simple to use and includes many built-in SEO tools.
SEO Features:
Automatic sitemaps and clean URLs:Shopify generates SEO-friendly URLs for products, collections, and blogs, making it easier for search engines to index your pages.
SEO apps: Tools like Plug in SEO allow merchants to optimize meta titles, descriptions, images, and check for broken links.
Mobile-friendly themes: All Shopify themes are responsive, ensuring that product pages perform well in Google’s mobile-first indexing.
HTTPS security: Shopify includes SSL certificates by default, which Google favors for ranking and user trust.
Deep Dive: Shopify’s limitation is that you don’t have full control over server-level SEO settings, like caching rules or custom 301 redirects. But for most small and medium businesses, Shopify’s built-in tools are enough.
Pros:
User-friendly and beginner-friendly.
Excellent ecommerce SEO tools.
Secure and fast hosting.
Cons:
Limited server-level SEO control
Some advanced SEO features require paid apps
3. Webflow – Modern SEO Friendly CMS
Webflow is a design-focused CMS that lets you build visually appealing websites while keeping full control over SEO. It is perfect for marketers, designers, and startups that want both design flexibility and SEO power.
SEO Advantages of Webflow:
Clean Code and Fast Loading: Webflow generates clean HTML and CSS, which improves page speed. Faster websites rank better in Google.
Meta Tags and Headings: You can easily add meta titles, descriptions, headings, and alt text for images. This helps search engines understand your pages.
Schema Markup: Webflow lets you add structured data, which can show rich results in search engines like star ratings, event info, or product details.
Mobile Responsiveness: All Webflow designs are responsive, helping your site perform well on mobile devices.
Pros: Full design freedom, modern interface, good for SEO without coding. Cons: Learning curve is higher than WordPress, fewer plugins available. Example Use Case: A startup creating a portfolio website can use Webflow to design attractive pages while ensuring Google can read and rank all content properly.
4. Wix – Improved but Limited
Wix is a beginner-friendly drag-and-drop website builder that makes it simple to create a website quickly. It is ideal for small websites or individuals just starting online but has some limitations for advanced SEO.
SEO Advantages of Wix:
SEO Wiz: Wix provides an intuitive tool called SEO Wiz that guides users step by step to optimize their website. It helps set meta titles, descriptions, headings, and even provides a personalized SEO plan. This is very helpful for beginners who are not familiar with SEO.
Mobile-Friendly Templates: Most Wix templates are responsive, which means they automatically adjust to different screen sizes. Google gives preference to mobile-friendly sites, so this helps in rankings.
Automatic Sitemaps and Meta Tags: Wix automatically generates a sitemap for your site, making it easier for search engines to crawl and index your pages. It also automatically creates meta tags for your pages, ensuring basic SEO is in place even if you don’t do it manually.
SSL and Security: Wix automatically provides HTTPS for all websites, which is important for SEO as Google prefers secure websites.
Built-in Blog Feature: Wix has a blog feature that allows users to publish content directly on the website, which can improve SEO through fresh, relevant content.
Pros:
Extremely user-friendly and beginner-friendly.
Quick setup for small websites.
Includes basic SEO tools without additional plugins or coding.
Cons:
Not suitable for large, highly optimized, or enterprise-level SEO projects.
Performance may lag for complex sites.
5. Drupal – Enterprise Level SEO
Drupal is a highly flexible, open-source CMS often used by large organizations, government websites, and enterprise-level businesses. While it has a steeper learning curve than WordPress, its SEO capabilities are robust and highly customizable.
SEO Advantages of Drupal:
Advanced URL Control: Drupal allows complete control over URL structures, including custom aliases, which helps create keyword-rich URLs.
Built-in SEO Modules: Modules like Pathauto, Metatag, and XML Sitemap allow for advanced optimization of meta tags, sitemaps, and canonical URLs.
High Performance: Drupal is optimized for speed and scalability, which positively impacts page load times—a key SEO ranking factor.
Structured Data Support: You can easily implement schema markup for rich snippets, enhancing visibility in search results.
Strong Security: Drupal’s security features are highly regarded, which helps maintain site integrity and rankings over time.
Example Use Case: A large educational institution or media website can use Drupal to handle thousands of pages while maintaining precise SEO control, including custom meta tags, schema, and multilingual content.
Pros:
Highly customizable and scalable.
Strong security and performance.
Excellent for large, complex websites.
Cons:
Steep learning curve.
Requires developer expertise for advanced features.
6. Squarespace – Simplicity Meets SEO
Squarespace is known for its simplicity and elegant design templates. It is ideal for small businesses, portfolios, and creatives who want an attractive website without handling complex technical setups.
SEO Advantages of Squarespace:
Built-in SEO Features: Squarespace automatically generates sitemaps, clean URLs, and supports SSL certificates.
Mobile Optimization: All Squarespace templates are responsive, ensuring good performance in mobile search results.
Content Management Made Easy: Users can easily edit meta descriptions, page titles, and image alt text without additional plugins.
Automatic Schema Markup: Squarespace adds structured data to pages to improve search engine understanding.
Example Use Case: A small business, like a local bakery or designer portfolio, can quickly build a beautiful, SEO-friendly website without technical knowledge.
Pros:
Very user-friendly and beginner-friendly.
Elegant templates with responsive design.
Built-in SEO and security features.
Cons:
Limited advanced SEO customization.
Less flexibility compared to WordPress or Drupal.
7. Adobe Commerce (Formerly Magento)
Adobe Commerce is a robust CMS for large-scale ecommerce websites. It is designed for businesses that need advanced ecommerce functionality combined with strong SEO capabilities.
SEO Advantages of Adobe Commerce:
Custom URL & Metadata Control: Adobe Commerce allows full control over product URLs, meta descriptions, and title tags.
XML Sitemaps & Schema Markup: The platform can generate sitemaps automatically and implement structured data for products, reviews, and offers.
Mobile-Friendly & Performance Optimized: Supports responsive design and advanced caching for faster load times.
Advanced SEO Extensions: A variety of extensions are available to manage redirects, rich snippets, and layered navigation for SEO optimization.
Example Use Case: A large online retailer with thousands of products, like an electronics or fashion brand, can use Adobe Commerce to manage product catalogs while optimizing each page for SEO.
Pros:
Highly customizable for large ecommerce sites.
Strong SEO and marketing tools.
Supports multi-store setups and international SEO.
Cons:
Requires development expertise.
Higher cost and maintenance.
8. Joomla: Flexible and Powerful
Joomla is a versatile CMS that strikes a balance between ease of use and customization. It is suitable for small to medium businesses, community websites, and even ecommerce stores.
SEO Advantages of Joomla:
Built-in SEO Features: Joomla supports clean URLs, metadata management, and XML sitemaps natively.
SEO Extensions: Extensions like sh404SEF help manage redirects, canonical tags, and social metadata for better SEO.
Multilingual Support: Joomla handles multiple languages without requiring additional plugins, maintaining SEO best practices for each language.
Responsive Templates: Many Joomla templates are mobile-friendly, supporting Google’s mobile-first indexing.
Example Use Case: A medium-sized business or community portal can use Joomla to manage content efficiently while optimizing for SEO.
Pros:
Flexible and extendable with extensions.
Multilingual support out of the box.
Good balance between ease of use and customization.
Cons:
Smaller community than WordPress.
Some extensions may require technical expertise to configure.
How to Make Any CMS SEO-Friendly
Making any CMS SEO-friendly is all about optimizing both the structure and the content of your website so that search engines can easily understand, index, and rank it. Even if a CMS doesn’t come with strong built-in SEO tools, you can still implement strategies to improve its SEO performance. Here’s a detailed guide:
1. Optimize URLs and Permalinks
Use clear, descriptive URLs that reflect the page content. Include primary keywords naturally, avoid unnecessary numbers or symbols, and keep URLs short. This helps search engines understand your page topic and improves click-through rates from search results. Clean URLs also make it easier for users to navigate your site.
2. Use SEO Plugins or Extensions
Install tools like Yoast SEO for WordPress or SEO Manager for Shopify to simplify optimization. These plugins provide on-page SEO suggestions, manage meta titles and descriptions, generate sitemaps, and improve readability. They make SEO accessible even for beginners, helping search engines index your site effectively and boost organic visibility.
3. Improve Site Speed
Fast-loading websites enhance user experience and search engine rankings. Compress images, leverage browser caching, minimize code, and choose a reliable hosting service. Optimizing speed reduces bounce rates and improves engagement. Tools like Google PageSpeed Insights or GTmetrix can identify bottlenecks, ensuring your CMS runs efficiently across devices and browsers.
4. Create Structured Data
Implement schema markup to help search engines understand your content context. Structured data enhances rich snippets, displaying reviews, ratings, events, or product info in search results. This can improve click-through rates and visibility. Many CMS platforms allow easy schema integration through plugins or manual code, boosting SEO without altering the main content.
5. Internal Linking Strategy
Link related pages and posts within your website to guide users and search engines. Effective internal linking improves navigation, distributes page authority, and helps search engines crawl your site more efficiently. Use descriptive anchor text and link to relevant content to increase engagement and improve the ranking potential of important pages.
6. Regular Content Updates
Frequently updating your content keeps your website relevant for both users and search engines. Add fresh information, update statistics, and improve readability. Regular updates signal authority and expertise, encouraging higher rankings. Combining evergreen content with timely posts ensures continuous engagement, attracting repeat visitors and maintaining your site’s SEO performance over time.
Conclusion
Choosing the best CMS for SEO depends on your website’s purpose, technical skills, and SEO goals. For most businesses and blogs, WordPress remains the top choice due to its flexibility, plugin ecosystem, and ease of use. E-commerce stores may benefit from Shopify’s built-in SEO features, while enterprise websites may require Drupal’s advanced capabilities.
When making a choice, consider not just the CMS itself but also how it will support ongoing SEO efforts. An SEO-friendly CMS paired with quality content, technical optimization, and strategic marketing can drive significant organic traffic and improve online visibility.
Frequently Asked Questions (FAQs)
What CMS is best for SEO?
WordPress is widely considered the best CMS for SEO due to its flexibility, user-friendly interface, and extensive plugin ecosystem like Yoast SEO. It allows easy optimization of meta tags, URLs, sitemaps, and content structure. Regular updates, mobile responsiveness, and fast-loading themes further enhance search engine visibility and ranking.
Do I need plugins or extensions for SEO?
Yes, plugins or extensions help optimize SEO efficiently. They assist with meta tags, sitemaps, schema markup, keyword analysis, and content readability. While not mandatory, they simplify tasks, improve site structure, and boost rankings. Popular examples include Yoast SEO for WordPress and SEO Toolkit for platforms like Shopify or Joomla.
How does mobile responsiveness impact page SEO?
Mobile responsiveness greatly impacts SEO because search engines prioritize mobile-friendly websites in rankings. A responsive design ensures content adapts to all screen sizes, improving user experience, reducing bounce rates, and increasing engagement. Slow or poorly formatted mobile pages can hurt rankings, making responsiveness essential for SEO success.
Which CMS is most used?
WordPress is the most used CMS, powering over 40% of all websites globally. Its popularity comes from ease of use, flexibility, and a vast library of themes and plugins. It suits blogs, e-commerce, and corporate sites, allowing users to build and manage websites efficiently without extensive coding knowledge.
Sahil Bansal is a digital marketing expert with deep knowledge of trending topics in SEO, social media, affiliate, and content marketing. Known for insightful blogs and reviews, he keeps audiences informed and businesses ahead with his sharp analysis and marketing expertise.
Broken links can quietly damage a website’s SEO performance and user experience. Many website owners focus on content, backlinks, and keywords, but forget to check website for broken links. When visitors click a link and see a 404 error page, it creates frustration and reduces trust. Search engines also notice these issues and may lower rankings over time.
In this detailed guide, we will explain what is a broken link, why it matters for SEO, and most importantly, how to fix broken links step by step. We will also cover how to find broken links on your website, how to fix broken internal links, and how to fix broken links in WordPress.
What Are Broken Links?
A broken link is a hyperlink on a website that no longer works or leads to a valid destination. These links can appear due to deleted pages, moved content, mistyped URLs, or external websites being unavailable. When visitors click on a broken link, they often see a 404 error page, which can harm the website experience.
Types of Broken Links
Internal broken links: Internal broken links lead to pages within the same website that are deleted or moved. Learning how to fix broken internal links by updating URLs or adding redirects helps protect site structure, user experience, and SEO performance.
External broken links:These links point to pages on external websites that are no longer accessible. Although they may not directly damage SEO rankings, they can reduce website credibility and create a poor experience for visitors.
Broken Image Links: Broken image links occur when image files are deleted, missing, or incorrectly referenced. As a result, images fail to load, affecting page design, reducing engagement, and negatively impacting SEO and accessibility.
Broken Redirect Links: These links appear when a redirect sends users to an invalid or outdated destination. Instead of guiding visitors properly, broken redirects lead to error pages and may waste crawl resources.
Broken Anchor Links: Anchor links stop functioning when the targeted section or heading is removed or renamed. Users who click these links do not reach the intended content, which can lower usability and create frustration.
In SEO terms, broken links can reduce crawl efficiency, page authority, and user engagement. Understanding what is broken link in SEO helps identify why search engines may lower rankings for sites with too many broken links.
Why Broken Links Hurt Your Business
Broken links harm your business by frustrating users, lowering search engine rankings, damaging brand credibility, and wasting marketing efforts. When links don’t work, visitors leave, search engines rank your site lower, and your campaigns lose effectiveness. Fixing broken links ensures a smooth user experience, better visibility, and trust.
1. Poor User Experience
When users click a link and encounter a 404 error or broken page, it creates frustration. Frustrated visitors are more likely to leave your site immediately, increasing bounce rates. If they cannot easily access the information or products they need, they may choose a competitor instead, directly impacting engagement, leads, and sales.
2. Negative Impact on SEO
Broken links signal to search engines that a website is poorly maintained. Crawlers may struggle to index your pages correctly, which can lower your search rankings. Reduced visibility in search results means fewer visitors discovering your site, limiting organic traffic and reducing opportunities to convert those visitors into paying customers or loyal followers.
3. Damage to Brand Credibility
A website filled with broken links looks unprofessional and outdated. Users may question the reliability of your business if your site appears neglected or poorly managed. This loss of trust can directly affect customer perception, brand authority, and overall credibility, making potential clients hesitant to engage, buy, or recommend your business to others.
4. Wasted Marketing Efforts
Marketing campaigns lose value when they direct users to broken links. Paid ads, social media posts, or email campaigns that lead to non-functioning pages fail to deliver the intended message. As a result, your marketing investment is wasted, potential conversions are lost, and your return on investment decreases, reducing the overall effectiveness of your promotional efforts.
Broken links disrupt user experience, harm SEO, reduce credibility, and waste marketing resources. Regularly auditing your website for broken links and fixing them ensures visitors have a smooth experience, improves search rankings, and builds trust in your business.
How to Find Broken Links on Your Website
Finding broken links on your website is very important for SEO, user experience, and conversions. When visitors click a link and see a 404 error page, it creates a bad impression and may reduce trust. Search engines like Google also consider broken links as a negative signal because they affect site quality. Below is a simple and clear explanation of how to find broken links on your website.
1. Google Search Console to Find Broken Links
Google Search Console is a free tool provided by Google that helps monitor website performance, indexing status, and technical issues. One of the easiest ways to find broken links is by checking 404 errors inside this tool. When a page shows a 404 error, it means the page does not exist. This usually happens when:
A page was deleted.
The URL was changed.
The link was typed incorrectly.
Another website is linking to a wrong URL.
Step by Step Process
1. Log in: Sign in to your Google Search Console account. 2. Select Your Website: Choose the correct website property from your dashboard. 3. Go to Indexing → Pages: In the left sidebar, click on Indexing, then click on Pages. 4. Check for Not Found (404): Scroll down to the section called Why pages aren’t indexed. Look for the error labeled Not Found (404). 5. Click and Review URLs: Click on the 404 error. You will see a list of all broken URLs Google has found on your website.
2. Use Screaming Frog SEO Spider
Screaming Frog SEO Spider is a website crawling tool that checks every page of your website, just like a search engine. It helps find broken links, 404 errors, redirects, and other technical SEO issues. Here is a clear and simple explanation of the steps:
1. Install and Open the Tool: Download Screaming Frog SEO Spider from its official website and install it on your computer. After installation, open the tool. 2. Enter Your Website URL: At the top of the tool, you will see a search bar. Enter your full website URL. 3. Start the Crawl: Click the Start button. The tool will begin scanning all the pages, links, images, and files on your website. This may take a few minutes depending on your website size. 4. Go to the Response Codes Tab: After the crawl is complete, click on the Response Codes tab. This section shows the status code of every URL found on your website.
3. Manual Checking to Find Broken Links
Manual checking means you personally test the links on your website without using any special tools. This method is useful for small websites or when you want to double check important pages like service pages, blog posts, or landing pages. Although it takes more time, it helps ensure important links are working properly.
1. Open Your Website in a Browser: Open your website in browsers like Google Chrome, Mozilla Firefox, or Microsoft Edge. Browse normally and ensure all pages load correctly without errors, delays, or unexpected redirects. 2. Visit Important Pages First: Start with high traffic pages such as homepage, services, blogs, and contact page. These pages impact conversions, so checking them first ensures important user journeys are working properly. 3. Click Every Internal Link: Click menu links, footer links, buttons, and in text links. If any page shows 404 error or does not load correctly, note the URL and fix immediately. 4. Check External Links: Click links pointing to other websites. Sometimes external pages are removed or changed, creating broken outbound links that affect user trust and overall website credibility. 5. Check Images and Download Links: Test image links, PDF downloads, forms, and brochures. Ensure files open correctly and download without errors. Broken media links reduce user experience and professionalism. 6. Use Incognito Mode: Open your website in Incognito mode in Google Chrome to avoid cached data. This helps you see real time errors and detect broken links accurately.
How to Fix Broken Links in WordPress
To fix broken links in WordPress, we first need to find them and then correct, remove, or redirect them. Broken links can affect user experience and SEO, so it is important to check and fix them regularly. The full process can be understood in five simple steps.
1. Find the broken links
The first step is to scan the website and detect broken links. We can do this by using a plugin inside WordPress. One popular option is the Broken Link Checker plugin, which scans posts, pages, and comments automatically and shows links that are not working. We can also use tools like Google Search Console or other online SEO tools to find pages that are giving 404 errors. These tools help us create a list of all the links that need attention.
2. Access the list of reported links
After the scan is finished, the plugin will display a complete list of broken links. This list is usually available under a new section in your dashboard, such as Tools > Broken Links, or inside a dashboard widget. From there, you can review all flagged URLs along with details about where they appear on your site.
3. Fix the broken links one by one
For every broken URL shown in the report, you will have different options when you hover over it:
Edit URL: If you know the correct or updated destination link, click Edit URL and replace the old address with the new one. The plugin will automatically recheck the link.
Unlink: If the target page no longer exists and there is no replacement, you can remove the hyperlink while keeping the anchor text intact.
Dismiss: If a link is temporarily unavailable or incorrectly marked as broken, you can dismiss the alert to remove it from the list.
4. Set up redirects when needed
If a page has been permanently moved to a new address, the best solution is to create a 301 redirect. This sends visitors and search engines automatically to the new page. It also helps keep the SEO value of the old link. We can manage redirects using a simple redirection plugin or an SEO plugin.
5. Keep checking regularly
Even after fixing all broken links, our work is not fully done. New broken links can appear over time when pages are deleted or URLs change. We should scan the website every few weeks or at least once every few months. Also, since link checker plugins can slow down the website, it is better to deactivate them after the scan and activate them again only when needed.
By following these steps, we can keep our WordPress website clean, user friendly, and strong in search results.
How to Fix Broken Links on Website
Broken links are links on your website that do not work. When users click them, they see a 404 error or a page that no longer exists. Broken links affect user experience, SEO rankings, and website credibility. Here is a simple explanation of how to fix broken links on a website:
301 Redirects: Use a 301 redirect to permanently send users and search engines from a broken URL to a relevant working page. This helps preserve link equity, maintain rankings, and improve overall user experience.
Update the Link: If the original page has moved to a new address, update the hyperlink so it points directly to the correct URL. This ensures visitors land on the right content without errors or confusion.
Remove the Link: When no relevant replacement page exists, remove the broken link from your website. This prevents users from encountering error pages and keeps your content clean, professional, and easy to navigate.
Restore the Page: If a page was deleted by mistake or during website updates, restore it using backups or server archives. Bringing it back online helps recover traffic, maintain authority, and avoid losing valuable backlinks.
Fix Typos: Sometimes broken links occur due to spelling errors or incorrect URL structure. Carefully review and correct any typos in the link path so users and search engines can access the intended page properly.
Will It Check the Entire Site for Broken Links
Yes, there are tools that can check your entire website for broken links, not just one page. Tools like Broken Link Check and Dead Link Checker go through your site the same way a search engine would. They move from page to page and look at every internal and external link to see if something is not working.
1. Complete Site Coverage: These tools automatically follow links across your website, moving from page to page just like a search engine crawler. Depending on the tool, they can scan hundreds or even thousands of URLs in a single session. They identify common issues such as 404 not found errors, server problems, redirected links, and even broken images.
2. Detailed Reporting: After the scan is finished, you receive a structured report. This report usually includes the page where the broken link exists, the anchor text used, the faulty destination URL, and the type of error returned. This makes it simple to track down and fix each issue.
Popular Options
Online tools that work directly in your browser.
Desktop software like Screaming Frog SEO Spider, which offers a free version that scans up to 500 URLs.
WordPress plugins such as Broken Link Checker, which monitor broken links directly from your WordPress dashboard.
Browser extensions such as Check My Links only analyze the page you are currently viewing. In contrast, dedicated crawling tools are built to examine your entire website, giving you a complete overview of link health and technical issues.
Conclusion
Broken links are a common technical SEO issue that can harm user experience, search rankings, and business credibility. When users click a link and see a 404 error, it creates frustration and reduces trust. Search engines like Google also view broken links as a sign of poor website maintenance, which can impact crawl efficiency and rankings. Regularly checking your website for broken internal and external links helps maintain site quality and authority.
Tools such as Google Search Console and Screaming Frog SEO Spider make it easier to detect and fix errors. By updating URLs, setting up 301 redirects, or removing invalid links, businesses can protect SEO performance, improve user experience, and maintain a professional online presence.
Frequently Asked Questions (FAQs)
How can you handle broken links?
Broken links should be handled by identifying them using tools like Google Search Console or Screaming Frog SEO Spider. After finding them, update the URL with the correct page, set up 301 redirects, or remove the link. Regular audits help maintain user experience and improve SEO performance by preventing errors.
How do broken links affect user experience?
Broken links frustrate users by leading to error pages instead of the intended content. This interrupts browsing, reduces trust, and can increase bounce rates. Users may leave the site if they encounter multiple broken links, negatively impacting engagement, satisfaction, and overall perception of the website’s reliability and professionalism.
What Is the best way to find broken links?
The best way to find broken links is by using specialized tools like Screaming Frog, Ahrefs, or Google Search Console. These tools crawl your website, identify 404 errors, and generate reports. Regular audits help maintain site health, improve user experience, and boost SEO performance by quickly fixing or redirecting broken links.
What Is the difference between 404 and 410 status codes?
A 404 status code means the requested page was not found but might exist in the future. A 410 status code means the page is permanently gone and will not return. 404 is temporary or uncertain, while 410 signals permanent removal, helping search engines update their indexes more efficiently.
Sahil Bansal is a digital marketing expert with deep knowledge of trending topics in SEO, social media, affiliate, and content marketing. Known for insightful blogs and reviews, he keeps audiences informed and businesses ahead with his sharp analysis and marketing expertise.
Search engine optimization continues to evolve, but one concept that remains widely discussed in the SEO community is Domain Authority. Whether someone is running a blog, managing an ecommerce store, or handling SEO for clients, understanding Domain Authority helps measure website strength and competitive position.
Domain Authority, commonly known as DA, is not a Google ranking factor. It is a metric created by Moz to estimate how likely a website is to rank in search engine results. Even though Google does not officially use DA, marketers rely on it to evaluate SEO progress, compare competitors, and plan link building strategies.
In this detailed guide, we will explore what Domain Authority is, what is considered a good DA score, how Moz calculates it, why it matters for SEO, and how to improve it effectively.
What is Domain Authority?
Domain Authority is a score developed by Moz that predicts how well a website may rank on search engine result pages. The score ranges from 1 to 100. The higher the score, the stronger the website’s potential ability to rank.
It is important to understand that Domain Authority is comparative, not absolute. A score of 40 might be excellent in one niche but average in another. DA is most useful when comparing your site to direct competitors rather than looking at the number alone.
Think of Domain Authority like a reputation score. Just as businesses build reputation over time through trust and quality service, websites build authority through quality backlinks, strong content, and consistent SEO practices.
What is a Good Domain Authority Score?
Domain Authority (DA) is a search engine ranking score created by Moz. It predicts how likely a website is to rank on search engines like Google. The score ranges from 1 to 100, and the higher the score, the stronger the website’s authority. But what is considered a good Domain Authority score? The answer depends on your industry and competitors.
General Domain Authority Score Ranges
1 to 20 DA: New websites or small blogs at the start of their SEO journey. They have limited backlinks, low authority, and minimal search visibility while gradually building content and domain trust.
21 to 40 DA: Growing websites with consistent content publishing and some quality backlinks. These sites are gaining search engine trust, improving rankings, and slowly building a stronger online presence within their niche.
41 to 60 DA: Established websites with solid backlink profiles and good search engine performance. They rank for competitive keywords, attract steady organic traffic, and demonstrate strong authority within their industry.
61 to 80 DA: Highly authoritative websites such as major brands or large media platforms. They have extensive high quality backlinks, strong brand recognition, and dominate search results across multiple competitive keywords.
In general, a good domain authority score for a small or medium business website is 30-50, while for competitive industries, aiming for 50+ is ideal.
How is Domain Authority Calculated?
Domain Authority DA is calculated by Moz using a machine learning algorithm that evaluates a website’s overall link profile. It mainly looks at the number and quality of linking root domains and total backlinks to estimate how likely a site is to rank in search engine results. The score is measured on a 1 to 100 logarithmic scale, where a higher number reflects stronger ranking potential. It is important to understand that DA is a third party metric created by Moz and not a direct ranking factor used by Google.
Core Factors That Determine Domain Authority Score
1. Backlink Profile
The backlink profile is the foundation of Domain Authority. It looks at how many websites link to your site and how strong those links are. Search engines consider backlinks as trust signals. A natural and relevant backlink profile improves credibility and increases overall DA score.
2. Linking Root Domains
Linking root domains refer to the number of unique websites linking to your domain. Getting links from many different trusted websites is more powerful than getting many links from just one website. A diverse link profile shows authority and strengthens your Domain Authority significantly.
3. Quality of Links
Not all backlinks have the same value. Links from trusted, relevant, and high authority websites pass more strength to your site. Low quality or spammy links can harm your reputation. Earning quality backlinks naturally helps improve DA in a steady and sustainable way.
4. Spam Score
Spam Score measures the likelihood that a website may be penalized or considered low quality. A high spam score can reduce trust and affect Domain Authority negatively. Maintaining clean backlinks and avoiding suspicious link building practices helps keep the spam score low.
5. Machine Learning System
Moz uses a machine learning system to compare your website’s link profile with thousands of other websites in its index. Based on this comparison, it predicts how likely your website is to rank in search results. This prediction becomes your Domain Authority score.
How Does Moz Calculate Domain Authority?
Moz calculates Domain Authority using a machine learning model that analyzes multiple ranking factors across thousands of search results. The system compares real search engine results and tries to predict how likely a website is to rank in Google based on its overall link profile and trust signals.
Here is a clearer breakdown of the process:
Moz collects link data from its own index called Mozscape, which tracks billions of web pages and links.
It evaluates factors such as linking root domains, total backlinks, link quality, Page Authority, and Spam Score.
The model then compares these signals against search results to determine how strongly a domain is likely to rank.
Finally, the score is scaled on a 1 to 100 logarithmic scale. This means it is much easier to move from 20 to 30 than from 70 to 80.
Understanding how Moz calculates Domain Authority is important because it highlights that quality matters more than quantity. A few strong, relevant backlinks from trusted websites will improve Domain Authority more effectively than many low quality links.
Domain Authority vs Domain Rating
Although domain authority (DA) and domain rating (DR) sound similar, they measure different aspects of a website’s strength. Understanding the difference can help you analyze competitors and improve your SEO strategy.
Domain Authority (DA): Developed by Moz, this metric predicts how well a website is likely to rank on search engines. It considers multiple factors, including the number and quality of backlinks, linking root domains, and the overall SEO health of a site. DA is expressed as a score from 1 to 100.
Domain Rating (DR): Developed by Ahrefs, this metric measures the strength of a website’s backlink profile. It focuses mainly on the quality and quantity of external links pointing to the website and gives an indication of how authoritative the site is in terms of links. DR is also scored from 1 to 100.
In short, DA predicts ranking potential, while DR measures backlink strength. Both metrics are useful for SEO analysis, competitor research, and link-building strategies. Knowing the difference helps you make informed decisions about your SEO strategy and evaluate your website’s authority accurately.
Why is Domain Authority Important?
Domain Authority is a score that shows how strong a website is in search engines. It was created by Moz to predict how well a website can rank on Google. The score ranges from 1 to 100. The higher the score, the stronger the website is considered in terms of ranking power. Now let us clearly understand why Domain Authority is important:
1. Helps Measure Website Strength
Domain Authority helps evaluate the overall strength of a website in search engines. A higher score usually means stronger backlink profiles and better ranking potential. It allows comparison between different websites in the same industry. This makes it easier to understand whether a site has competitive power or needs improvement in SEO performance.
2. Useful for Competitor Analysis
Domain Authority is very helpful when analyzing competitors. By checking competitor scores, it becomes easier to understand their authority level and backlink strength. If competitors have higher scores, it indicates stronger SEO efforts. This insight helps identify gaps in strategy and highlights areas where improvement is required to compete effectively in search rankings.
3. Shows Backlink Quality
Domain Authority largely depends on the number and quality of backlinks pointing to a website. High quality backlinks from trusted and relevant websites improve the score. Low quality or spam links can negatively affect performance. Monitoring this score helps understand whether link building efforts are strong, natural, and beneficial for long term search engine growth.
4. Helps in Link Building Decisions
Before choosing websites for guest posting or backlink opportunities, Domain Authority can be checked. Websites with higher scores generally pass more value and trust. This makes it easier to select strong domains for collaboration. It reduces the risk of linking with low quality websites and improves overall SEO effectiveness through smarter link building decisions.
5. Indicates Long Term SEO Growth
A steady increase in Domain Authority over time usually reflects consistent SEO improvement. It shows that backlink quality, content strategy, and overall optimization efforts are moving in the right direction. Tracking this score regularly helps measure progress and determine whether current SEO activities are delivering positive long term results.
6. Improves Trust and Credibility
Websites with higher Domain Authority are often perceived as more reliable and trustworthy. This perception can attract business partnerships, advertisers, and potential customers. A strong score indicates solid online presence and authority in a specific niche. It builds confidence among users and industry professionals who evaluate website strength before collaboration.
How to Check Domain Authority?
Domain Authority can be checked using SEO analysis tools that measure the strength of a website’s backlink profile. These tools calculate a score on a 100 point scale to estimate how well a website can rank in search engines. To check it, you simply enter your website URL into a trusted SEO tool and review the authority score provided.
Moz Link Explorer: Go to the official Moz website and open Link Explorer. Enter your website URL and click search. You will see your Domain Authority score along with backlink details.
Use Ahrefs Website Authority Checker: Ahrefs provides a free website authority checker. Enter your domain, and it will show Domain Rating, which is similar to Domain Authority.
SEMrush Authority Score Tool: SEMrush offers an Authority Score feature. Add your domain in the tool, and it will display your website authority and backlink data.
Install MozBar Extension: MozBar is a free browser extension by Moz. Once installed, it shows Domain Authority directly on search engine result pages.
Use Small SEO Tools: Websites like Small SEO Tools also allow you to check Domain Authority for free by simply entering your domain name.
High Domain Authority Websites
High Domain Authority websites are websites that have strong trust and credibility in the eyes of search engines like Google. Domain Authority is a score developed by Moz that ranges from 1 to 100. The higher the score, the more likely a website is to rank well in search results.
Websites such as Wikipedia, Forbes, and BBC usually have very high Domain Authority because they have strong backlinks, quality content, and high traffic.
Getting backlinks from high Domain Authority websites can improve SEO performance. These links signal trust and relevance, helping websites rank higher. However, quality and relevance matter more than just the score alone.
How to Improve Domain Authority
Improving Domain Authority is a long term process. Domain Authority is a metric created by Moz that predicts how well a website may rank on search engines like Google. It is scored from 1 to 100, and higher scores mean stronger ranking potential compared to competitors. Let’s explain each point in more detail so you clearly understand how to improve DA effectively.
1. Build High-Quality Backlinks
High quality backlinks improve Domain Authority by signaling trust and relevance to search engines. When respected websites link to your content, it strengthens credibility, improves rankings, and increases referral traffic.
Guest Posting: Write valuable, informative articles for reputable industry blogs. In return, you earn a contextual backlink to your website, improve brand visibility, build authority, and connect with a wider relevant audience.
Industry Collaborations: Partner with industry experts, agencies, or businesses for webinars, interviews, podcasts, or case studies. These collaborations naturally generate backlinks, strengthen relationships, increase brand exposure, and build long term credibility.
Create Link Worthy Assets: Publish in depth guides, original research, industry statistics, free tools, or detailed case studies. High value resources attract natural backlinks because other websites reference and cite useful, trustworthy content.
Digital PR: Reach out to journalists, bloggers, and online publications with newsworthy stories or insights. Getting featured on reputable news sites and niche blogs earns authoritative backlinks and increases brand trust.
Important: Always focus on quality over quantity. A few backlinks from high authority, relevant websites deliver stronger SEO impact than hundreds of low quality, spammy, or unrelated links.
2. Create Valuable Content
Understand what users are searching for and create content that directly answers their questions clearly and completely. When content satisfies user intent, engagement improves, bounce rate reduces, and rankings increase naturally.
Publish In Depth Content: Create detailed guides, tutorials, and case studies that fully cover a topic. Comprehensive content builds authority, keeps users longer on your website, and increases chances of earning quality backlinks from relevant websites.
Update Old Content: Refresh outdated articles with updated data, keywords, and examples. Updated content signals relevance to search engines like Google and improves rankings without creating new pages.
Use Proper Structure: Organize content with headings, short paragraphs, and bullet points for better readability. Well structured content improves user experience, increases engagement time, and encourages sharing and linking from other websites.
Add Data and Visuals: Include statistics, examples, images, and infographics to make content more trustworthy and engaging. Data driven content attracts backlinks because other websites prefer referencing reliable and informative sources.
Maintain Consistency: Publish quality content regularly to build trust and topical authority. Consistency signals reliability to search engines, strengthens brand credibility, and supports long term improvement in Domain Authority.
3. Improve On Page SEO
On page SEO focuses on optimizing elements within your website to help search engines understand your content better and improve ranking strength. Proper on page optimization increases relevance, improves user experience, and supports long term Domain Authority growth.
Optimize Title Tags: Create clear, keyword focused title tags for every page. Titles should accurately describe the content and include the primary keyword naturally. Well optimized title tags improve click through rate and help search engines understand page relevance.
Write Compelling Meta Descriptions: Meta descriptions should summarize the page content clearly and encourage users to click. Although they do not directly impact rankings, higher click through rates improve overall performance and visibility.
Use Proper Heading Structure: Organize content using H1, H2, and H3 headings. A clear structure improves readability and helps search engines understand the hierarchy and main topics of your content.
Improve Internal Linking: Link related pages within your website using descriptive anchor text. Internal linking distributes link equity, improves crawlability, keeps users engaged longer, and strengthens overall site authority.
Optimize Keyword Placement: Use primary and secondary keywords naturally in titles, headings, introduction, and throughout the content. Avoid keyword stuffing. Balanced keyword usage improves relevance without harming readability.
Optimize Images: Compress images for faster loading and add descriptive alt text. Image optimization improves user experience and allows search engines to understand visual content better.
Enhance User Experience: Ensure content is easy to read with short paragraphs, bullet points, and simple language. Better user engagement signals positively impact search performance and support Domain Authority growth.
4. Fix Technical SEO Issues
Technical SEO ensures your website functions properly for both users and search engines. A technically strong website improves crawlability, indexing, user experience, and overall authority.
Improve Website Speed: Fast loading websites reduce bounce rate and increase user satisfaction. Optimize images, use caching, minimize code, and choose reliable hosting to improve performance.
Ensure Mobile Friendly Design: Most users access websites through mobile devices. A responsive design improves usability, engagement, and search engine rankings since Google uses mobile first indexing.
Use Secure HTTPS Protocol: Install an SSL certificate to secure your website. HTTPS builds trust with users and is a confirmed ranking factor in search engines.
Fix Crawl Errors: Regularly check for broken links, 404 errors, and redirect issues. Fixing these problems improves crawl efficiency and ensures search engines can index your pages correctly.
Submit XML Sitemap: Create and submit an XML sitemap to search engines. A sitemap helps search engines discover and index important pages faster.
Optimize URL Structure: Use clean, short, and descriptive URLs. Simple URLs improve user experience and make it easier for search engines to understand page topics.
5. Reduce Spammy Links
A healthy backlink profile is essential for maintaining and improving Domain Authority. Low quality or spammy links can negatively impact credibility and ranking potential.
Perform Regular Backlink Audits: Use SEO tools to review your backlink profile and identify low quality, irrelevant, or toxic links. Regular monitoring prevents long term damage.
Disavow Harmful Links: If certain backlinks are clearly spammy and cannot be removed manually, use Google’s Disavow Tool to prevent them from affecting your website’s reputation.
Avoid Buying Links: Paid or manipulative link schemes violate search engine guidelines and can result in penalties. Focus only on earning natural, high quality backlinks.
Remove Unnatural Links: Contact website owners to remove harmful links when possible. Cleaning up poor quality links strengthens overall trust signals.
Maintain Link Relevance: Ensure backlinks come from relevant industry websites. Relevant links provide stronger authority signals compared to unrelated sources.
6. Increase Website Traffic
Higher website traffic improves brand visibility, user engagement, and overall authority. When more users visit and interact with your content, search engines recognize your website as valuable and relevant.
Focus on Organic Traffic: Target relevant keywords and create helpful content to attract users through search engines. Organic traffic is sustainable and builds long term authority.
Promote Content on Social Media: Share blog posts, guides, and resources on social platforms to increase visibility. More exposure increases the chances of earning backlinks and referral traffic.
Use Email Marketing: Build an email list and regularly share valuable content with subscribers. Email traffic increases repeat visits and strengthens audience loyalty.
Improve User Engagement: Encourage comments, shares, and longer session durations. Higher engagement signals improve credibility and support ranking performance.
Target Long Tail Keywords: Long tail keywords are less competitive and easier to rank for. Ranking for multiple specific keywords increases steady traffic growth over time.
Leverage Referral Traffic: Collaborate with partners and industry websites to generate referral visits. Referral traffic increases brand awareness and improves authority signals.
Conclusion
Understanding what is a good domain authority, and why it is important is essential for any website owner or digital marketer. While DA is not a direct ranking factor, it serves as a valuable benchmark for assessing site strength, planning SEO strategies, and tracking growth.
Improving DA requires patience, quality content, strategic link building, and regular SEO audits. Websites with higher domain authority generally enjoy better visibility, more traffic, and enhanced credibility. By following the strategies outlined in this guide, businesses and bloggers can steadily increase domain authority and position themselves as authorities in their respective niches.
Tracking DA, focusing on quality backlinks, maintaining a consistent publishing schedule, and keeping technical SEO optimized are key steps toward long-term online success.
Sahil Bansal is a digital marketing expert with deep knowledge of trending topics in SEO, social media, affiliate, and content marketing. Known for insightful blogs and reviews, he keeps audiences informed and businesses ahead with his sharp analysis and marketing expertise.