Webtopping

Author name: Sahil Bansal

how to clear cache on iphone

How to Clear Cache on iPhone: Complete Guide 2026

iPhones are known for their smooth performance and long term reliability. However, even the best devices can slow down over time. One common reason for this is a buildup of cache files.

Cache files are temporary data stored by apps, browsers, and websites to help your iPhone load content faster. While cache improves speed initially, too much of it can take up valuable storage space and may cause performance issues. This is why learning how to clear cache on iPhone is important for keeping your device fast and responsive.

Clearing cache can help free up storage, fix minor glitches, and improve overall performance. It is especially useful if apps are lagging, Safari feels slow, or your iPhone storage is running low.

In this complete 2026 guide, we explain everything you need to know about clearing cache on your iPhone. You will learn how to clear app cache on iPhone, and useful tips for better iPhone storage management. Whether you want smoother performance or more free space, this guide covers all the essential steps in a simple and easy to follow way.

What Is Cache on iPhone

Cache is temporary data stored by apps and web browsers to help them load faster. For example, Safari saves images, website files, and cookies so websites open more quickly the next time you visit them. Apps like Instagram, YouTube, and Maps also store photos, videos, and other data to reduce loading time and improve performance.

Although cache is helpful, too much of it can cause problems. Over time, cached files can take up a lot of storage space and may slow down your iPhone or cause apps to crash. That is why it is important to know how to clear cache on iPhone apps to maintain smooth performance and free up storage.

Why Clearing Cache on iPhone Is Important

Clearing cache on an iPhone offers several important benefits. First, it helps free up storage space. Many apps store large amounts of cached data over time, and clearing this data can quickly recover valuable space on your device.

Second, it improves performance. If an app or browser feels slow, crashes, or freezes often, clearing the cache can usually resolve the issue. Third, it helps fix bugs. Old or corrupted cache files can cause apps to behave incorrectly, and removing them allows apps to run smoothly again.

Finally, clearing cache improves privacy. It removes stored website data, cookies, trackers, and saved login sessions. For these reasons, clearing cache on an iPhone should be done regularly to keep the device fast, secure, and clutter free.

How iPhone Cache Works in iOS 2026

In 2026, iOS still does not include a single clear all cache button. Apple designs iOS to manage cache automatically in the background. This helps keep the system fast, stable, and secure. Even so, users can manually control cache using Safari settings, app offloading, deleting and reinstalling apps, and a few system level steps.

Cache on an iPhone is temporary data stored to make apps and websites load faster. Instead of downloading the same files again and again, iOS saves them locally. Over time, this cached data can grow large and use storage space, which may slow down certain apps or cause issues. On iOS 2026, cache exists in three main areas.

1. Browser Cache

Browser cache is created when you visit websites in Safari or other browsers like Chrome and Firefox. It stores images, scripts, cookies, and site data so pages open faster the next time you visit.

If the browser cache becomes too large or corrupted, websites may load incorrectly, show outdated content, or fail to open properly. Clearing browser cache can fix login problems, loading errors, and display issues. Safari allows clearing cache directly from iPhone settings, while third party browsers provide their own in app options.

2. App Cache

App cache is generated by apps such as Instagram, YouTube, Netflix, Amazon, and other social media, streaming, and shopping apps. This cache includes images, videos, search history, offline data, and temporary files that help apps run smoothly.

iOS does not offer a universal way to clear app cache. Some apps include a built in option to clear cache. If not, users can offload the app to remove cached data while keeping documents, or delete and reinstall the app to fully clear cache. Clearing app cache can free storage and fix freezing, crashing, or slow app performance.

3. System Cache

System cache consists of temporary files created by iOS itself. These files support system processes, updates, animations, and background tasks. Unlike browser and app cache, system cache is not visible to users.

Apple manages system cache automatically. iOS clears these files when storage space is low or after system updates and restarts. Users can indirectly reduce system cache by restarting the iPhone, updating iOS, or resetting settings if necessary.

How to Clear Cache and Cookies on iPhone

Your iPhone stores temporary data called cache and cookies to make apps and websites load faster. While this can improve performance, over time it can slow your device, cause glitches, or fill storage. Clearing them regularly keeps your iPhone fast, frees space, and protects your privacy.

1. Understanding Cache and Cookies

  • Cache: Cache is temporary data that apps and websites save on your iPhone, such as images, scripts, and files. For example, Safari stores website images so pages load faster the next time you visit. However, too much cache can slow down apps or cause them to misbehave.
  • Cookies: Cookies are small files that store information from websites, like login details, site preferences, and tracking data. They help websites remember you, but they can also track your online activity.

Why clearing cache and cookies helps:

  • Fixes problems with websites not loading properly.
  • Removes outdated data that can cause apps to glitch.
  • Frees up storage space on your iPhone.
  • Protects your privacy by deleting tracking cookies.

2. Clearing Safari Cache and Cookies – Detailed Explanation 

Safari on iPhone stores cache and cookies, which are temporary files that can slow down your browser and take up storage. Learning how to clear Safari cache on iPhone helps improve performance, fix website issues, free up space, and protect your privacy for smoother browsing.

Step-by-Step Guide

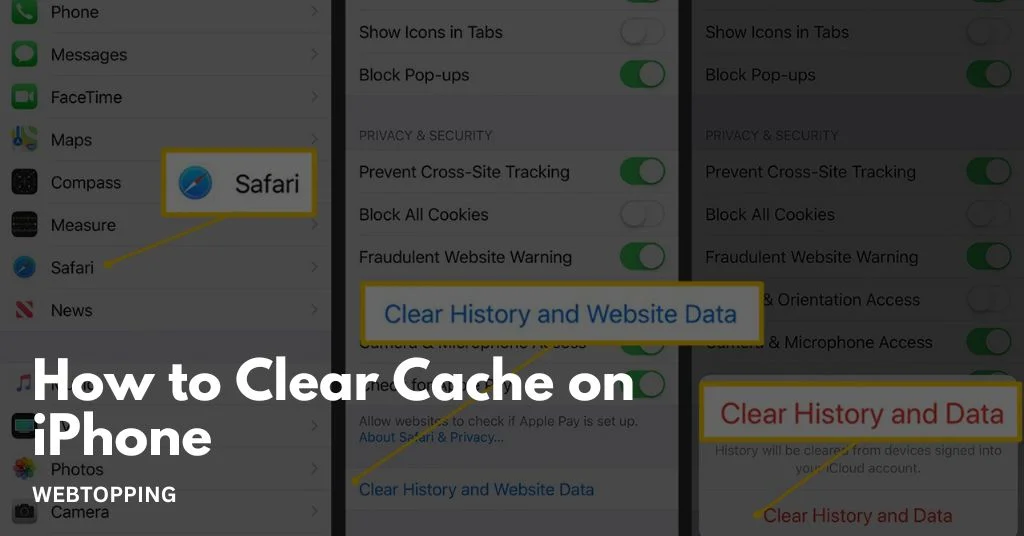
Step 1: Open Settings

  • Tap the Settings app on your iPhone home screen.
  • Settings is where you control all the system functions and apps.

Step 2: Go to Safari

  • Scroll down until you see Safari, then tap it.
  • This opens Safari’s settings where you can manage data, privacy, and security options.

Step 3: Tap Clear History and Website Data

  • This option removes all browsing history, cookies, and cache stored by Safari.
  • Browsing history includes the websites you visited.
  • Cookies are files that save your login information and site preferences.
  • Cache includes images and files that websites store to load faster.

Step 4: Confirm Clear History and Data

  • Safari will ask for confirmation. Tap Clear History and Data to delete everything.
  • Once cleared, all websites will treat your browser like it’s new. You will need to log in again on sites where you previously saved credentials.

What Happens After Clearing Safari Cache and Cookies

1. Speed Improvement: Removing old cached files can make Safari load websites faster.
2. Fixes Loading Problems: Some pages may not load correctly due to outdated cache. Clearing it solves these issues.
3. Auto-Fill and Logins Reset: Stored login information is removed, so you will need to log in again.
4. Privacy Protection: Cookies that track your activity across websites are deleted, improving your privacy.
5. Frees Storage Space: Cache files can take up significant storage over time, especially if you visit image-heavy websites.

3. Clearing Cache and Cookies in Other Browsers  

If you use browsers other than Safari, such as Chrome, Firefox, or Edge, they also store cache and cookies. Knowing how to clear browser cache on iPhone for these apps can help fix slow-loading pages, free up storage space, and protect your privacy. Each browser has its own method: usually, you can access the settings within the app, find the Privacy or History section, and select the option to clear browsing data, including cache and cookies. Regularly clearing them ensures your browser runs smoothly and keeps your personal data safe.

A. Google Chrome

1. Open the Chrome app on your iPhone.
2. Tap the three dots at the bottom-right corner to open the menu.
3. Tap History → Clear Browsing Data.
4. Select the options:

  • Cookies, Site Data: removes saved login information and preferences.
  • Cached Images and Files: removes temporary files stored to make websites load faster.

5. Tap Clear Browsing Data, then Confirm.

What happens:

  • Your Chrome browser will remove old website data.
  • You may need to log in again on sites where you were previously signed in.
  • Website pages will load fresh with updated content.

B. Mozilla Firefox

1. Open the Firefox app.
2. Tap the three-line menu at the bottom-right corner, then go to Settings → Data Management.
3. Toggle Cache and Cookies to select them.
4. Tap Clear Private Data.

What happens:

  • Clears stored cache and cookies from Firefox.
  • Removes stored login details and website preferences.
  • Helps fix page loading issues and speeds up the browser.

C. Microsoft Edge

1. Open the Edge app on your iPhone.
2. Tap Settings → Privacy → Clear Browsing Data.
3. Choose:

  • Cookies and Site Data
  • Cached Images and Files

4. Tap Clear.

What happens:

  • Old cookies and cache are removed.
  • Improves performance and fixes website loading problems.
  • Protects your privacy by deleting tracking data.

Extra Tips for All Browsers

  • Clearing cache does not delete bookmarks or saved passwords unless you specifically choose those options.
  • If a website is still not loading correctly, try restarting the browser after clearing the cache.
  • Regular cleaning every 1–2 months keeps your browser fast and storage optimized.

How to Clear App Cache on iPhone            

iPhones do not have a universal Clear Cache button like Android phones. This is because iOS is designed to manage storage and cache automatically. However, users can still clear cached data using a few different methods. Clearing cache helps apps run faster, fixes bugs, and frees up storage space.

Method 1: Offload Unused Apps

1. Open Settings.
2. Tap General > iPhone Storage.
3. Scroll down to find the app you want to offload.
4. Tap the app and select Offload App.
5. After the app is offloaded, reinstall it from the App Store.

Why it works: When you offload an app, iOS deletes the app program files, which includes cached files. Your saved data (like login information, messages, or game progress) stays safe. When you reinstall, you get a fresh version of the app without the old cache.

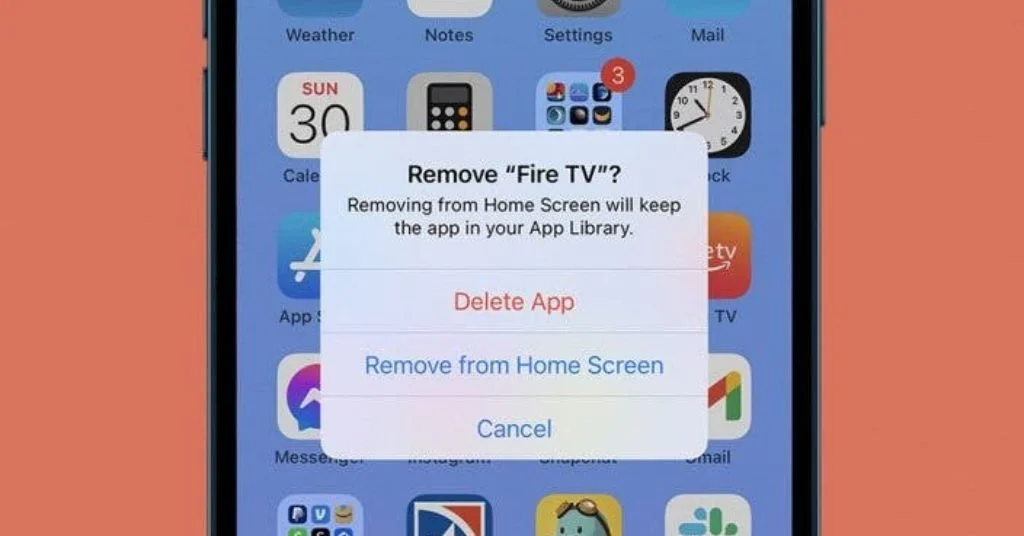
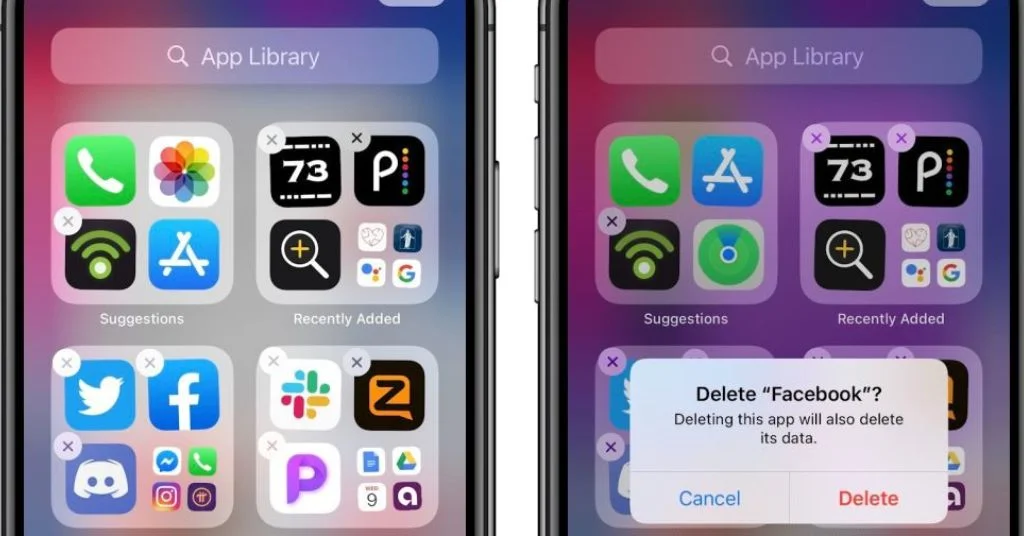
Method 2: Delete and Reinstall Apps

If an app has a very large cache or is misbehaving, the most reliable way to clear it is to delete the app completely and reinstall it.

1. Press and hold the app icon on the Home screen.
2. Tap Remove App, then Delete App to remove it completely.
3. Open the App Store and reinstall the app.

Note: Make sure any important data is backed up, either in iCloud or the app’s own backup system, before deleting.

Method 3: Clear Cache Within App Settings

Some apps allow you to clear cached data directly from their internal settings. This method is faster and easier than offloading or deleting the app.

Steps for Popular Apps:

  • Instagram: Open the app → Settings > Account > Storage > Clear Cache.
  • WhatsApp: Open the app → Settings > Storage and Data > Manage Storage → Remove unwanted files.

Why it works: Apps store temporary files like images, videos, or browsing history to make the app run faster. Over time, these files can take up significant storage. Clearing cache from the app settings removes these temporary files without affecting your saved data, such as messages, photos, or account information.

Tip: Regularly checking app settings for cache management can help maintain storage space and improve app performance.

How to Clear Cache on iPhone Apps Automatically      

Clearing cache on iPhone apps automatically isn’t directly possible because iOS doesn’t provide a system-wide setting for this. However, you can manage storage and reduce cached data efficiently. First, go to Settings > General > iPhone Storage. Here, you’ll see apps and the space they use. Some apps, like Safari, allow automatic cache clearing; for Safari, go to Settings > Safari > Clear History and Website Data. 

For other apps, you can enable Offload Unused Apps, which removes the app but keeps its data, effectively clearing temporary files. Regularly updating apps and restarting your iPhone also helps reduce cache buildup. While full automation isn’t available, these steps keep your device optimized with minimal manual effort.

iPhone Storage Management Tips for 2026

Here’s a detailed guide on iPhone storage management tips for 2026. Managing storage has become even more important as apps, photos, and videos continue to grow in size.

1. Use iCloud and Cloud Services: iCloud allows you to store photos, videos, and files in the cloud instead of your device. You can also use Google Drive, Dropbox, or OneDrive to offload large files. Enabling iCloud Photos automatically uploads your media, freeing device storage.

2. Review and Delete Large Apps: Go to Settings > General > iPhone Storage to see a list of apps by size. Remove apps you rarely use or offload them temporarily; offloading keeps app data but removes the app itself.

3. Clear Cache and Temporary Files: Some apps, like social media or streaming apps, accumulate cache over time. Clearing app cache through settings or reinstalling the app helps free up space.

4. Optimize Media Storage: Use Optimize iPhone Storage for photos and videos to keep smaller versions on the device while storing full-resolution versions in iCloud. For videos, consider compressing or moving older files to external storage.

5. Delete Old Messages and Attachments: iMessage and WhatsApp media can take up a lot of space. Set messages to auto-delete after 30 days or 1 year in Settings > Messages, and remove large attachments manually.

6. Manage Downloads and Offline Content: Check apps like Spotify, Netflix, or Podcasts for downloaded content. Delete episodes, songs, or movies you’ve already consumed.

7. Use Smart Storage Management Features: iOS 17 and beyond include recommendations under Settings > iPhone Storage, such as reviewing large attachments, deleting duplicate files, and removing unused apps.

8. Regular Backups and Cleanup: Back up your iPhone to iCloud or a computer, then delete old files, apps, or media you don’t need. Regular cleanup prevents storage from filling up unexpectedly.

Following these tips helps keep your iPhone fast, responsive, and ready for new apps, photos, or updates without worrying about storage limits.

Final Thoughts

Knowing how to clear cache on an iPhone is essential in 2026. Although Apple does not offer a one-tap solution, the methods outlined above are safe, effective, and easy to follow. From clearing Safari cache to managing app cache and optimizing storage, these steps help keep your iPhone fast and reliable.

Clearing cache should be a regular part of iPhone maintenance. By following the right approach, storage remains organized, apps run smoothly, and your iPhone continues to perform at its best.

Frequently Asked Questions (FAQs)

Do you need to clear the cache on an iPhone?

Yes, clearing cache on an iPhone can help free storage, improve app performance, and fix loading issues. Safari, apps, and system caches store temporary data that may slow the device over time, so periodic clearing keeps it running smoothly.

How to clear app cache iPhone for large apps?

For large apps, go to Settings → General → iPhone Storage → select the app. Offload or delete and reinstall the app to remove stored cache. This works well for Instagram, YouTube, Netflix, and other apps with heavy cache.

Does clearing cache delete personal data on iPhone?

Clearing cache usually removes temporary files like images, scripts, or offline data. Saved passwords, messages, and account information are generally safe unless you choose to clear cookies or app data stored in settings.

What is app cache iPhone, and why should I clear it?

App cache is temporary data stored by apps like images, videos, offline files, and scripts. Clearing it helps free up storage, fix app crashes or slowdowns, and keeps your iPhone running smoothly.

How to manage iPhone storage and cache together?

Use Settings → General → iPhone Storage to see which apps use the most space. Offload unused apps, clear app cache, optimize photo storage with iCloud, and remove old messages or downloads to maintain storage and speed.

Can clearing cache improve battery life on iPhone?

Yes, clearing cache can slightly improve iPhone battery life. Large cache and temporary files force apps to process extra data, using more power. Removing these files reduces background workload, helping apps run more efficiently and conserving battery over time.

How to Clear Cache on iPhone: Complete Guide 2026 Read More »

how to set up voicemail on android

How to Set Up Your Voicemail on an Android Phone

Setting up voicemail on an Android phone is an easy but important task that helps you stay connected when you cannot answer calls. Voicemail allows callers to leave messages when your phone is busy, switched off, or out of reach. Most Android phones include voicemail by default, but it needs a quick setup to work properly. In just a few minutes, you can create a secure PIN, record a personal greeting, and start receiving messages. Once set up, voicemail makes it easier to catch up on missed calls and respond at the right time without losing important information.

We protect the tech you love by making everyday technology easier to use. We also help with setting up and fixing your devices, so you can follow clear steps to set up voicemail, change greetings, reset passwords, and fix common voicemail issues without stress.

What Is Voicemail on Android Phone

Voicemail on Android phone is a built in service provided by your mobile carrier. When someone calls and you cannot answer, the call is forwarded to voicemail. The caller can leave a voice message which you can listen to later. These messages are stored on the carrier server and can be accessed anytime.

Android voicemail setup is usually quick but many users skip it. Without setup, callers may hear a default message or may not be able to leave messages at all. Setting up voicemail allows us to create a personal greeting, protect messages with a PIN, and manage voicemail settings Android users often need.

Benefits of Setting Up Voicemail on Android

Setting up voicemail on your Android phone is not just a convenience it is an essential step for staying connected and managing communication efficiently. A properly configured voicemail ensures you never miss important calls, keeps your messages organized, and enhances your security. Here are the key benefits:

1. Never Miss Important Calls

With voicemail on Android phone, callers can leave messages even when your phone is busy, switched off, or out of network coverage. This means you can catch up on messages at your convenience without worrying about missing urgent information.

2. Professional Communication

Recording a personal greeting helps you maintain a professional image. When clients, colleagues, or contacts reach your voicemail, they know they have reached the right person. This is especially useful for business users who rely on clear communication.

3. Organized Message Management

Android offers options like visual voicemail Android, which displays your messages in a list format. This allows you to listen, delete, or save messages easily, helping you stay organized and prioritize important calls. You no longer need to listen to all messages in sequence simply choose the ones that matter.

4. Enhanced Security

By setting a secure PIN during Android voicemail setup, you ensure that only you can access your messages. This adds an extra layer of protection, keeping sensitive or personal messages private.

5. Time Efficiency

Voicemail allows you to focus on tasks without being interrupted by calls. You can check messages when convenient, respond when necessary, and avoid constant disruptions during work or personal time.

6. Customizable Experience

Most Android phones allow you to record personal greetings, change voicemail settings, and enable features like visual voicemail on Android. This flexibility means you can tailor your voicemail to fit your communication style and preferences.

7. Easy Access Anywhere

Once set up, your voicemail is accessible from your Android phone, other phones, or even through visual voicemail apps. This ensures that you can stay updated on messages even when traveling or away from your primary device.

How to Set Up Visual Voicemail on Android

Visual voicemail is a convenient feature that lets you view, manage, and listen to voicemail messages directly on your Android phone, without needing to call your voicemail number. It allows you to see a list of messages, choose which ones to play, delete, or save, and makes managing multiple messages much faster.

Follow these steps to set up visual voicemail on Android:

1. Open the Phone App: Locate and tap the Phone app on your Android device. This is usually the default app with a phone receiver icon.
2. Go to Voicemail Settings: Tap the Voicemail icon or navigate to Menu > Settings > Voicemail.
3. Select Visual Voicemail: Look for the Visual Voicemail option and tap it. Follow the on-screen prompts to enable the feature.
4. Verify Your Phone Number and Carrier Details: Some carriers require verification before activating visual voicemail. Ensure your phone number and carrier information are correct.
5. Set Up Your PIN and Greeting: If prompted, create a voicemail PIN for security and record a personal greeting. Even with visual voicemail, a PIN helps protect your messages.
6. Finish Setup: Once completed, your voicemail messages will appear in a list format. You can now play, pause, delete, or save messages directly from your Android phone without calling your voicemail number.

How to Set Up Voicemail on Android Without Password

Setting up voicemail on Android without a password can seem tricky, but it is possible. This situation usually occurs if the voicemail password is forgotten, not provided by the mobile carrier, or during the initial setup of a new Android phone. Some carriers also reset voicemail passwords automatically after a phone reset, leaving the phone without a set password. Knowing how to set up voicemail on Android without password ensures that voicemail remains accessible and secure.

Why It Might Be Necessary

  • Forgotten Password: Over time, users may forget their voicemail PIN or password.
  • No Password Provided: Some carriers do not automatically provide a password during phone activation.
  • Phone Reset or New Device: After resetting a phone or switching to a new Android device, the previous voicemail password may no longer work.
  • Carrier Restrictions: Certain carriers require users to set up voicemail directly without a pre-set password.

Step-by-Step Guide to Set Up Voicemail Without Password

1. Open the Phone App: Launch the default Phone app on the Android device. This app is used to make calls and access voicemail.

2. Access Voicemail:

  • Tap the voicemail icon, usually found in the app menu.
  • Alternatively, press and hold the number 1 on the dial pad, which is the standard shortcut to access voicemail on most Android phones.

3. Handle the Password Prompt:

  • If prompted for a password, select the Forgot password option if available.
  • Follow the carrier’s instructions carefully. Most carriers allow sending a temporary PIN via SMS or email, which can be used to complete the setup.
  • Some carriers may require calling a specific support number to reset the password.

4. Record Voicemail Greeting: After resetting or bypassing the password, record a personalized voicemail greeting. A clear and concise greeting informs callers that they have reached the correct number and provides any important instructions, such as asking them to leave a message.
5. Complete Setup: Follow the on-screen prompts to finish setup. This typically includes confirming the temporary PIN, saving the greeting, and enabling voicemail notifications.

Tips for Using Voicemail Without a Password

  • Use a Temporary PIN: Many carriers provide temporary PINs when a password is not available. These should be used immediately to secure voicemail access.
  • Update Security Later: Once the voicemail is set up, consider setting a new permanent password or PIN to prevent unauthorized access.
  • Enable Visual Voicemail: If supported by the carrier, enabling visual voicemail android provides an easier way to check messages without entering a PIN each time.
  • Keep Carrier Instructions Handy: Different carriers may have slightly different steps or apps for voicemail setup. Following the official instructions ensures success.
  • Check Notification Settings: Make sure voicemail notifications are enabled so new messages are not missed.

Common Issues and Solutions

  • Voicemail Not Accessible: If the phone still asks for a password, try restarting the device and reattempting setup.
  • Temporary PIN Not Received: Ensure the correct phone number is registered with the carrier, and the network connection is active.
  • Visual Voicemail Errors: Update the voicemail or phone app to the latest version and clear app cache if needed.

By carefully following these steps, setting up voicemail on Android without a password can be completed smoothly. Even without a password initially, voicemail remains secure if temporary PINs are used and settings are updated properly. This ensures no calls or messages are missed, and voicemail on android phone works reliably.

How to Check Voicemail on Android 

Checking voicemail on Android is straightforward. The process differs slightly depending on whether standard voicemail or visual voicemail android is being used. Standard voicemail requires calling the voicemail number to listen to messages, while visual voicemail android displays messages in a list, allowing direct playback and easier management.

Methods to Check Voicemail

1. Using Standard Voicemail:

  • Open the Phone app on the Android device.
  • Tap the voicemail icon, or press and hold 1 on the dial pad.
  • Follow the automated prompts to listen to new messages.
  • Messages can typically be saved, deleted, or repeated during playback using the keypad options.

2. Using Visual Voicemail Android:

  • Open the visual voicemail app provided by the carrier or the built-in visual voicemail feature.
  • A list of voicemail messages will appear, showing the caller’s name, number, and time of the message.
  • Tap any message to play it instantly.
  • Messages can be saved, deleted, or shared directly from the app without calling the voicemail number.

Tips for Checking Voicemail

  • Check Regularly: Regularly checking voicemail ensures that no messages are missed, especially urgent calls.
  • Enable Notifications: Make sure voicemail notifications are enabled in the phone’s settings so new messages are alerted immediately.
  • Organize Messages: Use visual voicemail android to sort or prioritize messages for faster response.
  • Keep Apps Updated: Ensure the voicemail or phone app is updated to avoid errors when checking messages.

Understanding how to check voicemail on Android, whether using standard voicemail or visual voicemail android, ensures all messages are received and managed efficiently. Visual voicemail android, in particular, provides a faster and more organized way to access messages compared to traditional voicemail.

Common Troubleshooting Tips for Android Voicemail Setup

Even after you set up voicemail on your Android phone, it may not always work perfectly. Problems can happen because of network issues, app glitches, or incorrect settings. Here’s a simple way to understand and fix common voicemail problems.

1. Voicemail Not Working

Sometimes your voicemail may not ring, or callers might not be able to leave messages. This usually happens because the phone isn’t properly connected to your carrier’s voicemail system, or there is a temporary glitch in your phone.

1. Restart Your Phone: Restarting your phone clears temporary software glitches and refreshes the connection to your carrier’s network. Many voicemail problems are caused by temporary bugs that a simple restart can fix.

2. Check Your Voicemail Number: Your carrier assigns a specific number to access voicemail. If this number is incorrect in your phone’s settings, voicemail won’t work.

  • Go to Phone app > Settings > Voicemail > Voicemail number.
  • Compare it with the number provided by your carrier. Correct it if necessary.

3. Reset Voicemail Settings: Sometimes the setup process has errors. Re-entering your voicemail number and password can fix these problems. This ensures your phone correctly connects to your voicemail server.

Pro Tip: If none of these steps work, the issue might be on your carrier’s side. Contact them and ask if they can reset voicemail for your account.

2. Visual Voicemail Not Showing Messages

Visual voicemail is a feature that displays voicemail messages directly on your phone screen instead of having to call a number. Messages may not show because the app isn’t updated, the phone has a weak internet connection, or temporary files are causing problems.

1. Check Internet Connection: Visual voicemail relies on mobile data or Wi-Fi. If your internet is weak or disconnected, messages won’t load. Try switching between Wi-Fi and mobile data to see if the messages appear.

2. Update the App: Older versions of the visual voicemail app may have bugs. Updating the app ensures you have the latest fixes and improvements. Open the Google Play Store, search for the app, and tap Update if available.

3. Clear App Cache: Sometimes apps store temporary files that cause glitches. Clearing the cache removes these files:

  • Go to Settings > Apps > Visual Voicemail > Storage > Clear Cache.
    This can fix problems without deleting your saved messages.

Tip: If you use a carrier-specific app, make sure it’s the official app recommended by your network. Third-party apps may not work properly.

3. Forgotten Voicemail Password

Forgetting your voicemail password prevents access to messages. This often happens if you don’t use voicemail frequently or change your password and forget it.

1. Contact Your Carrier: Call customer support and request a voicemail password reset. They will ask you to verify your identity to ensure your account is secure.

2. Use the Carrier’s App or Website: Many carriers allow you to reset your voicemail password online. Log in to your account and follow the instructions to create a new password.

Tip: Choose a password that is secure but easy to remember, so you won’t forget it again.

4. Voicemail Notifications Not Appearing

Sometimes your phone receives voicemail, but you don’t get alerts. This can happen because notifications are turned off, your phone is in Do Not Disturb mode, or there’s a software glitch.

1. Enable Notifications: Make sure voicemail notifications are turned on:

  • Go to Settings > Apps > Voicemail > Notifications and toggle them on.

2. Restart Your Phone: Restarting refreshes the system and can fix issues where notifications aren’t appearing properly.

3. Check Do Not Disturb Mode: If Do Not Disturb is on, voicemail alerts may be blocked.

  • Go to Settings > Sound & Vibration > Do Not Disturb and allow voicemail notifications.

Tip: Also check if notifications for specific apps are blocked in your phone’s settings.

Extra Tips for Fixing Voicemail Issues

1. Update Your Android System: Software updates often fix bugs that could affect voicemail. Go to Settings > System > Software Update to check for updates.

2. Check Call Forwarding Settings: Voicemail relies on call forwarding to work properly. Make sure it’s active:

  • Go to Phone app > Settings > Call Forwarding and ensure it’s set up correctly.

3. Reset Network Settings: If voicemail still doesn’t work, resetting network settings can help. This removes old or corrupted network settings:

  • Go to Settings > System > Reset Options > Reset Network Settings.
    Note: This will reset Wi-Fi, mobile data, and Bluetooth, so you’ll need to reconnect to networks.

4. Test on Another Phone: Put your SIM card in another phone to see if voicemail works. If it does, the problem is with your phone, not the network.

Conclusion

Setting up voicemail on an Android phone ensures you never miss important calls and helps you stay organized and connected. Whether you choose standard voicemail or visual voicemail Android, following the proper setup steps makes managing messages easy and efficient. 

At Webtopping, we simplify technology so you can quickly record personalized greetings, create secure PINs, and customize voicemail settings on your Android phone. Troubleshooting common issues, and becomes straightforward when you know the right steps. 

By taking a few minutes to complete Android voicemail setup, you gain reliable access to your messages anytime, anywhere, enhancing communication, professionalism, and peace of mind in both personal and business interactions.

Also Read: How to Hide Apps on iPhone: Complete Step-by-Step Guide (2026)

Frequently Asked Questions (FAQs)

What number is voicemail on Android?

On most Android phones, voicemail can be accessed by pressing and holding the 1 key on the dialer. The default voicemail number is usually set by your carrier. You can also dial your carrier’s voicemail number directly to check messages if the shortcut doesn’t work.

How to enable visual voicemail on Android?

To enable visual voicemail, open the Phone app, go to Settings → Voicemail → Visual Voicemail, and follow prompts to set it up. Your carrier may require activation. Once enabled, voicemails appear as a list with playback options instead of calling the voicemail number.

Difference between voicemail and visual voicemail?

Traditional voicemail requires calling a number to hear messages sequentially. Visual voicemail displays messages in a list on your phone with sender info, timestamps, and playback controls. It allows easier message management, including saving, deleting, or sharing, unlike standard voicemail, which is less convenient and linear.

Why is voicemail not working on Android?

Voicemail may fail due to incorrect voicemail number settings, carrier issues, network problems, or outdated software. Check Phone app → Settings → Voicemail for correct setup. Restarting the phone or contacting your carrier can resolve activation or connectivity issues preventing voicemail from receiving or playing messages.

How to Set Up Your Voicemail on an Android Phone Read More »

how to hide apps on iphone

How to Hide Apps on iPhone: Complete Step-by-Step Guide (2026)

Hiding apps on an iPhone can help you keep your device organized, protect your privacy, or simply reduce clutter on your home screen. Apple offers multiple ways to hide apps without deleting them, making it easy to manage what appears on your device. 

You can move apps to the App Library, use folders, restrict apps through Screen Time, or hide pre-installed apps from the home screen. Each method ensures your apps remain accessible when needed but out of sight for a cleaner look. 

In this guide, we will explain how to hide apps on iPhone step by step, including tips on hidden apps on iPhone, iPhone privacy settings, and more, so you can control your device efficiently.

Why You Might Want to Hide Apps on iPhone

Hiding apps on your iPhone helps protect your privacy, maintain security, organize your home screen, and control what children or other users can access. It keeps apps out of sight without removing them entirely.

1. Privacy and Security Reasons

Some apps contain sensitive information, like banking, messaging, or health data. Hiding these apps prevents others from easily accessing your private information if they use your phone. It also reduces the risk of accidental data exposure, making your personal and financial information safer while keeping these apps fully functional for your use.

2. Organization

Many people have numerous apps, but not all are used regularly. Hiding apps you rarely use declutters your home screen and makes it easier to find the apps you use daily. This creates a cleaner, more organized interface, reducing visual clutter and improving overall navigation, while still keeping the hidden apps installed for whenever you need them.

3. Parental Control

iPhone users can hide apps to control what children or other users can access. Certain apps may contain content unsuitable for kids or may allow unintended purchases. By hiding these apps, parents can ensure a safer environment on the device while still keeping the apps installed, giving flexibility to restore access when appropriate without having to delete them.

4. Keeping Apps Hidden Without Deleting (expanded explanation)

iPhone allows you to hide apps without deleting them, meaning the apps remain installed but are not visible on the home screen. This is useful for maintaining privacy, reducing clutter, or controlling access for children. Hidden apps can be accessed later via search, App Library, or settings. This approach ensures convenience, security, and organization while avoiding the hassle of reinstalling apps.

How to Hide Apps on iPhone Without Deleting It

Apple designs iPhone with a strong focus on privacy, security, and simplicity. However, Apple also believes that apps should never be fully hidden in a way that could confuse users or reduce security. That is why there is no single hide app button on iPhone.

Instead, iOS provides multiple built in features that work together to hide apps without deleting them. These tools are flexible and powerful. Some help keep the Home Screen clean. Some protect private apps. Some are perfect for parents. Others help improve focus and productivity.

Each method below serves a different purpose. One method alone can help, but combining two or more methods gives the best and most secure result.

Method 1: Hide Apps on iPhone Home Screen Using App Library

The App Library is one of the easiest and safest ways to hide apps on an iPhone. Introduced in iOS 14, the App Library automatically stores all installed apps in categorized folders that are accessible by swiping left past the last Home Screen page. When you remove an app from the Home Screen, it is not deleted. It simply moves to the App Library. This method is perfect for users who want a clean Home Screen without uninstalling apps. The app remains fully functional and can still receive updates and notifications.

Key Points:

1. Long press the app icon on the Home Screen.
2. Tap Remove App from the menu.
3. Select Remove from Home Screen, not Delete.
4. The app moves to the App Library automatically.
5. Apps remain accessible through the App Library search bar.
6. This method is fast, safe, and reversible anytime.

Method 2: Hide Apps Using App Library Only Setup

If you want maximum privacy and a minimal Home Screen, this method is ideal. Apple allows users to keep all apps inside the App Library while keeping the Home Screen nearly empty. This setup makes it difficult for others to casually browse installed apps. With this method, new apps automatically go to the App Library instead of appearing on the Home Screen.

Key Points:

1. Open Settings > Home Screen.
2. Select App Library Only under new app downloads.
3. Manually remove existing apps from Home Screen pages.
4. Keep only essential widgets if needed.
5. Access all apps through the App Library swipe.
6. Ideal for privacy focused and minimal users.

Method 3: Hide Apps on iPhone in Settings Using Screen Time

Screen Time is a built in iOS feature that helps control and restrict app usage. By using Screen Time settings, users can hide specific apps or entire app categories from the Home Screen and search results. This method is widely used by parents to control access, but it also works well for personal privacy. 

Once an app is restricted, it cannot be opened or found unless the restrictions are changed. This makes Screen Time a reliable way to hide apps without deleting them from the iPhone.

Key Points:

1. Open Settings and tap Screen Time.
2. Turn on Screen Time if it is not already enabled.
3. Tap Content & Privacy Restrictions.
4. Select Allowed Apps or choose app categories.
5. Disable the apps you want to hide until restrictions are removed.

Method 4: Hide Apps by Moving Them into Folders

Using folders is a simple and effective way to hide apps visually on an iPhone. While this method does not completely remove apps from view, it makes them much less noticeable during normal use. 

By placing apps inside folders and moving them to deeper pages, they become harder to find for anyone casually browsing the phone. This method works best when combined with App Library or Search restrictions for better privacy and control.

Key Points:

1. Drag one app icon onto another to create a folder.
2. Rename the folder using a simple and generic name.
3. Move the app to the second or third page inside the folder.
4. Keep commonly used apps on the first folder page.
5. This reduces visibility and prevents accidental access.
6. No iPhone settings changes are required.

Method 5: Hide Apps from Search and Siri Suggestions

Even after removing apps from the Home Screen, they can still appear in Spotlight Search or Siri suggestions, which reduces privacy. This method helps hide those apps completely by removing them from search results and smart suggestions. 

Once disabled, the app will not show up when typing in search or when Siri suggests apps based on usage. The app remains installed and accessible only through the App Library, making this an effective way to improve privacy without deleting anything.

Key Points:

1. Open Settings and tap Siri & Search.
2. Scroll down and select the app you want to hide.
3. Turn off Show App in Search.
4. Disable Show Content in Search.
5. Turn off Siri Suggestions so the app no longer appears in searches.

Method 6: Hide Apps Using Focus Mode (Advanced Method)

Focus Mode is a powerful iOS feature that helps hide apps by showing only selected apps on a custom Home Screen. When Focus Mode is active, all other apps are hidden from view, reducing distractions and improving privacy. 

This method is ideal for work time, personal privacy, or when you want a clean and distraction free screen. Apps remain installed and fully safe, and they reappear automatically when Focus Mode is turned off.

Key Points:

1. Open Settings and tap Focus.
2. Create a new custom Focus Mode.
3. Select the apps you want to allow in that mode.
4. Assign a specific Home Screen page to the Focus Mode.
5. Turn on Focus Mode when needed, and hidden apps return once it is turned off.

How to Find Hidden Apps on iPhone (All Methods)

Sometimes apps may seem to disappear from your iPhone Home Screen. This doesn’t always mean they are deleted. Apps can be hidden in folders, removed from the Home Screen, restricted through settings, or moved to the App Library. Here’s a full guide to help you find hidden apps on iPhone using every possible method.

Method 1: Use the App Library

The App Library is a feature on your iPhone that shows all the apps installed on your device. Even if an app isn’t on your Home Screen, it still exists in the App Library. This is useful if you accidentally hid an app or just can’t find it. Here’s how to use it:

1. Open the App Library

  • Swipe left on your Home Screen until you reach the last page.
  • Swipe one more time, and you’ll see the App Library. It looks like a set of app icons organized into groups.

2. Search for the App

  • At the top of the App Library, there is a search bar.
  • Tap it and type the name of the app you are looking for.

3. Check if the App is Installed

  • If the app shows up in the search results, it means it’s installed on your device.
  • Even if it’s not visible on your Home Screen, it’s still accessible from here.

4. Move the App to the Home Screen

  • To make it easier to access, tap and hold the app, then drag it back to your Home Screen.

5. Browse Categories

  • The App Library automatically sorts apps into categories like Social, Utilities, Entertainment, and more.
  • If you can’t remember the app’s name, you can browse through these categories to find it.

Method 2: Spotlight Search

Spotlight Search is one of the quickest and most efficient ways to locate apps on your iPhone, especially when the app might be hidden in folders, placed on a different Home Screen page, or even removed from the Home Screen entirely. Unlike scrolling through multiple pages or folders manually, Spotlight Search scans your entire device, including apps, contacts, emails, messages, and suggested App Store results.

Steps to use Spotlight Search:

1. Access Spotlight Search

  • Swipe down from the middle of your Home Screen. It’s important to swipe from the middle and not the top, because swiping from the top brings down the Notification Center.
  • A search bar labeled “Search” will appear at the top of the screen, along with recent suggestions and apps you frequently use.

2. Type the app name

  • Start typing the name of the app you are looking for in the search bar. Spotlight will display results in real-time as you type.

3. Check the results

  • If the app is installed on your iPhone, it will appear in the search results.
  • You can tap the app icon directly from the search results to open it instantly.

4. Additional benefits

  • Spotlight Search can also show suggested apps from the App Store that you may want to download if they aren’t installed.
  • It is particularly helpful for users with many apps spread across several Home Screen pages or inside folders, as it bypasses the need to manually locate the app.

Tip: If Spotlight Search does not show the app, it may not be installed, or it may be restricted through Screen Time or hidden using Home Screen settings.

Method 3: Screen Time App List

Screen Time is a feature in iOS that tracks your device usage and allows you to apply limits or restrictions on specific apps. Interestingly, it can also help you identify apps that may be hidden from your Home Screen or restricted through settings. Even if you cannot see an app normally, it might still be installed and appear in Screen Time’s usage list.

Steps to find apps using Screen Time:

1. Open Settings → Screen Time: Launch the Settings app and scroll down to select Screen Time. If Screen Time is not enabled, you may need to turn it on first.
2. Tap See All Activity: This shows a detailed breakdown of your app usage over time, including daily and weekly summaries.
3. Scroll to the App Usage list: Here, you will find all apps that have been used recently. This list confirms whether an app is installed, even if it is hidden or restricted.
4. Identify hidden apps: Apps that are restricted using Screen Time will still appear in this list. You can adjust the restrictions to make these apps visible again by going into App Limits or Always Allowed settings.

Method 4: Check the App Store

The App Store is another reliable way to check whether an app is installed on your iPhone. This method works even if the app is hidden due to Home Screen settings, restrictions, or if it has been removed from view. The App Store recognizes apps that are installed and provides options accordingly.

Steps to check apps in the App Store:

1. Open the App Store: Tap the App Store icon on your Home Screen or access it through Spotlight Search.
2. Search for the app: Use the search bar at the top of the App Store screen to type the app name.
3. Check the app status:

  • If the app is installed, you will see an Open button next to it. Tapping Open will launch the app directly.
  • If the app is not installed, the button will display Get or show a cloud download icon. This allows you to download the app again.

Additional tips:

  • This method is useful for apps hidden in the App Library or within folders on the Home Screen.
  • It can also help identify if the app has been deleted by mistake, as you can reinstall it with a single tap.
  • Some apps may show up as installed even if they are restricted via Screen Time; combining this method with Screen Time checks ensures accuracy.

iPhone Privacy Settings to Hide Apps

iOS is designed with strong privacy in mind. It gives you multiple layers of control to hide apps, manage who can see them, and reduce digital exposure. These tools work together to protect your personal space without deleting apps.

1. Screen Time Restrictions

Screen Time is more than a usage tracker it’s a powerful privacy tool.

How it works:

  • You can restrict access to certain apps based on category or individually.
  • Restrictions can hide apps completely, so they disappear from the home screen and can’t be launched without disabling the restriction.

Key features:

  • App Limits: Set daily usage limits for specific apps. When the limit is reached, the app is hidden or requires a passcode to reopen.
  • Content & Privacy Restrictions:
    • Go to Settings → Screen Time → Content & Privacy Restrictions → Allowed Apps.
    • You can toggle off apps like Safari, Camera, Mail, FaceTime, and others. They vanish from the home screen, creating privacy for apps you don’t want others to see.

Why it helps: Even if someone has access to your phone, restricted apps won’t appear anywhere. You can combine this with a Screen Time passcode to prevent changes.

2. Notifications Management

Even if an app is hidden from your home screen, it can still show up through notifications. Notifications include pop-ups, sounds, badges (the little red dots), or previews of messages. If these appear, someone could see that the app exists, even if it’s hidden.

How to manage notifications:

1. Open Settings → Notifications → [App Name].
2. Adjust these options:
3. Lock Screen notifications: Turn this off so alerts don’t appear when your phone is locked.

  • Banners and Sounds: Turn these off to prevent pop-up alerts and sounds while using your phone.
  • Show Previews → Never: This hides the content of messages and notifications so no one can read them without opening the app.
  • Badges: Turn off red dots that appear on app icons for unread messages.

Why it helps: Even if the app is installed and active, notifications won’t give it away. No sounds, pop-ups, or previews will appear, keeping your private apps truly invisible to anyone who picks up your phone.

3. Focus Modes – In-Depth

Focus Modes in iOS are like customizable filters for your iPhone. They allow you to control which apps, notifications, and people are visible depending on the time of day or activity. Think of it as a privacy shield that dynamically hides apps.

How to set up a Focus:

1. Go to Settings → Focus → + (Create New Focus).
2. Choose a template: Personal, Work, Sleep, or create a custom Focus.
3. Customize allowed notifications:

  • Choose people and apps that are allowed during this Focus mode.
  • All other apps disappear from the home screen and are inaccessible until you switch Focus off.

Advanced uses of Focus Modes:

  • Automate Focus: You can set a Focus to start at certain times (e.g., Work Focus 9 AM–5 PM) or at certain locations (like the office).
  • Hide work apps during personal time: Your social media apps could be hidden when Work Focus is on.
  • Dynamic home screen pages: Focus Modes allow you to hide entire home screen pages, so apps you want private aren’t even visible unless you switch Focus off.

Why it helps: Focus Modes provide dynamic and flexible privacy. Unlike Screen Time restrictions that are fixed, Focus lets you hide apps only when needed without deleting or uninstalling them. It’s perfect for sensitive apps, ensuring they’re invisible at critical times.

Final Thoughts

Hiding apps on iPhone is a straightforward process that enhances privacy, organization, and focus. Whether you want to hide apps on iPhone without deleting them, manage hidden apps through iOS settings, or simply declutter your home screen, there are multiple methods to suit your needs. By understanding hidden apps on iPhone and how to access them when necessary, you can maintain a clean, secure, and personalized device.

Mastering these steps ensures you have control over what appears on your iPhone while keeping all your apps functional and private. Start organizing your iPhone today and experience a clutter-free, secure mobile experience.

Frequently Asked Questions(FAQs)

How to hide apps on iPhone in settings?

Go to Settings > Screen Time > Content & Privacy Restrictions. Turn on restrictions, then tap Allowed Apps and toggle off the apps you want hidden. You can also use Content Restrictions to hide apps by age rating, preventing access to apps unsuitable for certain users.

How to hide apps on iPhone home screen?

Hide apps on iPhone home screen by moving them to the App Library. Tap and hold the app, choose Remove App, then select Move to App Library to keep it accessible but hidden. Alternatively, organize apps into folders and place them on the second or third page of a folder for a cleaner home screen.

Can someone still access my hidden apps?

Yes, hidden apps can still be accessed, depending on the device and settings. Hiding only removes the app icon from the home screen it doesn’t uninstall or block the app. Someone who knows how to search the app list, check app settings, or use device search can still find and open them.

What is the best way to lock apps on iPhone?

The best way to lock apps on iPhone is using Screen Time. Go to Settings → Screen Time → App Limits, set limits for specific apps, and protect with a passcode. Alternatively, some apps like Notes or third-party apps offer password or Face ID protection for added security.

How do I create a hidden folder on my iPhone?

Tap and hold any app until all apps start jiggling. Drag an invisible app onto the app you want to hide to create a folder. Keep the invisible app on the first page and move the app to hide to the folder’s second page, making it hidden from view.

How to Hide Apps on iPhone: Complete Step-by-Step Guide (2026) Read More »

what is clickup

What is ClickUp? A Complete Guide to ClickUp Features, Pricing, and Benefits

If you are looking for a robust solution to organize your work, ClickUp might be exactly what you need. ClickUp is a cloud-based productivity platform that combines project management, task tracking, and team collaboration in one place. Whether you are a freelancer, a small business, or a large enterprise, ClickUp aims to simplify workflows and increase productivity by providing flexible tools tailored to your team’s needs.

In this guide, we will explore what ClickUp is, what ClickUp is used for, how it works, its key features, benefits, pricing, and alternatives to help you decide if it is the right project management tool for you.

What is ClickUp?

ClickUp is a cloud-based project management and productivity platform that combines tasks, documents, goals, reminders, and team collaboration in one centralized space. Unlike other tools that specialize in just one function, ClickUp is an all-in-one platform designed to replace multiple productivity apps like Trello, Asana, Slack, and Google Docs.

The platform is highly flexible, which means it can work for individuals, small teams, and large organizations alike. Whether you are managing software development projects, marketing campaigns, content creation, or daily administrative tasks, ClickUp allows you to organize and track all work in one place.

What is ClickUp Used For?

ClickUp is a project management and productivity platform that helps individuals, teams, and businesses organize their work in one place. It is designed to manage tasks, projects, and workflows efficiently, making collaboration easier and reducing the need for multiple tools. Here’s a detailed breakdown of what ClickUp is used for:

1. Task and Project Management

One of the primary uses of ClickUp is project management. Whether you are managing a small personal project or a large-scale corporate initiative, ClickUp offers a wide range of tools to ensure projects run smoothly from start to finish.

  • Project Planning: You can create detailed project timelines with milestones, deadlines, and dependencies. This allows you to visualize how tasks connect and what needs to be completed first.
  • Task Assignment: ClickUp allows you to assign tasks to individual team members or groups. You can also set priorities, due dates, and estimated completion times to keep projects on track.
  • Progress Tracking: ClickUp provides multiple views like List, Board, Gantt, and Calendar views, so managers can monitor project progress in real time. For example, a software development team can track each stage of a product release, from ideation to deployment, ensuring that deadlines are met.
  • Resource Allocation: Managers can see who is overloaded and who has capacity, allowing for smarter workload distribution.

Example Use Case: A marketing team planning a product launch can use ClickUp to create tasks for content creation, social media posts, and email campaigns. Each task can be assigned to a team member, with deadlines and dependencies clearly outlined. This ensures the launch is executed on time without confusion.

2. Team Collaboration

ClickUp is designed to make teamwork easier by centralizing communication and collaboration. Instead of relying on scattered emails, chat apps, or spreadsheets, ClickUp brings everything into one platform so teams can work together efficiently.

Key Features for Collaboration:

  • Comments and Mentions: Team members can comment directly on tasks or documents, allowing for contextual discussions. Using @mentions notifies specific people, so the right team members are looped in instantly. For example, a designer can tag a content writer to provide feedback on a social media post draft.
  • Real-Time Editing: ClickUp allows multiple team members to edit documents, wikis, or task descriptions simultaneously. This reduces confusion from multiple versions of the same file and ensures everyone is always working on the latest version.
  • Notifications and Updates: Automatic notifications keep everyone informed about changes, task completions, or approaching deadlines. This ensures that no one misses important updates and helps the team stay aligned.
  • Shared Workspaces: Teams can create shared spaces, folders, and lists that organize projects and tasks. This makes it easy for everyone to know what is happening, who is responsible for what, and what the next steps are.

Example Use Case: A product development team can collaborate on a new app launch by creating a shared project in ClickUp. Developers, designers, and marketers can all comment on tasks, update progress, and share resources in real time. This eliminates confusion, reduces unnecessary meetings, and keeps everyone on the same page.

3. Goal Tracking and Performance Measurement

ClickUp is not only for managing tasks but also for tracking goals and measuring team or individual performance. This helps ensure that the work being done aligns with the company’s bigger objectives and that progress is visible.

  • Setting Goals: You can define clear, measurable goals in ClickUp. Goals can be high-level (like increasing sales by 20% this quarter) or smaller, team-level goals (like completing all tasks in a project on time). Each goal can be linked to specific tasks or projects, so progress is tracked automatically.
  • Tracking Progress: ClickUp shows progress in visual formats like progress bars, percentages, and charts. As tasks are completed, the linked goals update automatically, giving managers and teams a real-time view of how close they are to achieving their objectives.
  • Key Results: Goals can be broken down into key results, which are smaller, actionable milestones. This allows teams to focus on concrete steps that lead to the larger goal. For example, if a goal is to launch a marketing campaign, key results might include creating content, designing graphics, and scheduling social media posts.
  • Performance Insights: ClickUp provides analytics and reports showing who is completing tasks on time, which projects are ahead or behind schedule, and overall team productivity. This helps managers identify bottlenecks and areas where additional support might be needed.

Example Use Case: A sales team sets a goal to increase client onboarding by 30% in the next quarter. Each task related to client outreach, follow-ups, and documentation is linked to this goal. As team members complete these tasks, ClickUp automatically updates the progress of the goal. Managers can then see which team members are contributing the most, which tasks are causing delays, and adjust strategies accordingly.

4. Time Management and Scheduling

ClickUp acts like a personal and team assistant that helps you plan your work so nothing gets forgotten. Instead of juggling multiple tools, ClickUp keeps tasks, deadlines, and schedules in one place, making it easier to manage your day and your team’s work.

  • Task Deadlines and Reminders: You can assign due dates to tasks so everyone knows when something needs to be completed. ClickUp also sends reminders for upcoming deadlines, reducing the chance of missed tasks. For example, if a designer has a deadline to deliver graphics by Friday, ClickUp will remind them ahead of time.
  • Time Tracking: ClickUp has built-in time tracking tools, letting team members log how long they spend on each task. This helps managers see where time is being spent and identify tasks that may take longer than expected. For instance, a developer can track hours spent on coding versus testing, helping the team plan future projects more accurately.
  • Scheduling and Calendar Views: ClickUp provides multiple scheduling views, like Calendar, Gantt, and Timeline. Teams can see which tasks are due when, plan overlapping work, and ensure resources are allocated properly. For example, a content team can plan blog posts, social media updates, and email campaigns on a shared calendar to avoid scheduling conflicts.
  • Recurring Tasks: Tasks that happen regularly can be set to recur automatically. This reduces repetitive work in task creation and ensures consistent scheduling. For example, a weekly team report can be automatically created every Monday, so no one forgets it.
  • Workload Management: ClickUp shows who is assigned to which tasks and how much work each person has. This allows managers to balance workloads, ensuring no one is overburdened and deadlines are realistic. For example, if one team member has five tasks due the same day, a manager can reassign one task to another member to prevent delays.

5. Workflow Automation

ClickUp allows teams to automate repetitive tasks and processes, which saves time, reduces errors, and ensures work moves smoothly without constant manual intervention. Automation in ClickUp is like having a digital assistant that handles routine tasks so the team can focus on higher-value work.

Key Features of Workflow Automation:

  • Automated Task Actions: You can set up rules that trigger actions automatically when certain conditions are met. For example:
    • When a task is marked Complete, it can automatically move to a Done folder.
    • When a task is assigned to someone, ClickUp can automatically set a due date or priority.

This ensures tasks follow the correct workflow without someone manually updating them each time.

  • Notifications and Alerts: Automation can trigger notifications to relevant team members. For instance, if a task’s status changes to Review Needed, ClickUp can notify the reviewer automatically. This keeps everyone informed without having to check manually.
  • Recurring Tasks: Automation can schedule tasks to recur without any manual input. For example, a weekly team meeting or a monthly report can be automatically created at the same time every week or month.
  • Custom Automation Rules: ClickUp allows teams to create custom automation tailored to their processes. Examples include:
    • Assigning a task to a specific person when it enters a certain stage.
    • Updating a status automatically when a subtask is completed.
    • Changing priorities based on approaching deadlines.
  • Integrations with Other Tools:
    Automation can also extend to other platforms. For example, ClickUp can automatically create tasks from emails, Slack messages, or form submissions. This connects workflows across tools and reduces the need to switch apps constantly.

How ClickUp Works

Many users wonder how ClickUp works and whether it is difficult to use. Despite its wide range of features, ClickUp is designed to be intuitive and user-friendly. Here’s a detailed explanation of how it works:

1. Sign Up and Create a Workspace: Start by signing up with your email and creating a workspace. A workspace is the main hub where all your projects, tasks, and teams are organized.
2. Set Up Projects and Tasks: Projects are broad categories of work. Within each project, you can create tasks representing individual pieces of work. Tasks can include details such as due dates, descriptions, priority levels, and attachments.
3. Assign Tasks and Define Roles: Assign tasks to team members and clarify responsibilities. This ensures accountability and reduces confusion within the team.
4. Choose Your View: ClickUp offers multiple views including List, Board, Calendar, Gantt, and Timeline. Teams can select the view that best helps them visualize and manage their work.
5. Track Progress: Track tasks and projects through status updates, dashboards, and reporting tools. This ensures that nothing falls through the cracks and progress is always visible.
6. Collaborate on Tasks: Team members can comment, share files, and communicate directly on tasks. This keeps all relevant information in one place and improves teamwork.
7. Use Automations: ClickUp automates repetitive tasks such as assigning work, sending reminders, or updating statuses. This saves time and reduces errors.
8. Measure Performance: Dashboards and reports provide insights into productivity, task completion, and team performance. Managers can use these insights to make informed decisions.

By following these steps, teams can efficiently manage projects and tasks using ClickUp without confusion.

ClickUp Features

ClickUp is a powerful project management and productivity tool designed to organize work in one place. It helps teams plan tasks, manage deadlines, track progress, collaborate in real time, and improve overall workflow efficiency.

1. Multitask Toolbar 

The Multitask Toolbar in ClickUp allows users to select multiple tasks at once and perform bulk actions quickly. It helps save time by enabling mass updates like changing status, assigning users, setting priorities, or deleting tasks together.

2. Customization

ClickUp customization lets teams tailor the platform to match their workflow. Users can create custom statuses, fields, views, and automation rules. This flexibility helps different teams manage projects in a way that fits their specific processes and goals.

3. Real Time Reporting

Real time reporting in ClickUp provides instant insights into project progress and team performance. Dashboards update automatically, showing task status, workloads, deadlines, and productivity. This helps managers make faster decisions using accurate and current data.

4. Mobile App

The ClickUp mobile app allows users to manage tasks and projects from anywhere. It supports task updates, comments, notifications, and reminders. This ensures teams stay connected, productive, and responsive even when working remotely or on the move.

How Much Does ClickUp Cost?

The cost of ClickUp depends on the pricing plan selected and the number of users. ClickUp typically charges on a per user per month basis, with discounts available for annual billing.

The Free plan costs nothing but has feature limitations. The Unlimited plan is affordable for small teams, while the Business plan is designed for growing organizations that need advanced controls and reporting. Enterprise pricing is custom and designed for large organizations with complex needs.

When considering how much does ClickUp cost, it is important to compare the value provided. Many teams replace several tools with ClickUp, which often results in overall cost savings.

ClickUp pricing in 2026

Here’s a clear 2026 ClickUp pricing breakdown for the main plans with typical annual (per-user) costs and what they include. This gives you a clear side-by-side view of the tiers and their key points:

PlanAnnual Price (Approx)Best ForKey Features
Free Forever$0 / user / monthPersonal or very small teamsUnlimited users & tasks, basic views. Storage limited (~60–100 MB). Basic automation & limits on higher-end features.
Unlimited$7 / user / monthSmall teamsUnlimited storage, unlimited dashboards, integrations, Gantt charts, timeline, custom fields.
Business$12 / user / monthMid-sized teamsAdvanced automations, workload views, reporting, time tracking, better team management features (e.g., SSO).
Business Plus~$15–$22 / user / monthMultiple teams / larger teamsCustom roles, priority support, more guest controls and finer permissions.
EnterpriseCustom pricingLarge organisationsSSO, white labeling, advanced permissions, compliance, dedicated support.

Notes:

  • All paid prices above are typical annual billing rates monthly billing is usually higher per user.
  • Enterprise pricing isn’t published publicly you must contact ClickUp sales.
  • Add-ons such as ClickUp AI/Brain cost extra per user per month on top of the plan.

If you want, I can also include a version with monthly billing prices in one table for comparison.

What Is The Best ClickUp Alternative?

A ClickUp alternative is another project management or productivity tool that you can use if ClickUp feels too complex, expensive, or doesn’t fit your workflow. Different tools are better for different kinds of teams from simple task lists to large enterprise planning.

1. Asana: Best for Team Workflow & Collaboration

Asana helps teams stay organized with task lists, project boards, and timelines. It’s great for assigning tasks, tracking progress, and managing deadlines. Teams can collaborate easily with comments, attachments, and notifications. Its visual dashboards give a clear overview of work, while integrations with other tools improve efficiency. Asana is perfect for teams that want structured workflows without losing flexibility or collaboration.

2. Monday.com: Best for Visual Workflows

Monday.com makes project management visually intuitive with colorful boards and customizable workflows. Teams can track tasks, deadlines, and progress at a glance. Automation reduces repetitive work, while templates let teams quickly adapt the tool to their needs. Its integrations and reporting features make it suitable for marketing, development, and operations teams. Monday.com is ideal for teams that prefer visual clarity and organized, streamlined workflows.

3. Trello: Best Simple Kanban Tool

Trello is a lightweight Kanban-style project management tool. Tasks are organized into boards, lists, and cards, making it simple to track progress visually. Users can add due dates, attachments, checklists, and labels to cards for easy management. Trello’s simplicity, flexibility, and mobile-friendly interface make it ideal for small teams or individuals who want a straightforward tool without unnecessary complexity.

4. Notion: Best for Notes + Lightweight PM

Notion combines note-taking, databases, and task management in one platform. Users can create pages, kanban boards, calendars, and tables to organize tasks and projects. It’s highly customizable, making it easy to tailor to team workflows. Notion is perfect for small teams or individuals who want a flexible tool for both project management and knowledge organization without heavy, complicated features.

5. Wrike: Best for Reporting & Large Teams

Wrike is built for large teams and enterprises that need detailed project tracking and reporting. It provides Gantt charts, timelines, dashboards, and real-time collaboration. Teams can create custom workflows, assign tasks, and monitor performance with analytics. Wrike’s strong reporting and integration options make it ideal for complex projects where managers need oversight, transparency, and efficiency across multiple departments.

Is ClickUp used for project management?

Yes, ClickUp is widely used for project management. It is an all in one platform designed to help teams plan, track, and manage projects from start to finish. ClickUp allows users to create tasks, set priorities, assign work to team members, and track progress in real time. It supports multiple project views such as lists, boards, calendars, and Gantt charts, making it easy to manage different workflows. 

ClickUp also includes features like time tracking, goal setting, file sharing, and automation to reduce manual work. Teams can customize dashboards and task statuses based on their needs. Because of its flexibility and wide range of tools, ClickUp is suitable for small teams, large businesses, and remote teams managing complex projects efficiently.

Frequently Asked Questions

Is ClickUp really better than Jira?

ClickUp is often easier to use and more flexible for general work and tasks. Jira is stronger for complex software development and detailed issue tracking. ClickUp can fit more teams, while Jira suits technical projects. Which is better depends on your needs and workflow style and cost differences matters too.

Can you do timesheets in ClickUp?

Yes, you can do timesheets in ClickUp. ClickUp has a built‑in Timesheets Hub where you can track, view, edit, filter, submit, and approve time logged on tasks across your workspace. It connects with ClickUp’s time tracking and lets you manage billable or non‑billable hours.

How many people can use ClickUp for free?

On ClickUp’s Free Forever plan you can invite unlimited people (team members and guests) to your workspace at no cost. There isn’t a cap on how many users you can add, unlike some competitors’ free plans. However, advanced features and storage are limited on the free tier.

How to use ClickUp for daily tasks?

To use ClickUp for daily tasks, start by creating a space for your work. Add lists for projects and tasks for individual actions. Set due dates, priorities, and reminders. Use statuses to track progress. Check your dashboard daily to review and update tasks, ensuring efficient organization and productivity.

What is ClickUp? A Complete Guide to ClickUp Features, Pricing, and Benefits Read More »

how to cancel youtube tv

How to Cancel YouTube TV: Complete Step by Step Guide

YouTube TV is an online live television streaming service created for people who want to watch TV without using cable or satellite connections. It offers live channels such as news, sports, movies, entertainment, and regional channels. YouTube TV works on mobile phones, smart TVs, tablets, laptops, and desktop computers. Because of its flexibility and free trial option, many people sign up very quickly.

However, not everyone wants to keep the subscription forever. Some people only use it for sports seasons, some forget to cancel the free trial, and some want to reduce monthly expenses. Because of this, a very large number of users search online for how to cancel YouTube TV, how to cancel YouTube TV subscription, and how to cancel my YouTube TV subscription.

This guide is written in the simplest possible language and gives the largest explanation of the YouTube TV cancellation process. Every small detail is explained so that even first time users can understand without confusion. This includes desktop cancellation, phone cancellation, free trial cancellation, billing explanation, mistakes to avoid, and what happens after cancellation.

How YouTube TV Subscription System Works

YouTube TV is a live TV streaming service offered by Google. It provides access to live channels such as news, sports, entertainment, and local channels in many regions. The service works on phones, smart TVs, tablets, and computers.

YouTube TV is a monthly subscription. There is no annual contract. This means users can cancel anytime. Billing is done on a monthly cycle, and payments are usually charged automatically using the Google account payment method.

There is also a free trial for new users. The free trial period can vary depending on promotions. Understanding how billing works helps avoid unwanted charges when planning YouTube TV cancellation.

How to Cancel My YouTube TV Subscription on Phone

Many users prefer to manage their subscriptions directly from their mobile phone. YouTube TV allows cancellation through the mobile app, but the exact steps depend on whether you are using an Android phone or an iPhone, and how the subscription was originally purchased. Understanding this difference helps avoid confusion during the cancellation process.

How to Cancel YouTube TV on Android Phone

If you subscribed to YouTube TV using a Google account on an Android device, cancellation can be completed directly inside the YouTube TV app. This is the most common method.

Follow these steps carefully:

1. Open the YouTube TV app on your Android phone.
2. Confirm that you are signed in with the same Google account used to start the subscription.
3. Tap your profile picture located in the top right corner of the screen.
4. Select Settings from the menu.
5. Tap on Membership to view subscription details.
6. Choose Cancel membership.
7. Follow the on screen instructions and confirm the cancellation.

After canceling, YouTube TV will remain active until the end of the current billing period. No additional charges will be applied unless the subscription is restarted.

How to Cancel YouTube TV on iPhone

Canceling YouTube TV on an iPhone depends on how the subscription was billed. Some users subscribe through Google, while others subscribe through Apple. The cancellation method changes based on this.

If the YouTube TV Subscription Was Started Through Google

If billing is handled by Google, the cancellation can be done inside the YouTube TV app or through a browser.

Steps to cancel:

1. Open the YouTube TV app on your iPhone.
2. Make sure you are signed in with the same Google account used to start the subscription.
3. Tap the profile icon in the top right corner of the screen.
4. Select Settings from the menu.
5. Tap Membership to view subscription details.
6. Choose Cancel.
7. Confirm the cancellation when prompted.

Your access will continue until the end of the billing cycle, and no future payments will be charged.

How to Cancel YouTube TV Free Trial

If you signed up for YouTube TV using a free trial, it is very important to cancel the trial before the trial period ends. If you do not cancel on time, YouTube TV will automatically start charging your payment method once the free trial is over. This is why many users search for how to cancel YouTube TV free trial at the last moment.

The good news is that cancelling the free trial is simple, and the steps are exactly the same as cancelling a paid YouTube TV subscription.

1. Sign In to Your YouTube TV Account

Open a browser on your computer or phone and go to the YouTube TV website. Sign in using the Google account that you used to start the free trial. Make sure you use the correct account to access your subscription details.

2. Open the Settings Menu

Once signed in, click your profile picture located at the top-right corner of the screen. From the drop-down menu, select Settings. This section allows you to manage your account, view subscription details, and make changes, including cancelling your free trial before it ends.

3. Go to Membership

Inside Settings, click on the Membership tab. Here, you will see your current subscription plan, the free trial end date, and any add-ons. This page shows important information that helps you confirm your trial status and manage your YouTube TV subscription easily.

4. Click Cancel Membership

Click the Cancel Membership button. YouTube TV may ask why you are cancelling. Select any reason provided or skip it if allowed. Following this, you will be guided through the necessary steps to successfully cancel your free trial without being charged.

5. Confirm the Cancellation

Finally, review the confirmation screen and confirm the cancellation. Once done, YouTube TV will show a message confirming that your free trial will end on its last day. No charges will be taken, and you can still use the service until that day.

Cancel YouTube TV Using Google Account Subscription Settings

Canceling YouTube TV using Google Account subscription settings means stopping your YouTube TV membership directly through your Google account’s payment and subscription management page, rather than doing it inside the YouTube TV app or website. This is useful if you subscribed via Google Play or want to manage all your subscriptions in one place.

Steps to Cancel YouTube TV via Google Account

1. Sign in to your Google Account

  • Use the Google Account that is linked to your YouTube TV subscription.

2. Go to Google Subscriptions

3. Locate YouTube TV Subscription

  • You will see a list of all active subscriptions. Find YouTube TV in the list.

4. Select Cancel Subscription

  • Click on YouTube TV → Select Cancel Subscription.

5. Follow the Confirmation Steps

  • Google will ask you to confirm cancellation and may provide options to pause instead of cancel. Follow the on-screen prompts to complete cancellation.

6. Confirmation

  • After cancellation, Google will send a confirmation email. Your YouTube TV access continues until the end of your current billing period.

YouTube TV Manage Subscription Options

YouTube TV offers flexible options to manage your subscription, giving users full control over their viewing experience. You can easily upgrade or downgrade your plan, add premium channels like HBO, Showtime, or Starz, and manage add-ons such as Sports Plus or Entertainment Plus. Changing your payment method or updating billing information is straightforward through your account settings. 

You can also pause your membership temporarily if you won’t be using the service, or cancel it entirely at any time without penalties. Additionally, YouTube TV allows multiple streams and account sharing, which can be adjusted under your subscription settings. Notifications and email preferences can also be customized to stay informed about billing or new features. This ensures a personalized and flexible TV experience.

YouTube TV Unsubscribe Meaning

When you unsubscribe from YouTube TV, it means you are canceling your subscription to the service. You will no longer be billed monthly, and access to live TV channels, on-demand content, and cloud DVR features will stop at the end of your billing cycle. Unsubscribing does not delete your Google account, but it does end all YouTube TV benefits. 

You can still re-subscribe later if you choose. Sometimes people unsubscribe temporarily to avoid charges or because they no longer need the service. YouTube TV may ask for feedback on why you’re leaving, but this step is optional. It’s a simple way to manage your streaming costs and subscription preferences.

What Happens When You Cancel YouTube TV

Canceling YouTube TV ends future billing, removes access after your current period, deletes cloud DVR recordings, cancels add-ons automatically, and retains account data, but previous recordings are permanently lost.

1. Service Access

After canceling, you keep access until the end of your current billing cycle. Once it ends, all live channels, on-demand content, and cloud DVR recordings become unavailable, and you cannot watch or access any previously saved shows or movies.

2. Billing Stops

You will not be charged for future months. YouTube TV does not refund partial months, so you retain access for the remainder of your current billing cycle. Automatic payments stop, ensuring no further billing occurs after your subscription ends.

3. Cloud DVR Recordings

All cloud DVR content is permanently deleted shortly after cancellation. This includes recorded shows, movies, or sports events. Once removed, these recordings cannot be recovered. You should download any content you want to keep before canceling your subscription.

4. Membership and Add-ons

All add-on subscriptions, such as HBO Max, Showtime, or extra sports channels, are canceled automatically when YouTube TV is canceled. There is no need to cancel these individually, as they are linked directly to your main YouTube TV membership.

5. Account Data

Your account information, preferences, and settings remain saved after cancellation. This allows you to resubscribe later without reconfiguring your account, but any past cloud DVR recordings or content will not be restored, and previous viewing history may not be fully retained.

6. Resubscribing

When you resubscribe, you can start immediately, but you are treated as a new subscriber. Previous cloud DVR recordings are not restored, and any past promotions or benefits linked to your prior subscription will not apply to your new account.

In short, canceling stops future charges, removes access at the end of the billing period, deletes cloud DVR content, and ends add-ons automatically. Your account stays but without previous recordings. 

YouTube TV Cancellation and Billing Problems

YouTube TV users sometimes face cancellation and billing problems, which can be frustrating. Some users report difficulty canceling their subscription, as the process may not be straightforward in the app or website. Others experience unexpected charges even after cancellation, often due to overlapping billing cycles or auto-renewal settings. Issues with refunds are also common, with delays or partial reimbursements causing confusion. 

Additionally, payment method errors or account-related glitches can lead to double charges or failed transactions. To resolve these problems, users should carefully follow YouTube TV’s cancellation steps, check billing dates, and contact customer support with detailed account information. Keeping documentation of charges helps in resolving disputes efficiently.

Final Summary

Canceling YouTube TV is easy when the correct steps are followed in the right order. Whether you are canceling a YouTube TV free trial, stopping a paid subscription, or managing a family account, the entire process can be completed directly from the account settings linked to your Google account.

It is always important to confirm that the cancellation is successful, check your billing date, and make sure you are signed in with the correct Google account. Following these simple steps helps avoid unwanted charges and confusion. With this detailed explanation, the YouTube TV cancellation process becomes clear, straightforward, and stress free.

Frequently Asked Questions

Is pausing YouTube TV better than cancelling?

Pausing YouTube TV is often better than cancelling if you plan to return, as it preserves your account, preferences, and DVR recordings. Cancelling deletes all saved content and may require a new setup later. Pausing offers flexibility, avoids losing data, and allows resuming without restarting from scratch.

How do I cancel my subscription to YouTube TV?

To cancel your YouTube TV subscription, sign in at tv.youtube.com, click your profile picture, then go to Settings. Select Membership, choose Manage, and click Cancel Membership. Follow the prompts to confirm. Your subscription will remain active until the end of your current billing cycle.

Can I cancel YouTube TV without charge?

Yes, you can cancel YouTube TV anytime without paying a cancellation fee. YouTube TV does not have long-term contracts. Once you cancel, your access continues until the end of your billing cycle, after which you won’t be charged. Refunds for the current month are generally not provided.

How to access your recordings after cancellation?

After canceling YouTube TV, you lose access to all cloud DVR recordings immediately. Recordings are tied to an active subscription, so once canceled, they are deleted. To keep your recordings, you must either maintain your subscription or download saved content before canceling, as YouTube TV does not allow access afterward.

Can you reactivate your subscription?

Yes, you can reactivate your YouTube TV subscription anytime. Simply sign in to your account and resume the subscription. Once reactivated, you regain access to live TV, on-demand content, and new recordings. Previous cloud DVR recordings are not restored, so only new recordings will be available after reactivation.

How to Cancel YouTube TV: Complete Step by Step Guide Read More »

how to download a youtube video

How to Download a YouTube Video: Complete Step-by-Step Guide

YouTube is one of the largest video platforms in the world. People use it every day to watch music videos, tutorials, podcasts, educational lessons, interviews, and entertainment content. Sometimes, internet connections can be slow or unreliable, making it difficult to stream videos online. In such cases, downloading YouTube videos for offline viewing becomes very helpful.

In this complete guide, we explain everything in simple words. We cover how to download YouTube videos on mobile, computer, iPhone, and Android. We also explain legal concerns, tools, formats, and safe practices so you can save YouTube videos without confusion.

Why You Might Want to Download YouTube Videos

Downloading YouTube videos can be useful for several reasons. One main benefit is offline access, allowing you to watch videos without an internet connection, which is handy during travel or in areas with poor connectivity. It also helps save mobile data, especially if you frequently watch long videos. 

Downloading can be useful for educational purposes, enabling students or professionals to refer to tutorials, lectures, or guides anytime. Creators and editors may download videos to use clips for personal projects, presentations, or inspiration. 

Additionally, having a copy ensures that content remains available even if it’s removed from YouTube. Overall, downloading offers convenience, flexibility, and uninterrupted access to valuable content.

Can You Download YouTube Videos

Yes, you can download YouTube videos, but it depends on the method and legality. YouTube’s terms of service generally prohibit downloading videos directly from the platform unless there is a download button provided by YouTube itself, like in YouTube Premium. Users can legally download videos for offline viewing using YouTube’s official app or service. 

There are also third-party tools and websites that allow video downloads, but using them may violate YouTube’s rules and could risk malware or legal issues. Always make sure to respect copyright laws and the content creator’s rights when downloading or sharing videos.

How to Download YouTube Videos Legally

Downloading videos from YouTube may seem simple, but it comes with legal considerations. Not all videos can be saved or shared, and breaking YouTube’s rules can lead to copyright issues or account penalties. To stay safe, it’s important to know how to download YouTube videos legally. Here’s a detailed guide:

  • Use YouTube Premium: With YouTube Premium, you can download videos directly within the YouTube app to watch offline. This is fully legal and officially supported by YouTube.
  • Download videos you own or have permission to use: You can legally download videos that you have uploaded yourself or videos for which the creator has given you explicit permission.
  • Download educational or Creative Commons videos: Some videos are shared under licenses that allow downloading and sharing, such as Creative Commons. Always check the license before downloading.
  • Avoid copyrighted content without authorization: Downloading videos you do not own or have permission to use may violate copyright laws and YouTube’s terms of service.

By following these rules, you can enjoy watching videos offline while respecting creators’ rights and staying fully legal. This ensures a safe, ethical, and worry-free experience when saving YouTube content.

How to Download a YouTube Video Without Premium

Downloading a YouTube video without Premium can be done, but it is important to understand the legal and ethical side first. YouTube’s terms allow downloads only through its own features like YouTube Premium. Downloading copyrighted videos without permission may violate those terms and local copyright laws. That said, here is an educational explanation of commonly known methods people use.

1. Online video downloader websites

Online video downloader websites are tools where a user pastes the YouTube video link into a box on the site. The website then processes the link and offers download options in different formats and resolutions. These sites are popular because they do not require installing software and work directly in a browser. However, many of them contain intrusive ads, pop ups, or misleading download buttons. Some may also stop working frequently or pose security risks. Users should be careful because these websites can expose devices to malware or phishing attempts.

2. Desktop software applications

Desktop software applications are programs installed on a computer that can download videos from YouTube. These tools often provide more control than online websites, such as choosing video quality, downloading playlists, or converting videos into audio files. While they may be more stable and faster, they still come with legal and ethical concerns if used to download copyrighted content without permission. In addition, downloading software from untrusted sources can be risky and may harm the system.

3. Browser extensions

Browser extensions are add ons that integrate directly into web browsers and may show a download button near the YouTube video player. They are convenient because they work inside the browser and do not require switching to another site or app. However, many popular browsers restrict or remove such extensions due to policy violations. Some extensions may also collect user data or compromise privacy. Like other methods, using them for copyrighted content can violate YouTube’s terms.

4. Screen recording tools

Screen recording tools allow users to capture a YouTube video by recording the screen while it plays. Most devices already include this feature, or users can install screen recording apps. Instead of downloading the original file, the tool records video and audio as displayed. Although easy to use, this method can reduce quality and capture notifications or background sounds. Recording copyrighted content without permission may still violate YouTube policies and copyright laws.

What Is a YouTube Downloader

A YouTube downloader is a tool or software that allows users to save videos from YouTube onto their device. Instead of watching videos only online, a downloader makes it possible to access videos offline at any time. These tools usually work by copying the video link from YouTube and pasting it into the downloader, which then processes the file and allows it to be downloaded in different formats and quality levels.

YouTube downloaders can be useful for educational purposes, such as saving tutorials, lectures, or informational videos for later viewing without an internet connection. Some downloaders also allow users to extract only the audio from a video. However, it is important to use YouTube downloaders responsibly, as downloading copyrighted content without permission may violate YouTube’s terms of service and copyright laws.

How to Download Videos From YouTube on a Computer

Downloading videos from YouTube on a computer means saving a YouTube video file to your desktop or laptop so it can be watched later without an internet connection. This is usually done using third party software, websites, or browser tools since YouTube does not allow direct downloads for most videos.

1. Understand the purpose and rules first

Before downloading any YouTube video, it is important to know why it is needed. Downloading videos should only be done for personal use such as offline watching, learning, or reference. Many videos on YouTube are protected by copyright, so they should not be reused, shared, or uploaded elsewhere without permission. Understanding these rules helps avoid legal issues and ensures responsible usage.

2. Select a reliable YouTube video downloading tool

A computer needs a proper video downloader to save YouTube videos. There are many desktop software programs and online tools available that support video downloads. A good downloader should be safe, easy to use, and free from viruses or unwanted ads. Some tools allow users to download videos in different formats and resolutions, which is helpful for storage and playback needs.

3. Copy the video URL from YouTube

Open YouTube in a web browser on the computer and search for the video to download. Once the video opens, go to the address bar at the top of the browser. Copy the full video link by right clicking and selecting copy or by using keyboard shortcuts. This link is required for the downloader to locate the video.

4. Paste the link into the downloader software or website 

After copying the video link, open the selected video downloader. Most tools have a clear input box where the YouTube link needs to be pasted. Once the link is added, the downloader scans the video and prepares available download options. This step connects the video source with the downloading tool.

5. Choose video format and quality

The downloader usually provides multiple options such as video quality and file format. Users can select lower quality to save storage space or higher quality like HD for better viewing. Common formats include MP4, which works on most devices. Selecting the right option ensures smooth playback on the computer without compatibility issues.

How to Download YouTube Videos on iPhone

Downloading YouTube videos on an iPhone can seem complicated at first because Apple limits direct downloads from YouTube to protect copyrights. Unlike Android, iPhones do not allow most third-party apps to save videos directly from YouTube to the device. However, there are several safe and practical ways to download YouTube videos on iPhone, whether for offline viewing, personal use, or archiving your favorite content. Below, we explain the most reliable methods in detail.

1. Using Documents by Readdle

Documents by Readdle is a free file manager app that has a built-in browser, allowing you to download YouTube videos directly to your iPhone. Here’s a step-by-step guide:

  • Install the App: Go to the App Store and download Documents by Readdle. This app is trusted and widely used for managing files on iPhones.
  • Open the App’s Browser: Open Documents, and tap the small browser icon at the bottom right corner. This opens a web browser within the app.
  • Visit a YouTube Downloader Website: In the browser, go to a site that can convert YouTube videos to MP4, such as Y2Mate, SaveFrom.net, or YTMP3.cc. These websites allow you to download videos in multiple resolutions.
  • Copy the Video URL: Open the YouTube app, find the video you want to download, and tap Share → Copy Link.
  • Paste the Link: Go back to the Documents browser, paste the video link into the downloader site’s input field.
  • Choose Format and Quality: Most downloader websites allow you to select the video format (MP4 is standard) and resolution (720p, 1080p, or 4K). Higher resolutions provide better quality but take more storage.
  • Download the Video: Tap the Download button. The video will first save in the Documents app.
  • Move the Video to Camera Roll: Open the downloaded file in Documents, tap Move → Photos, and save it to your iPhone’s Photos app. Now it’s accessible like any other video on your phone.

2. Using the Shortcuts App

Apple’s Shortcuts app is a powerful tool that automates tasks on your iPhone. You can create or install a shortcut to download YouTube videos. Here’s how:

  • Open the Shortcuts App: Launch the pre-installed Shortcuts app on your iPhone to access and manage automation tools for downloading YouTube videos safely.
  • Add a YouTube Downloader Shortcut: Download a trusted shortcut like “YouTube Video Downloader” from reliable sources to automate video downloads without risking malware or privacy issues.
  • Copy the YouTube Video Link: In the YouTube app, tap Share, select Copy Link, and save the video URL to use it with the downloader shortcut.
  • Run the Shortcut: Open the Shortcuts app, select the YouTube downloader shortcut, and paste the copied video link to start the download process automatically.
  • Choose Format and Quality: Some shortcuts allow selecting MP4 or MP3 format and preferred resolution, letting you download the video or audio in the best quality.
  • Save the Video: After processing, the shortcut saves the downloaded video to your iPhone’s Photos app, enabling offline access and easy playback anytime.

YouTube to MP4 Explained

Converting YouTube videos to MP4 allows users to save online content for offline viewing in a widely compatible format. MP4 works on almost all devices and social media players, keeping both video and audio quality intact. This makes it ideal for personal use, educational tutorials, music videos, or lectures.

The process is straightforward. First, copy the YouTube video link. Next, paste it into an online converter or dedicated software. Then, choose MP4 as the output format and download the file. Once downloaded, the video can be easily stored, shared, or played on any device without needing an internet connection.

It is important to follow copyright rules. Only download videos that are allowed by the creator or are in the public domain. Converting responsibly ensures creators’ rights are respected while giving users the flexibility to enjoy content offline.

Frequently Asked Questions

What is the safest way to download YouTube videos?

The safest way to download YouTube videos is by using official methods like YouTube Premium, which allows offline viewing within the app. Avoid third-party websites or software, as they may contain malware, violate copyright laws, or compromise personal data. Always prioritize legal and secure options for downloading content.

Is it illegal to download YouTube videos on Reddit? 

Yes, downloading YouTube videos from Reddit or any platform without permission violates YouTube’s terms of service. Sharing or using downloaded videos without the creator’s consent may also breach copyright laws, making it illegal. Legal ways include YouTube Premium or obtaining explicit permission from the content owner.

How do I get downloaded videos from YouTube?

You cannot directly download most YouTube videos due to copyright rules. YouTube Premium lets you save videos offline within the app legally. Third-party websites or apps claim to download videos, but they may be unsafe or illegal. Always respect copyright and use official features to access content safely.

How do I download a YouTube video directly to my gallery?

To download a YouTube video to your gallery, use YouTube Premium. Open the video in the YouTube app, tap Download, and select quality. The video saves within the YouTube app for offline viewing. Direct saving to the phone gallery isn’t allowed without third-party tools, which may be unsafe or illegal.

How to Download a YouTube Video: Complete Step-by-Step Guide Read More »

how to turn off vanish mode on instagram

How to Turn Off Vanish Mode on Instagram

Instagram is one of the most widely used social media platforms in the world, with millions of users sending messages every day. To make conversations more private, Instagram has introduced features like Vanish Mode, which automatically makes messages disappear after they are seen. This feature can be helpful for temporary chats, quick updates, or private conversations.

However, Vanish Mode can also be confusing for some users. It’s easy to accidentally activate, and important messages can be lost if you’re not careful. For people who want their messages to stay in the chat permanently, turning off Vanish Mode is essential.

In this guide, we will explain how to turn off Vanish Mode on Instagram. By following our step-by-step instructions, you can ensure your messages remain in the chat and avoid losing conversations that matter. Whether you are new to Instagram or just want more control over your messaging, this guide will make the process simple and straightforward.

What Is Vanish Mode on Instagram?

Vanish Mode is a special messaging feature on Instagram designed to make messages disappear automatically after they are seen. When you activate Vanish Mode, your chat becomes temporary, meaning that all texts, images, videos, and GIFs sent in that chat will vanish once the recipient views them and leaves the chat.

The main purpose of Vanish Mode is privacy and discretion. It allows users to send sensitive information, temporary updates, or casual messages without leaving a permanent record. It is particularly useful for conversations that do not require saving or storing messages, such as sharing a quick joke or temporary instructions.

However, while Vanish Mode offers privacy, it is not always ideal for everyone. Many users accidentally activate it, causing messages to disappear unexpectedly. Understanding Vanish Mode is crucial to know when it is appropriate to use and how to turn it off if necessary.

How Vanish Mode Works on Instagram

Vanish Mode works differently from regular Instagram messaging. Normally, messages stay in a chat until you manually delete them. When Vanish Mode is turned on, messages behave in a temporary way:

  • Messages are automatically removed after they are viewed.
  • Both users in the chat are notified when Vanish Mode is turned on.
  • Screenshots are usually notified to the other person to enhance privacy.
  • Any media shared (photos, videos, GIFs) will disappear along with the text.

Activating Vanish Mode is simple: swipe up from the bottom of a chat screen, and the mode will be enabled. Messages will be deleted automatically, giving you a temporary messaging experience.

However, this can cause frustration if it’s turned on accidentally. Many users report losing important messages because they didn’t realize Vanish Mode was active. Understanding how it works is the first step to managing it effectively.

Why Vanish Mode Turns On Automatically

Many Instagram users notice that Vanish Mode sometimes turns on without their intention. This usually happens because of gestures, accidental taps, or app-related issues. Understanding why it occurs can help prevent important messages from disappearing unexpectedly.

Here are the main reasons Vanish Mode may activate automatically:

1. Swiping Up in a Chat: Instagram turns on Vanish Mode when you swipe up from the bottom of a chat. If this gesture is done by mistake, the feature activates without warning.
2. App Updates or Glitches: Occasionally, Instagram updates or temporary bugs can trigger Vanish Mode on their own. This is rare but can happen after installing a new version of the app.
3. Accidental Taps on Notifications: Instagram sometimes shows pop-ups or prompts about Vanish Mode. Clicking on these notifications accidentally can enable the feature without you realizing it.

Being aware of these causes helps you avoid unintended activation of Vanish Mode and ensures your messages stay in the chat when needed.

How to Turn Vanish Mode Off on Instagram Disappearing Messages

Vanish Mode is a feature in Instagram Direct Messages (DMs) that allows messages to disappear automatically after they have been seen and you leave the chat. It’s designed for private, temporary conversations. When Vanish Mode is active, any text, photo, or video you send will disappear once the recipient sees it and the chat is closed.

Method 1: Swipe Up to Exit Vanish Mode

Vanish Mode is temporary and designed for quick disappearing messages. The easiest way to turn it off is directly in the chat by performing a simple swipe gesture at the bottom of the screen.

Step 1: Open Instagram and Go to Messages

Open the Instagram app on your phone and tap the Messenger icon located at the top-right corner. This will take you to your Direct Messages (DMs), where all active conversations are listed.

Step 2: Open the Chat in Vanish Mode

Select the conversation where Vanish Mode is active. Chats in Vanish Mode usually have a darker background and may display a notification saying You’re in Vanish Mode, indicating messages will disappear automatically.

Step 3: Swipe Up to Turn Off Vanish Mode

Place your finger at the bottom of the chat screen and swipe upwards gently. You may see a small animation showing the chat returning to normal, signaling that Vanish Mode is being deactivated successfully.

Step 4: Confirm That Vanish Mode Is Off

Once Vanish Mode is turned off, the chat background will return to its standard color. Messages will now behave normally and remain visible, meaning they will not automatically disappear after being seen.

Method 2: Turn Off Vanish Mode via Profile Settings

If Vanish Mode keeps activating accidentally, you can disable it permanently through Instagram settings. This ensures that future conversations always start in normal mode unless you manually enable Vanish Mode.

Step 1: Open Instagram and Access Settings

Open the Instagram app on your phone and tap your profile picture at the bottom-right corner. Then tap the three horizontal lines at the top-right to open the menu, and select Settings & Privacy.

Step 2: Go to Privacy Settings

Scroll down in Settings until you see the Interactions section. Tap Messages, which controls how you send, receive, and manage messages. This section contains options including Vanish Mode and other message preferences.

Step 3: Find Vanish Mode Settings

Within the Messages settings, locate the option labeled Vanish Mode. Tap this option to open the controls where you can enable or disable Vanish Mode, giving you full control over disappearing messages.

Step 4: Turn Off Vanish Mode

Toggle the Vanish Mode switch off to disable it completely. This prevents the feature from turning on automatically in any chat, so all future conversations will remain in normal mode by default.

Step 5: Confirm the Change

To ensure Vanish Mode is off, open a new chat with any user. The conversation will now start in standard mode, and messages will stay visible until you manually delete them, confirming Vanish Mode is disabled.

How to Remove Vanish Mode on Instagram If It Keeps Turning On

Some users notice that Vanish Mode activates repeatedly on Instagram, even when they don’t want it to. This usually happens because of temporary bugs, app glitches, or corrupted data in the Instagram app. When Vanish Mode turns on unexpectedly, messages can disappear, which may cause frustration or loss of important information. To fix this, you can follow these detailed steps:

1. Update Instagram

One of the most common reasons Vanish Mode may turn on by itself is that your app is not updated. Instagram regularly releases updates to fix bugs, improve stability, and enhance features. Older versions of the app may have glitches that can cause features like Vanish Mode to behave unexpectedly.

How to update:

  • On iPhone, open the App Store, search for Instagram, and tap Update if an update is available.
  • On Android, open Google Play Store, search for Instagram, and tap Update.

Why this works: Updating the app ensures you have the latest bug fixes and improvements. Many issues, including Vanish Mode turning on automatically, are resolved in updates. Using an outdated version increases the chance of glitches.

2. Restart the App

If Vanish Mode keeps turning on, the next simple step is to restart Instagram. Sometimes, the app may have temporary errors or memory issues causing the glitch. Restarting clears these temporary problems and restores normal functionality.

Steps to restart Instagram:

  • Close the app completely by swiping it away from recent apps.
  • Wait a few seconds.
  • Open Instagram again and check if Vanish Mode is still active.

Why this works: Restarting the app clears temporary data stored in memory. These temporary files can sometimes cause features to behave incorrectly. Restarting is quick and can solve the problem without requiring any complex steps.

3. Clear Cache (Android Users)

On Android devices, Instagram stores temporary files called cache. These files help the app load faster and run smoothly. However, sometimes the cache can become corrupted, which may cause glitches such as Vanish Mode turning on automatically. Clearing the cache removes these problematic files and allows Instagram to create fresh data, fixing unexpected issues without affecting your account or messages.

Steps to Clear Instagram Cache on Android:

  • Open your phone’s Settings.
  • Go to Apps or App Management (this may vary depending on your device).
  • Scroll through the list and select Instagram.
  • Tap Storage & Cache.
  • Select Clear Cache.

Why This Works: Clearing the cache removes temporary files that may be corrupted or causing conflicts. After clearing, Instagram generates new cache files the next time you open the app. This can fix glitches like Vanish Mode activating on its own and improve overall app performance.

4. Disable Vanish Mode Permanently

Even after fixing glitches, Vanish Mode can still activate if you accidentally swipe up in a chat. To avoid this and ensure your messages stay in normal chats, you can disable Vanish Mode permanently through Instagram’s settings. Once turned off, Vanish Mode will not activate automatically in any chat. You will only enter Vanish Mode if you choose to enable it manually.

Steps to Disable Vanish Mode Permanently:

  • Open the Instagram app on your phone.
  • Tap your profile picture at the bottom-right corner to go to your profile.
  • Tap the three horizontal lines (menu) at the top-right corner and select Settings & Privacy.
  • Scroll down to the Interactions section and tap Messages.
  • Find the Vanish Mode option and toggle it off.

Why This Works: Disabling Vanish Mode in the settings ensures that all new chats will start in normal mode by default. This prevents accidental activation, keeps your messages safe, and eliminates the risk of losing important information.

5. Update Device and System Settings

Sometimes, Instagram problems are not caused by the app itself but by your phone or tablet. If your device’s operating system (OS) is outdated, it may not work well with the latest version of Instagram. Updating your device ensures better performance, fewer glitches, and improved compatibility with apps.

Steps to Update Your Device:

  • iPhone: Open Settings → General → Software Update. If an update is available, tap Download and Install. Make sure your phone is connected to Wi-Fi and has enough battery before starting the update.
    Android: Open Settings → System → Software Update (this may vary slightly depending on your phone brand). If an update is available, follow the prompts to install it. Ensure your device is charged and connected to Wi-Fi.

Why this works: System updates fix bugs, improve compatibility with apps, and prevent glitches. Using an outdated system version can interfere with Instagram’s features.

Final Thoughts

Vanish Mode on Instagram is a powerful tool for private, temporary messaging. It offers convenience for fleeting conversations but can cause frustration when messages disappear unexpectedly. Learning how to turn off Vanish Mode ensures that important messages are preserved and conversations remain accessible.

By understanding how Vanish Mode works, why it turns on automatically, and how to manage it, Instagram users can maintain better control over their chats. Whether you are sending personal messages, professional updates, or casual texts, turning off Vanish Mode guarantees that nothing is lost.

Always remember to swipe carefully, check chat settings, and follow the simple steps provided in this guide. This way, you can enjoy Instagram messaging without worrying about disappearing messages.

Frequently Asked Questions

How to disable vanish mode forever?

To disable Vanish Mode permanently on apps like Instagram or Messenger, open a chat, swipe up to enter Vanish Mode, then swipe up again to exit. Vanish Mode stays off until manually activated, so it won’t auto-enable. Ensure app settings do not default to Vanish Mode for new chats.

Does Instagram notify when you screenshot a vanishing photo?

Yes, Instagram notifies the sender if you screenshot a vanishing photo or video sent via direct message. These are temporary messages that disappear after being viewed. Regular posts, stories, or chats do not trigger notifications, but vanishing content is specifically designed to alert the sender for privacy and security.

Can You Recover Messages Sent in Vanish Mode?

No, messages sent in Vanish Mode cannot be recovered. This feature is designed for temporary chats that disappear after being seen or when the chat is closed. Once a message vanishes, it is permanently deleted from both devices, ensuring privacy, and there is no way to retrieve it through the app or backups.

Does Vanish Mode Work in Group Chats?

Yes, Vanish Mode works in group chats, but only for messages sent while the mode is active. Once enabled, new messages disappear after being seen or when you leave the chat. Messages sent before activating Vanish Mode remain visible, and all participants are notified when it’s turned on.

How to Turn Off Vanish Mode on Instagram Read More »

what is white label seo

What is White Label SEO: A Complete Guide for Agencies and Businesses

White Label SEO is a service where an agency provides SEO solutions on behalf of another company, allowing that company to offer SEO without doing the work in-house. Essentially, the work is done by experts but branded under the client’s name. This approach helps marketing agencies, web design firms, or businesses expand their services, save time, and deliver professional SEO results without hiring a full team. White Label SEO can include keyword research, on-page optimization, link building, content creation, and performance reporting, all handled by specialists behind the scenes.

In this complete guide, we will explain how White Label SEO works, its benefits for agencies and businesses, the types of services offered, pricing models, and tips for choosing the right provider. We will also cover best practices to ensure quality results, client satisfaction, and long-term success in delivering SEO services under your brand. This guide will help you understand if White Label SEO is the right strategy to grow your business efficiently.

What is White Label SEO?

At its core, white label SEO is a service provided by one company that allows another company, usually a digital marketing agency, to rebrand and offer those services as their own. In simple terms, it’s like having a trusted SEO partner working behind the scenes while your agency takes the credit.

White Label SEO Meaning

White label SEO means an agency can offer SEO services under its own brand while a specialized provider handles the actual work. This approach lets agencies expand services without hiring in-house SEO experts. They can focus on building client relationships, planning strategies, and growing their business, while the partner ensures professional SEO execution behind the scenes.

White Label SEO Definition

A more formal white label SEO definition is a collaborative business model in which an SEO company offers its services to another company. The receiving company then markets, sells, and delivers these services under its own brand name. This model allows businesses or agencies to offer SEO solutions without developing in-house expertise, saving time and resources while expanding service offerings efficiently.

How Does White Label SEO Work?

White Label SEO is a service where an SEO agency or provider performs SEO work on behalf of another company or agency. The results, reports, and deliverables are rebranded, so the client sees the hiring agency as the service provider. This allows agencies to offer SEO services without having in-house experts.

1. Full-Service or Specific SEO Solutions

White label SEO offers complete services like keyword research, on-page SEO, link building, content, and technical optimization. Companies can also select specific services to meet client needs, allowing flexible solutions without building an in-house team, delivering professional SEO efficiently under the reseller’s brand.

2. Facilitated Sales

The reseller manages all sales and marketing to clients, presenting SEO services as their own. The white label provider completes the work behind the scenes. This lets businesses expand their offerings, attract clients, and generate revenue without hiring a full SEO team, focusing entirely on client acquisition and growth.

3. Client Relationships and Account Management

The reseller handles all client communication, updates, and account management. Clients interact directly with the reseller, unaware of the white label provider. This ensures seamless client experience while the provider executes SEO tasks in the background, allowing the reseller to maintain trust, manage expectations, and strengthen client relationships effectively.

4. Scalable Solutions

White label SEO allows businesses to grow services quickly. Companies can take on more clients without hiring additional SEO specialists because the white label provider handles all execution. This model ensures efficient scaling, adapting to demand, and increasing revenue while maintaining high-quality SEO services for all clients.

5. Brand Consistency

All deliverables, reports, and communication carry the reseller’s branding. Clients see a consistent and professional service experience, which builds trust and credibility. Even though the work is performed by a third-party provider, consistent branding makes it appear in-house, reinforcing the reseller’s reputation and fostering long-term client confidence.

White Label SEO Services You Can Offer

White label SEO providers offer a wide range of services that agencies can sell under their brand. Common white label SEO services include:

1. On-Page Optimization Techniques

On-page SEO focuses on improving the elements on a website to make it easier for search engines to understand and for users to navigate. White label SEO providers manage all these tasks, which agencies can resell under their own brand. Key components include:

  • Keyword Optimization: Placing the right keywords in strategic locations such as titles, headings, meta descriptions, and throughout the content to help the website rank for relevant search terms.
  • Content Structuring: Organizing website content using headings, bullet points, and internal links to make it easy to read and navigate, which improves user experience and SEO.
  • Meta Tags & Descriptions: Creating SEO-friendly page titles and meta descriptions that attract clicks from search engine results pages.
  • URL Structure & Navigation: Ensuring URLs are clean, descriptive, and logical, while improving website navigation to help both users and search engines find content easily.

Agencies can offer on-page SEO as a complete service package without doing the work themselves they simply rebrand the white label provider’s work as their own.

2. Off-Page Strategy and Link Building

Off-page SEO is all about improving a website’s reputation and authority on the internet. Instead of changing the website itself, these strategies focus on building trust and credibility from other sites and platforms. White label SEO providers take care of these tasks, which agencies can sell as their own service.

  • Link Building: Getting other reputable websites to link back to the client’s site, which shows search engines the website is trustworthy.
  • Guest Posting: Writing articles for other websites that include links to the client’s site, helping to attract more visitors and improve rankings.
  • Brand Mentions & Citations: Getting the client’s brand mentioned on popular or relevant websites, which increases online credibility.
  • Social Media Signals: Engaging with audiences on social media to increase visibility and indirectly help search rankings.

Off-page SEO helps search engines see a website as reliable and popular, which can improve rankings. Agencies can offer this service without doing the work themselves they simply rebrand the white label provider’s results.

3. Custom SEO Content Creation

Content plays a crucial role in SEO because it helps websites attract visitors and rank higher in search engines. White label SEO providers create high-quality content that agencies can resell under their own brand. Key services include:

  • Blog Posts & Articles: Write keyword-focused posts to attract visitors, answer questions, engage readers, and improve search engine rankings.
  • Website Content: Create SEO-friendly text for service, product, or landing pages, improving readability, rankings, and user experience.
  • Infographics & Visual Content: Design engaging visuals to simplify information, attract shares, backlinks, and increase website authority and visibility.
  • Content Strategy: Plan topics based on keyword research and audience needs, ensuring content relevance, effectiveness, and higher search visibility.

Agencies can provide content marketing services without producing the content themselves. Clients receive fresh, optimized content regularly, while agencies simply rebrand the work from the white label provider.

4. Technical SEO Audits

Technical SEO focuses on optimizing a website’s backend to improve search engine performance. White-label providers manage these tasks so agencies can offer services without doing the technical work themselves. Key areas include:

  • Site Speed Optimization: Faster-loading pages improve user experience and search engine rankings, keeping visitors engaged and reducing bounce rates across all devices.
  • Mobile-Friendliness: Ensures websites display and function correctly on smartphones and tablets, providing a seamless experience for mobile users and improving SEO.
  • Crawlability & Indexing: Fixing errors allows search engines to access, crawl, and index all pages properly, making content discoverable in search results.
  • Structured Data & Schema Markup: Adding metadata helps search engines understand page content, enabling rich results and better visibility in search listings.
  • Fixing Broken Links & Redirects: Resolves broken pages and improper redirects to improve user experience, prevent SEO penalties, and maintain website authority.

Clients can receive comprehensive SEO audits with actionable insights, while the white-label provider takes care of all technical implementation.

How to Get Started as a White Label SEO Reseller

A white label SEO reseller partners with an SEO agency to sell SEO services under their own brand. They manage client relationships while the provider performs the work, allowing businesses to offer SEO solutions without handling the technical execution.

Here’s a clear step-by-step guide to get started:

1. Research Providers: Look for trusted white label SEO agencies with proven results, positive reviews, and services that match your business needs. A reliable provider ensures your clients get high-quality SEO outcomes.

2. Check the Services: Evaluate the provider’s SEO services carefully. Review their on-page optimization, link building, content creation, and reporting methods to ensure their strategies align with the results you want for your clients.

3. Start with Few Clients: Begin with a small client base and limited services. Focus on delivering excellent results first. Gradually expand your offerings and take more clients as you gain confidence and experience.

4. Communicate Clearly: Maintain open communication with your provider and clients. Give regular updates, explain results clearly, and manage expectations. Transparent communication builds trust and ensures satisfaction with the work being done.

5. Track Results: Monitor the SEO performance even if the provider handles the work. Track website rankings, traffic, and conversions, and share branded reports with clients to demonstrate the effectiveness of your services.

White Label SEO vs Private Label SEO

Many people confuse these two, but the key difference is in control and involvement. White label SEO is fully managed by the provider, while private label SEO gives the agency more flexibility to execute tasks themselves and customize services.

  • White Label SEO: Services are provided and fully managed by the SEO provider. The agency acts as a middleman, presenting SEO results under its own brand without handling technical work. The provider creates strategies, performs optimizations, builds backlinks, and generates reports. This allows agencies to scale services quickly while focusing on client communication and brand reputation.
  • Private Label SEO: The agency may receive more flexibility in executing tasks themselves. Providers often offer access to SEO tools, training, and guidance, letting the agency implement strategies directly. This model allows agencies to learn, customize campaigns, and maintain more control over how SEO services are delivered, while still branding the work as their own.

Both models let agencies offer SEO under their brand. White label is more hands-off, with the provider doing most of the work, while private label requires the agency to be more involved in executing tasks and customizing strategies, giving them more control and learning opportunities.

White Label SEO vs In-House SEO

White label SEO offers outsourced expertise and scalability, while in-house SEO provides control and brand alignment but requires more time, resources, and skilled staff internally.

FeatureWhite Label SEOIn-House SEO
DefinitionOutsourced SEO services rebranded as your ownSEO handled internally by your own team
CostUsually lower upfront, pay per service/projectHigher due to salaries, tools, and training
ControlLimited control over day-to-day operationsFull control over all SEO activities
ExpertiseAccess to experienced SEO professionalsDepends on internal team skills
ScalabilityEasy to scale up by adding servicesScaling requires hiring or training staff
Time InvestmentMinimal internal effortRequires significant time and effort
BrandingCan maintain company brandingFully owned internally
FlexibilitySome limitations on customizing strategiesHigh flexibility and customization
Best forAgencies or businesses without SEO expertiseBusinesses wanting full control and long-term SEO growth

While in-house SEO provides full control and direct execution, it is costly and harder to scale. White label SEO allows agencies to expand quickly while maintaining high-quality output.

How to Choose the Right White Label SEO Provider

Choosing the right white label SEO provider is crucial because your business’s reputation depends on the quality of the SEO services delivered under your brand. Here’s a detailed guide to help you make the right choice:

1. Experience and Expertise

Look for a provider with proven experience in SEO across different industries. Check case studies, client reviews, and the results they have delivered. A knowledgeable provider will understand search engine algorithms and best practices.

2. Range of Services

Ensure the provider offers a full suite of SEO services, including technical SEO, on-page optimization, link building, content creation, and reporting. A comprehensive service ensures you can offer complete solutions to your clients without gaps.

3. Quality of Reporting and Transparency

The provider should offer clear, easy-to-understand reports that you can share with clients under your brand. Transparency in processes, progress tracking, and results is crucial for maintaining trust with your clients.

4. White Label Integration and Support

Choose a provider who allows seamless rebranding of reports and dashboards and offers support for your team. Quick communication and reliable support can prevent delays and help you deliver a better client experience.

5. Pricing and ROI

Compare pricing structures to ensure they are affordable for your agency while leaving room for profit. Focus on value and long-term results rather than just low prices, as quality SEO impacts client satisfaction and retention.

Conclusion

White label SEO is a strategic and practical solution for agencies and businesses aiming to expand services, save costs, and scale efficiently. By understanding what is white label SEO, its process, advantages, and differences from in-house or private label SEO, agencies can make informed decisions to grow their operations and deliver exceptional results to clients.

From saving time to accessing expert SEO professionals, the model empowers agencies to provide professional SEO services while maintaining brand integrity. Whether you are a small agency, a marketing consultant, or a large business, embracing white label SEO can unlock new opportunities for growth and client satisfaction.

Frequently Asked Questions (FAQs)

What does White label SEO mean?

White label SEO refers to a service where an SEO company provides optimization services that another agency can rebrand and offer as their own. This allows businesses to expand their offerings without doing the work themselves. The client sees the branding of the hiring agency, not the actual provider.

What are the main benefits of White Label SEO services?

Agencies using White Label SEO can provide expert SEO solutions under their own brand without building an in-house team. They save time, reduce costs, and expand service offerings. Agencies can scale quickly, deliver professional results, maintain client trust, and focus on strategy while experts handle SEO execution efficiently.

Can White Label SEO help small businesses?

Yes, White Label SEO can help small businesses by providing expert SEO services without hiring an in-house team. It improves website visibility, drives organic traffic, and boosts rankings. Small businesses can offer SEO solutions under their brand, save costs, and scale marketing efforts efficiently while focusing on core operations.

What is the main advantage of White Label SEO?

The main advantage of White Label SEO is that it allows agencies to offer SEO services under their brand without having in-house expertise. This saves time, reduces costs, and expands service offerings, enabling agencies to focus on client relationships and growth while a trusted partner handles SEO strategy, implementation, and reporting.

Is White Label SEO worth it in 2026?

Yes. White Label SEO is worth it in 2026 because it lets agencies offer SEO services without doing the work themselves. It saves time, expands offerings, improves client retention, and boosts revenue. With SEO demand growing, white label partners help scale reliably while maintaining quality and brand control.

What is White Label SEO: A Complete Guide for Agencies and Businesses Read More »

how i delete facebook group

How I Delete Facebook Group: Complete Step-by-Step Guide

Deleting a Facebook group is a common need for many users who no longer want to manage a community or feel the group has served its purpose. Many people search for how i delete Facebook group because the process is not as simple as clicking a delete button. Facebook requires group admins to follow specific steps before permanent removal is possible. This detailed guide explains everything clearly, using simple language, so anyone can understand how to delete a Facebook group without confusion.

This blog covers how to delete a Facebook group as admin, how to delete a Facebook group on Android, how to delete a Facebook group on iPhone, and what happens when a Facebook group is deleted. Each section explains the process carefully so nothing is missed.

Why delete your Facebook Group?

Deleting a Facebook Group can be the right decision when it no longer serves its purpose or adds value to members. If engagement is consistently low, the group may drain time and effort without delivering results. Managing spam, inactive members, or frequent conflicts can also become overwhelming and harm your brand image. 

In some cases, the group’s topic may no longer align with business goals, audience interests, or updated strategies. Privacy and compliance concerns can be another reason, especially if managing member data becomes risky. 

Deleting the group helps streamline focus, reduce distractions, and allocate resources to platforms that drive better engagement and growth. It also prevents outdated or unmanaged content from confusing or misleading your audience.

How Can I Delete Group in Facebook

To delete a Facebook group, you must be the admin of that group. Facebook does not allow direct deletion unless the group has no members. First, open Facebook and go to the group you want to delete. Click on Members and remove each member one by one. If there are other admins or moderators, remove them first before removing regular members. After all members are removed, you will be the only person left in the group.

Once you are the last member, click on Leave Group. Facebook will then automatically delete the group. Keep in mind that deleted groups cannot be recovered, and all posts, photos, and data inside the group will be permanently removed. Make sure to download or save any important information before deleting the group.

How to Delete Facebook Group I Created

Here’s a clear explanation of how to delete a Facebook group you created. Keep in mind that only the group admin can delete the group, and you must first remove all members before the option to delete appears. Follow these steps carefully:

1. Open Your Facebook Group

Log in to Facebook and go to the group you created. Only the admin can delete a group. Use the left-hand menu or search bar to locate it. Opening the group allows you to access the member list and group settings, which are necessary for deletion.

2. Remove All Members

Go to the Members tab to see everyone in the group. For each member, click the three dots next to their name and choose Remove from Group. Repeat this for all members. The group cannot be deleted while other members are still present, so this step is essential.

3. Leave the Group as Admin

After removing everyone else, find your name in the member list. Click the three dots and select Leave Group. Since you are the last member and admin, leaving the group will trigger Facebook to delete it automatically. This ensures the group is permanently removed.

4. Confirm Deletion

Facebook will prompt you to confirm leaving and deleting the group permanently. Read the message carefully, as this action cannot be undone. Confirming will remove all posts, comments, photos, and social media. Once confirmed, the deletion process begins immediately, and the group will no longer exist.

5. Verify Group Removal

After leaving and confirming, refresh your Facebook account and check your groups list. Ensure that the group no longer appears. Deletion is permanent, so double-check before proceeding. Make sure to save any important content or files from the group before starting this process.

How to Delete a Facebook Group Step by Step on Desktop

A Facebook Group is a community on Facebook where people with common interests can share posts, photos, videos, and discussions. Groups can be public, private, or secret, and are usually managed by one or more admins. Deleting a Facebook Group means permanently removing it from Facebook so that no members can access it or its content. Only group admins can delete a group.

Steps to Delete a Facebook Group on Desktop

1. Open Facebook and Go to Your Group

  • Log in to Facebook on your desktop browser.
  • From the left sidebar, click on Groups and select the group you want to delete.

2. Check Your Admin Status

  • Only admins can delete a group.
  • On the group page, click Members in the left menu to see a list of all members and confirm you are listed as an admin.

3. Remove All Members

  • You must remove every member before deleting the group.
  • Click the three dots next to each member’s name and select Remove from Group.
  • Confirm removal for each member.

4. Leave the Group Yourself

  • After all members are removed, click Leave Group next to your name.
  • Facebook will show a message confirming that leaving will delete the group.

5. Confirm Deletion

  • Click Confirm on the pop-up message.
  • The group and all its content will now be permanently deleted.

How to Delete a Facebook Group on Android

Deleting a Facebook group on a computer or laptop is the most common and straightforward method. Doing it on desktop gives you full control over the group and its members. Here is a detailed, step-by-step guide:

1. Log in to Facebook

Open your preferred web browser and log in to your Facebook account. Make sure you are using the account that has admin rights for the group you want to delete. Only admins can delete a group, so other members will not have this option.

2. Access Your Groups

On the left-hand menu of your homepage, click on Groups. This will show a list of all the groups you are part of. Then click on Your Groups to filter the groups you manage. Select the group that you want to delete.

3. Open the Members Section

Once inside the group, go to the Members section. This is where you will see a complete list of all members, including admins, moderators, and regular members. Deleting a group requires removing all members first, so this step is crucial.

4. Remove Members One by One

 To remove a member:

  • Click the three-dot menu next to their name.
  • Select Remove from Group.
  • You can also add a short message to let them know why the group is being deleted, but this is optional.

Repeat this process for every member in the group. It is important to remove everyone else before removing yourself, as Facebook only deletes the group once the last admin leaves.

5. Remove Yourself as the Last Member

After all members have been removed, go back to the Members list, find your name, and remove yourself from the group. Once you do this, Facebook will automatically delete the group permanently.

6. Confirmation of Deletion

There is no separate delete button because the group is deleted automatically once the last admin leaves. All posts, photos, files, and discussions in the group are permanently removed and cannot be recovered.

How to Delete a Facebook Group as Admin

If you are the admin of a Facebook group, you have the authority to delete it permanently. Deleting a group is a serious step because once it is deleted, it cannot be restored. Here’s a detailed guide on how to delete a Facebook group:

1. Access the Group: Log in to your Facebook account and go to the group you want to delete. You must be an admin to see the group management options. Only admins have the ability to remove members or delete the group.

2. Go to the Members List:In the group, find the Members section. This is where you can see all the people who are part of the group, including admins, moderators, and regular members.
3. Remove All Members: Before deleting the group, you must remove all members. Start by removing other admins or moderators first, then remove the regular members. To remove a member, click the three dots next to their name and select Remove from Group. Facebook will ask for confirmation before removing them.
4. Remove Yourself Last: Once all other members are removed, remove yourself from the group. When the last admin leaves, Facebook automatically deletes the group permanently.

Important Notes:

  • Deleting a Facebook group is permanent. Once deleted, the group, posts, photos, and discussions cannot be recovered.
  • This process works on desktop, Android, and iPhone.
  • If you want to keep the group for future use, consider archiving it instead. Archiving keeps the group visible to members but stops new posts and activity.

By following these steps carefully, you can successfully delete a Facebook group without leaving behind any members.

How to Permanently Delete a Facebook Group

If you want to remove a Facebook group forever, it’s important to delete it permanently. Many people ask, how to permanently delete a Facebook group? The process is similar to regular deletion, but it requires careful steps to ensure nothing is left behind and the group cannot be restored.

Here’s how to do it:

  • Remove all members: Go to the group’s Members list and remove each member individually. Facebook does not allow permanent deletion if other members are still part of the group.
  • Delete posts and content (optional): If you want, you can delete all posts, photos, files, or events before deleting the group. This ensures that no information remains accessible.
  • Confirm deletion: Once all members are removed and content is managed, go to Settings and select Delete Group. Facebook will ask you to confirm your action. After confirming, the deletion is permanent.

Important: Once the group is permanently deleted, there is no way to recover it. Make sure to double-check that you have backed up any important information and notified members if necessary.

What Happens When You Delete a Facebook Group

When you delete a Facebook group, the group is permanently removed, and all content within it is lost. This includes posts, comments, photos, videos, and files shared by members. Once deleted, the group cannot be recovered. Only the group admin can delete the group, and Facebook requires that all members be removed first. 

Members are not notified automatically, but they will no longer have access to the group or its content. Deleting a group also removes its presence from search results and Facebook recommendations. If the group is active or has valuable content, it’s better to consider archiving it instead, which preserves content while preventing new activity.

Common Problems While Deleting a Facebook Group

Deleting a Facebook group might seem straightforward, but many people run into common problems during the process. Here’s a clear explanation of the issues you may face:

1. You Must Be the Admin: Only group admins can delete a Facebook group. If you’re not an admin, you won’t see the option to delete it. Even if you created the group, if admin rights were transferred or removed, deletion won’t be possible.
2. All Members Must Be Removed First: Facebook requires that you remove all members from the group before deleting it. This can be time-consuming, especially for large groups. If members are left in the group, the Delete Group” option will remain unavailable.
3. Accidental Deletion: If you accidentally click delete without fully understanding, it permanently removes the group and all its content. There is no way to recover posts, photos, or discussions once deletion is complete.
4. Technical Glitches: Sometimes Facebook’s interface doesn’t load correctly, or the delete button doesn’t appear. This can happen due to browser issues, app bugs, or Facebook server problems. Logging out, clearing cache, or trying another device usually fixes it.
5. Large Groups Can Be Slow to Delete: For groups with hundreds or thousands of members, removing each member individually before deletion can take a lot of time. Facebook does not allow bulk removal, making deletion tedious.
6. Group Linked to Other Apps or Pages: If the group is connected to a Facebook page or other apps, deletion may be restricted or create errors. It’s important to unlink any integrations first.

In short, deleting a Facebook group involves being the admin, removing all members, and sometimes navigating Facebook glitches. Patience and careful steps are key to avoid problems.

Frequently Asked Questions

How to delete a Facebook group on iPhone?

To delete a Facebook group on iPhone, open the Facebook app, go to Groups, and select your group. Tap Members, remove each member individually. Once all members are removed, tap Leave Group. A prompt will appear asking if you want to delete the group confirm, and the group will be permanently deleted.

Are there any alternatives to deleting a Facebook group?

Yes, instead of deleting a Facebook group, you can archive it, which stops new posts and member activity while keeping content visible. Alternatively, you can change privacy settings, transfer ownership, or mute notifications. These options maintain the group for members without fully removing it, offering flexibility and continuity.

Can I recover a Facebook group after I delete it?

No, once you delete a Facebook group, it cannot be recovered. Deleting is permanent, unlike temporarily leaving or deactivating it. All posts, members, and content are lost forever. To avoid losing access, consider deactivating the group or assigning another admin before deletion.

How many members are needed to delete a group?

To delete a Facebook group, only the group admin can remove it. Members alone cannot delete the group, regardless of their number. The admin must first remove all members individually, then leave the group, which automatically deletes it. No specific member count affects this process.

How do I delete a Facebook community page?

To delete a Facebook community page, you must be an admin. Go to the page, click Settings, then General. Scroll to Remove Page and select Delete [Page Name]. Confirm deletion. The page will first be unpublished and permanently removed after 14 days, allowing a chance to cancel if needed.

How I Delete Facebook Group: Complete Step-by-Step Guide Read More »

Scroll to Top